Note: If you are tired by the activate Windows watermark, check out our article on how to get Windows 10 keys for free or cheap to solve the problem.
How to Remove Built-in Ads in Windows 10
All editions of Windows 10 include ads, but the good thing is that you can permanently disable most of it. So here’s how you can remove ads from the Windows 10 Start Menu, Lock Screen, File Explorer and Notification Prompts. We’ll also tell you how to turn off the Windows Ad ID for enhanced privacy and turn off all distracting ‘Live Tiles’ on the Start Menu. You can click on the button below to navigate to the topic of your choice.
Remove Ads From Windows 10 Start Menu
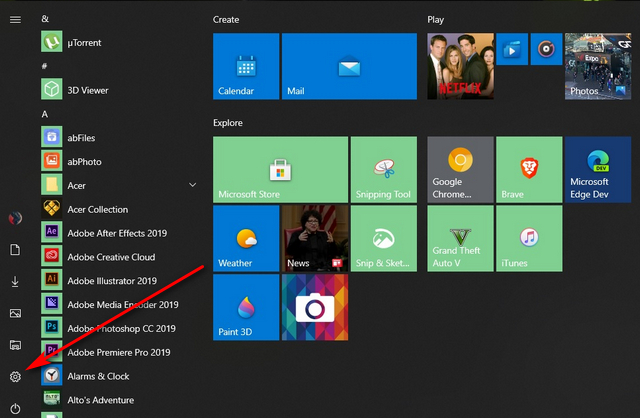
To remove ads from the Start Menu, go over to Windows 10 ‘Settings’ by clicking on the lever icon in the Start Menu.
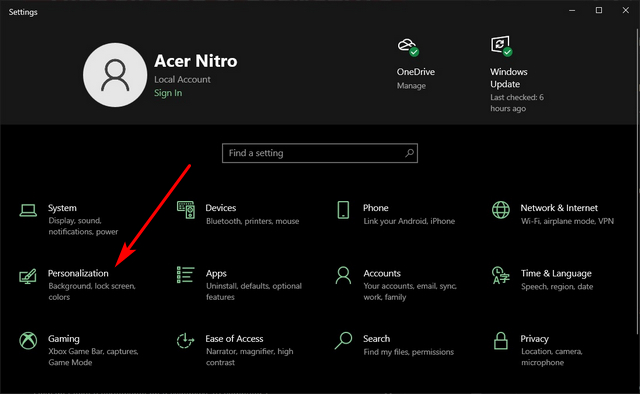
Next, click on ‘Personalization’.
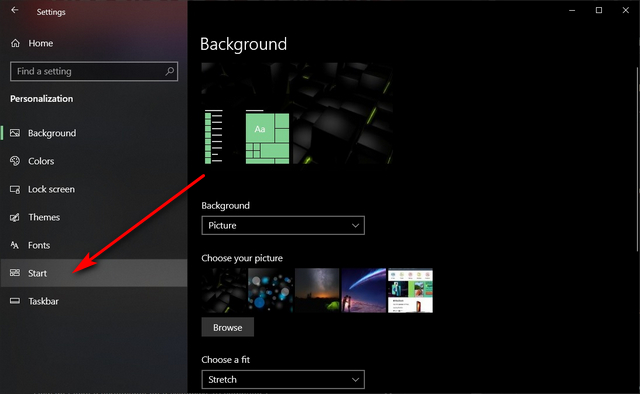
Now choose ‘Start’ to customize the Start Menu.
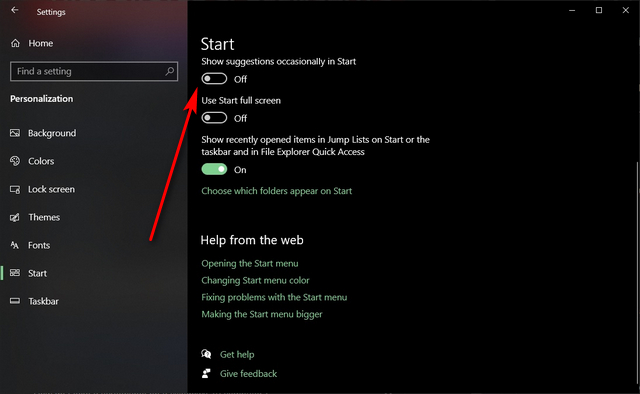
Finally, toggle off the setting that says “Occasionally show suggestions in Start”.
That’s it. You’ve now successfully disabled all ads from the Start Menu.
Remove Ads From Windows 10 Lock Screen
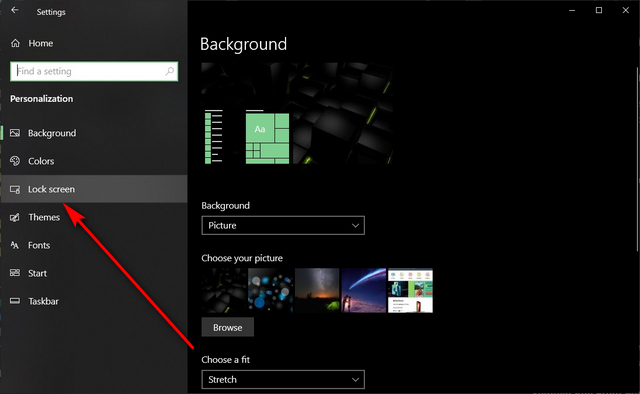
To get rid of lock screen ads, go over to Settings > Personalization as described earlier. Then click on ‘Lock Screen’.
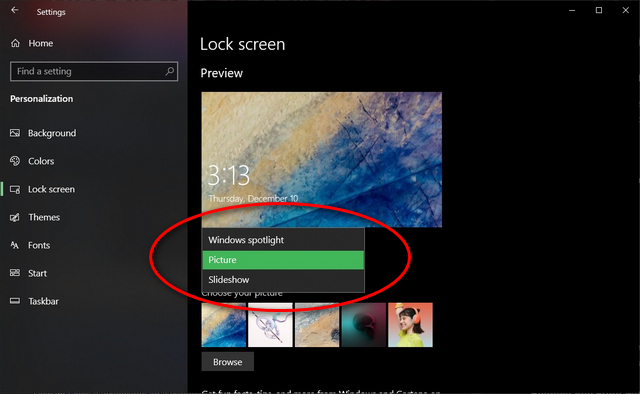
Now, from the drop-down menu, set the background to ‘Picture’ or ‘Slideshow’ instead of Windows Spotlight.
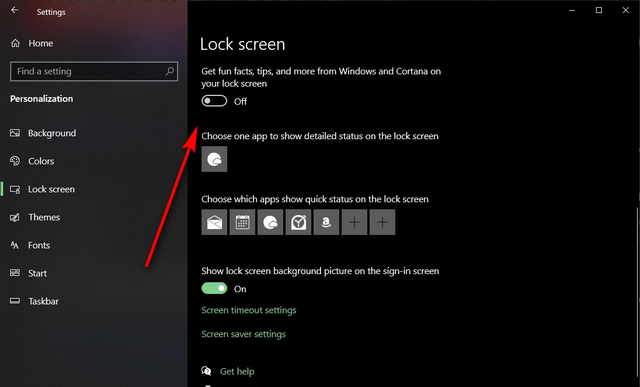
You should also toggle off the “Get fun facts, tips, and more from Windows and Cortana on your lock screen” for further peace of mind.
Your Windows 10 lock screen is now free of ads and annoying ‘tips’ and ‘fun facts’.
Remove Ads From Windows 10 File Explorer
Microsoft introduced ads on File Explorer with the Creators Update back in 2017, but relented following a massive backlash from users. However, the option still remains ‘On’ by default, so it makes sense to turn it off in case the company has a change of heart.
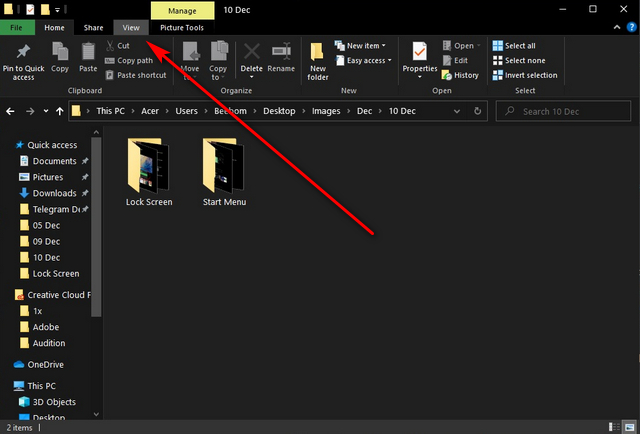
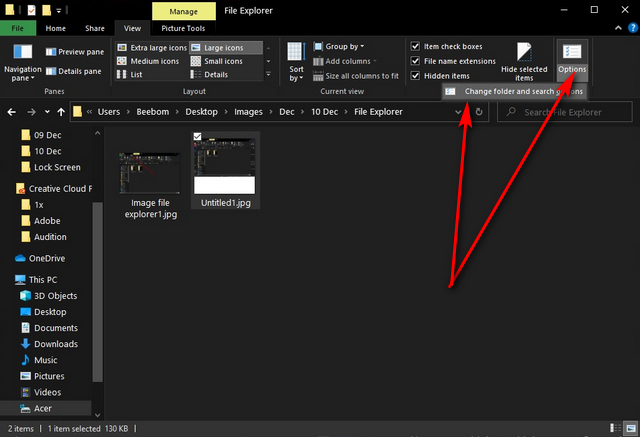
To remove banner ads from the Windows 10 File Explorer, click on the ‘View’ tab as seen in the screenshot below.
Now click on ‘Options’ on the top-right and select “Change folder and search options”.
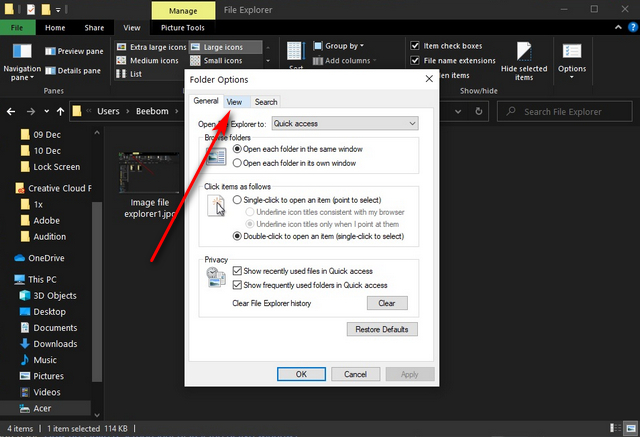
On the popup window (see below), click on the ‘View’ tab at the top.
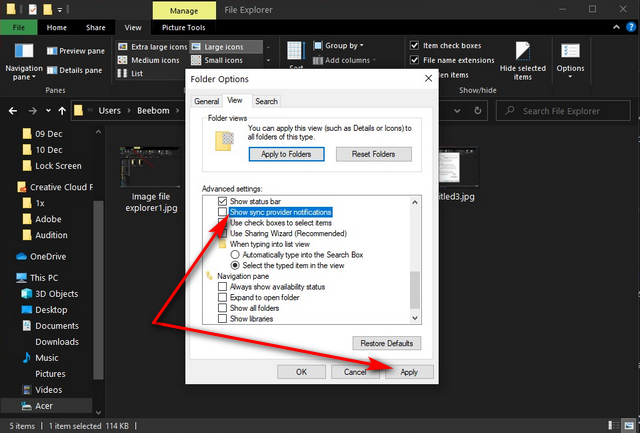
Now scroll down and deselect “Show sync provider notifications”. Finally, click on ‘Apply’ or ‘OK’ to apply the changes to your system.
You have now banished ads from the Windows 10 File Explorer for good.
Remove Notification Ads in Windows 10
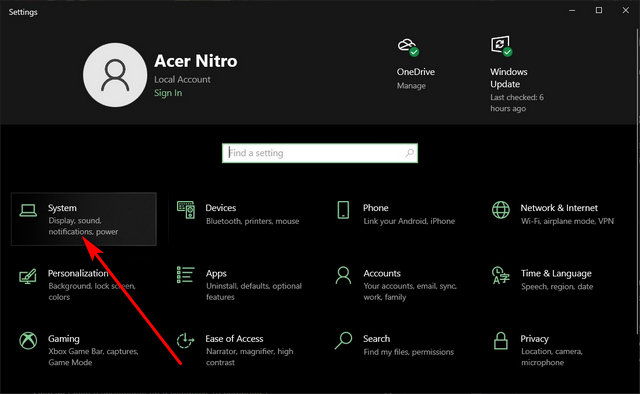
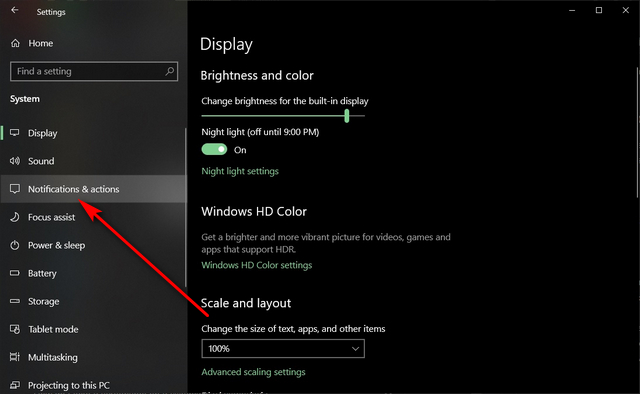
To disable notification ads (Microsoft calls them ‘suggestions’), go over to Settings as described earlier. Now click on ‘System’.
Next up, select ‘Notifications and Actions’ on the left pane.
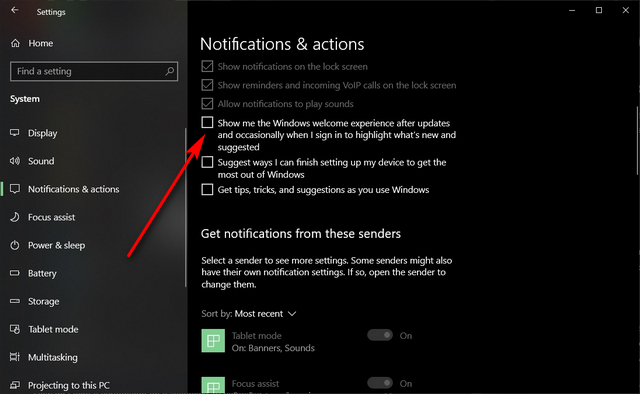
On the resultant screen, uncheck the option that says “Show me the Windows welcome experience…”.
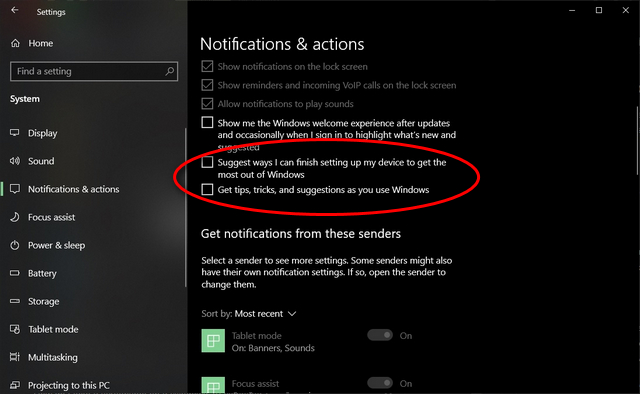
Note: This option is presented as a toggle on some versions of Windows 10, so you’ll need to set the toggle to ‘Off’ in that case. The rest of the process will remain identical. 4. You can also uncheck “Get tips, trick and suggestions…” and toggle off the “Get notifications from apps and other senders” for an even cleaner Windows experience.
Turn Off Advertising ID in Windows 10 for Better Privacy
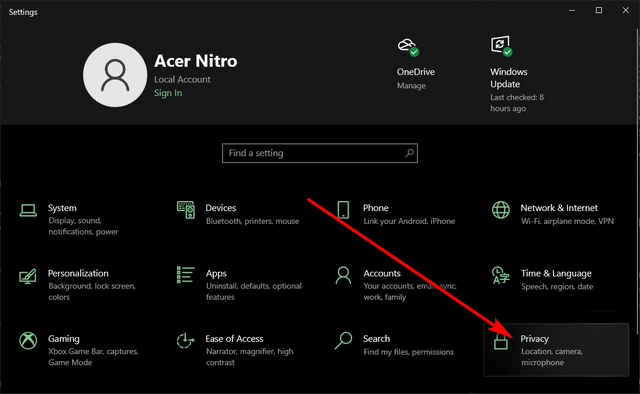
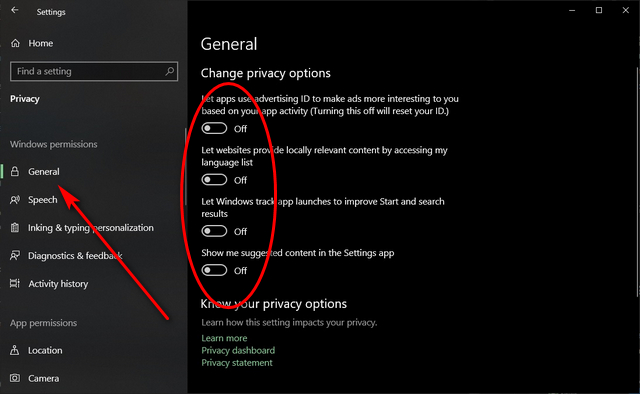
Windows 10 sends a unique advertising ID for each user to app developers and advertisers, but it is a privacy concern and should be turned off for good. To do that, navigate to Settings > Privacy.
Click on ‘General’ and turn off all the toggles as seen in the screenshot below to ensure better privacy.
Bonus: How to Disable Live Tiles in Windows 10
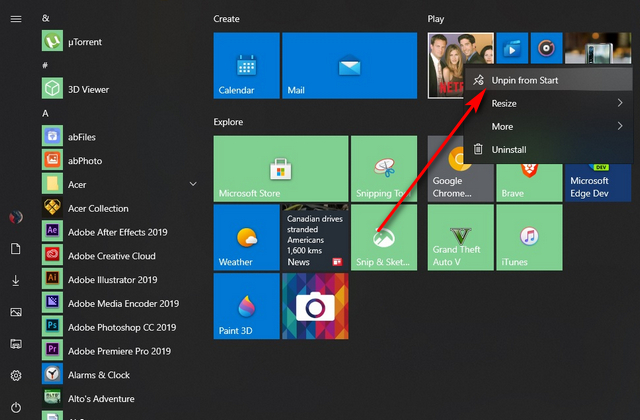
The ‘Live Tiles’ that come with the Windows 10 Start Menu can also be a source of annoying advertisements. To disable them, right-click on any such tile and select ‘Unpin from Start’.
Do note that you can unpin all Start Menu tiles, irrespective of whether they are ‘Live’ or not. That way, you’ll be left with only the ‘All Apps’ list on the left, but it will be a much cleaner and leaner Start Menu, something that many users prefer.
Remove All Annoying Ads From Your Windows 10 PC
Windows 10 can be a great all-purpose operating system, but persistent ads strewn across the OS can be a source of major annoyance for most users. However, following our guide above will help you banish most ads in Windows 10 for good. So do give it a shot to improve your experience on your PC and let us know how that went.
