Note: These methods only work on Chromebooks and not the Google Chrome browser. For recording Chrome on PC or Mac, check out our list of best screen recording extensions for Google Chrome.
Use Screen Recorder on Chromebook (August 2022)
In this article, we have included three easy methods to record the screen on a Chromebook. While two of the features are native to Chrome OS and work like a charm, the third method is important if you wish to record device audio along with the screen. That said, let’s dive in.
Record Screen on Your Chromebook with Screen Capture
- To record the screen on your Chromebook, open the Quick Settings menu in the bottom-right corner. You will find a “Screen capture” tile here, and you can click to open it. You can also use the Chromebook keyboard shortcut “Ctrl + Shift + Overview key (above 6 key)” to access the Screen Capture feature.
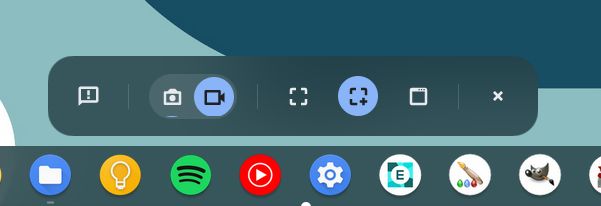
- The Screen Capture feature will open in a bottom-bar menu. Here, click the video icon to switch to the screen recording feature. On the right side, choose how you want to record — full-screen, partial, or active window.
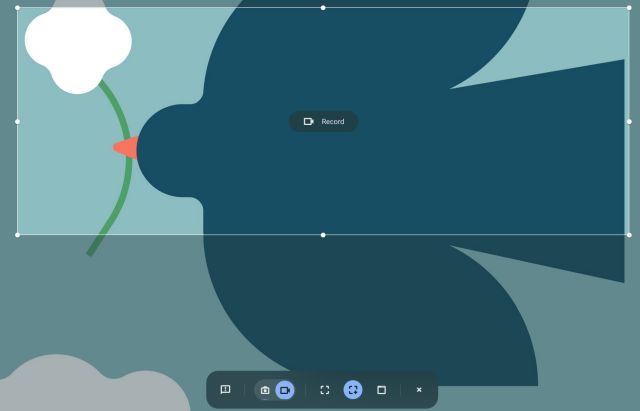
- Finally, hit the “Record” button, and your Chromebook will start recording the screen. In my testing, I didn’t notice any stutters while recording in any of the three modes. And the video quality of the screen recording was also good.
- You can also click the “Settings” icon and turn on “Microphone” under “Audio input” to record your audio as well. And now, after the latest update, you can add your webcam view to screen recordings as well. That’s awesome, right?
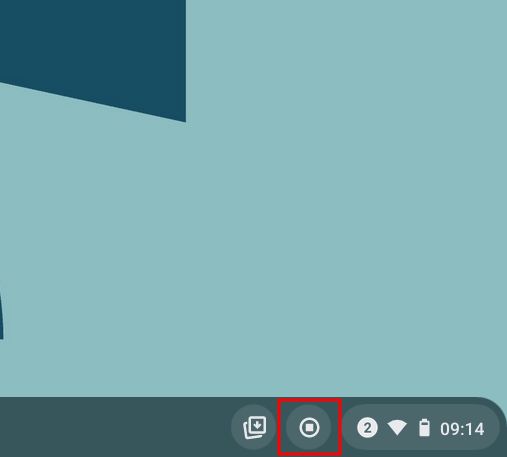
Note: The native Chromebook screen recorder does not record device audio internally. It records audio of whatever you are playing on your Chromebook via the microphone only. If you want to record the audio device internally, move to the last section. - To stop the screen recording, click the stop icon in the taskbar. The screen recording will then be stored in WEBM format inside the “Downloads” folder.
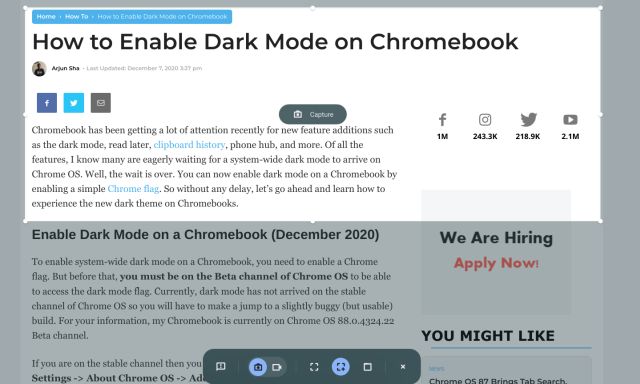
- Along with screen recording, the new tool also brings a new and intuitive way to take screenshots on a Chromebook. You can press the “Ctrl + Shift + Overview button (above 6 key)” shortcut to bring up the new screen capture mode. What I like about this tool is that it remembers the position of the last screenshot in partial mode, making the workflow much faster.
Record Screen on Your Chromebook with Screencast
Google has launched a new screen recording app on Chromebook called Screencast. If you have updated your device to Chrome OS 103, you will find this app in the app drawer. Screencast is an advanced screen recording tool, which is targeted at students and teachers, but anyone can take advantage of this awesome new tool. You can make engaging lessons and demos by recording your screen with Screencast on your Chromebook.
For example, along with screen and voice recording, you can include your face using the webcam, draw on the screen, generate a transcript, offer translations, and more. Having said that, keep in mind that Screencast currently works only if your device language is set to English (US). Now let’s learn how to record the screen on your Chromebook using the new Screencast app and create instructional videos.
- Make sure you have updated your Chromebook to Chrome OS 103. After that, open the App Drawer and click on the Screencast app.
- Next, click on “New Screencast” at the top-left corner to start screen recording on your Chromebook.
- After that, you can choose the full-screen area, window, or partial area to record the screen. The microphone and webcam are enabled by default, which can be disabled from the “settings” icon at the bottom.
- Now, click the red icon on the shelf to start the recording. You can click the “pen” icon for annotations, and you can drag the webcam view to whichever corner you want. Once you are done, click on the red “stop” button on the Chrome OS Shelf.
- You will find the recording in the Screencast app. Here, you can review the transcript and edit it.
- Finally, click on “Share” to share the screen recording with a shareable link. Note that, Screencast doesn’t save the video locally, which is a bummer.
Record Screen on Chromebook with Device Audio
If you wish to record the device audio on your Chromebook while recording the screen, I will highly recommend the Nimbus Screenshot & Screen Video Recorder extension. It’s one of the best Chrome extensions that lets you record the internal audio on Chromebooks. You also get advanced features like webcam view, audio recording from the mic, and more. Here is how it works:
- Go ahead and install the Nimbus Screen Recorder tool from the link here.
- Next, open the extension from the extension toolbar and click on “Record Video“.
- Here, choose “Tab” at the bottom and enable “Record Tab Sound“. You can disable the mic sound toggle if you wish. Note that, the internal audio recording option is only available in Chrome tabs and not the desktop.
- After that, click on “Start Record“, and that’s it. You will now be able to record the screen on your Chromebook with device audio using this Chrome extension.
Record Screen on Chromebook with Screen Capture and Screencast
So these are the three easiest ways to record the screen on your Chromebook. While the basic Screen Capture feature is great, I would have loved it if the tool allowed me to choose the file format, as WEBM is not a friendly video format. And while the Screencast app is fantastic, a local download option would make it even better. Anyway, that is all from us. If you are looking for third-party apps to record the screen on a Chromebook then go through our list. And if you are facing any issues, comment down below and let us know.