Microsoft has now released PC Manager, a new user-friendly way to manage and improve the performance of your PC. If your computer has been lagging recently or experiencing performance issues, then this new app from Microsoft might be the perfect solution for you. Let’s find out more about Microsoft PC Manager and how you can install and use it on your PC.
What is Microsoft PC Manager?
Microsoft PC Manager is a new resource management app from Microsoft that brings user-friendly ways to manage your PC’s performance. The app allows you to control and delete temporary files, free up RAM by killing resource-intensive tasks, and check for security and performance updates available for your computer. Microsoft PC Manager is an overall solution that brings existing performance management features in Windows 11 to a single app. Microsoft PC Manager uses existing tools in Windows like diskpart, task manager, event viewer, storage management, and more to help improve your PC’s performance with a single click. Since the pandemic, Microsoft has seen a sharp rise in new Windows users, which has allowed the company to get familiar with the need for a user-friendly experience when using Windows. While power and enthusiast users could already control and manage resources on previous versions of Windows with relative ease, users looking to use their PC for work or gaming purposes simply found it tedious to navigate through all the different apps and commands to manage resources on their PC. This would often make their systems lag with no one-click solution to help free up resources and improve performance. Microsoft PC Manager is now here, and an attempt to change that by allowing you to speed up your Windows 11 PC with a single click. The app was initially released for Chinese Windows 11 users but is now available for all Windows 11 and Windows 10 users worldwide. You can use our guide below to install and use Microsoft PC Manager on your computer.
Install And Use Microsoft PC Manager In Windows 11/10
Before installing and using Microsoft PC Manager, ensure your computer meets the requirements mentioned below. You can then use the next few sections to install and use Microsoft PC Manager on your computer.
Requirements
You will need to be running Windows 11 or Windows 10 (1809 or higher) on your PC in order to use Microsoft, PC Manager. If you’re unsure of your current Windows installation version, use the steps below to identify the same on your computer.
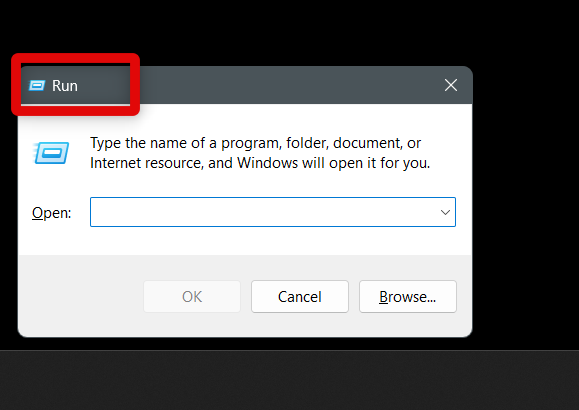
- Open Run on your PC. You can search and open run from the Start menu or use the Windows + R keyboard shortcut.
- Once Run is open on your PC, type in winver and press Enter on your keyboard. You can also click OK depending on your preferences.
- You will now be shown the About Windows page, and your current Windows installation version and build number will be available at the top. If you’re running a compatible version of Windows, then you can use the next few sections to download and use Microsoft PC Manager on your computer. If, however, you’re running an incompatible version, we recommend you use the Settings app to update your PC at the earliest. If your PC is incompatible with Windows 11 and its requirements, you can either bypass them and install Windows 11 or update your PC to Windows 10 1809 or higher.
Install Microsoft PC Manager in Windows 11/10
Now that you’re familiar with the requirements, here’s how you can install Microsoft PC Manager on your computer. Use these steps to help you install Microsoft PC Manager.
- Start by visiting pcmanager.microsoft.com in your favorite browser on your computer. Once the website opens, click Free Download to download Microsoft PC Manager. Save the .exe file once the download is triggered in a preferred location on your PC. Pro Tip: If you cannot open the website on your PC, try using a VPN for Windows. In some regions, the Microsoft PC Manager website might be inaccessible. Additionally, the website might appear in Mandarin, but the app also supports English. Once installed, Microsoft PC Manager will automatically start using your default system language if supported.
- Double-click and launch the downloaded .exe file on your PC. This will begin the setup process for Microsoft PC Manager and allow us to install the same on your computer.
- Click and check the box for I accept End User License and Privacy Agreements. This will unlock the Install option and allow us to install Microsoft PC Manager on your computer.
- Now click Install to begin the setup process for Microsoft PC Manager.
- Microsoft PC Manager will now begin installing on your PC. Wait for the process to complete. This shouldn’t take more than a few seconds, depending on the currently available resources on your PC. Microsoft PC Manager will now be installed on your PC. You can now use the section below to get familiar with Microsoft PC Manager and use it on your computer.
Use Microsoft PC Manager In Windows 11/10
Here’s how you can use all the features in Microsoft PC Manager to boost your computer’s performance and speed it up instantly.
- Open the Microsoft PC Manager app on your PC. You can launch the app using the desktop shortcut or the Start menu search on your PC. Once open, the app will be available in your system tray in the bottom right corner, and you can always access it using this icon once it has been launched on your computer.
- You will now be shown the RAM used at the top under Memory usage. Additionally, space occupied by temporary files on your PC will also be shown under Temporary files. Click Boost to free up RAM, clear temporary files, and cache files from your PC. This should bring down the RAM usage on your PC and speed it up instantly. You should use this Boost feature each time you feel your PC lags or faces performance issues.
- Next, you have Health Check in the Microsoft PC Manager app. This helps look for potential issues with your Windows PC and correct them automatically. When using Health Check, the Microsoft PC Manager app analyzes most junk and temporary files on your computer, including cache files, logs, and more. Unfortunately, a downside of using Health Check is that it will always prompt you to set Microsoft Edge as your default browser if you use a different one. Thankfully, you can always uncheck this option before clicking Proceed at the top when performing a Health Check using the Microsoft PC Manager on your computer. Health Check will also recommend you disable resource-hungry startup programs so that you can reduce your boot times.
- The next option available in the app is Storage Management. Click this option to manage the storage available on your PC and free up space if needed.
- Storage Management uses the existing disk cleanup feature to free up space on your PC. The tool is usually hidden under advanced tools in Windows and can also be accessed via CMD. However, using the Storage Management option in the Microsoft PC Manager app, you can now use disk cleanup easily. Click Deep Cleanup and follow the on-screen instructions to free up space on your PC. This option will look for all disposable files on your PC and delete them instantly.
- Click Manage large files to find and discover exceptionally large files stored on your PC. Microsoft PC Manager will scan your PC for files larger than the size you choose during this process and display them on your screen. You can then manually choose to either keep or delete these files from your PC at your discretion to free up even more space on your PC.
- The next option is the Manage apps option. Clicking this option will redirect you to the Settings app, where you can uninstall and manage all apps installed on your computer. This will allow you to remove unused apps to free up even more storage space on your PC.
- The last option under Storage Manager is Storage Sense. Storage Sense is an existing feature in the Settings app that intelligently manages and deletes temporary files on your system. This feature can help you automatically delete disposable files on your PC to free up space on your computer regularly. Clicking this option will redirect you to the Settings app, where you can turn on the toggle for Storage Sense based on your preferences.
- Now click Process management. This option will allow you to view all resource-hungry tasks and apps currently running on your PC. You can then click End to kill unnecessary apps as needed to boost the performance of your PC. Click End beside an app you do not need to free up resources on your computer.
- Click Startup apps to view all startup apps on your PC. These apps are allowed to launch in the background every time your PC boots up. This can help you access frequently used apps instantly as soon as you turn on your PC. However, these apps can significantly increase your PC’s boot-up times. If you find your PC taking a lot of time to boot up, you can disable startup apps to reduce boot-up times. It’s always a good idea to only turn startup capability for apps that you need. Simply turn off the toggle for the desired app in this section to disable its startup capabilities and prevent it from launching each time your PC boots up.
- Next, we have the Security section. This section will help you manage your Windows updates, driver updates, and more. Additionally, MSRT, or the Microsoft Safety Scanner, has also now been included in the Microsoft PC Manager app, which can help you scan your PC for threats and malware with a single click on your PC. Click Scan to perform a Scan instantly.
- Click Windows Update if you wish to check and install pending updates on your Windows PC. Any available updates will show up in this section.
- Check the boxes for every update you wish to install on your PC. Once done, click Update to download and install the selected updates on your Windows PC.
- Next, you have the Default browser section. Here you can set your default browser and prevent changes to it. Click Browser Protection to help you access these settings.
- Click Change default browser and choose your preferred default browser for your PC.
- Now click and turn on the toggle for Block change by malicious apps to prevent other apps from changing your default browser on your Windows PC.
- Go back and click Pop-up Management. This option will help you disable pop-ups on your PC if you find them to be annoying during your workflow.
- Turn on the toggle for Enable pop-up block to block all future pop-ups on your Windows PC. You will now have used the Microsoft PC Manager app to boost performance and free up resources on your Windows PC.
Can I disable my Anti Virus when using the Microsoft PC Manager app?
No, Microsoft PC Manager is not a replacement for your Anti-Virus. It is instead a performance booster designed to help free up resources and space on your PC with a single click.
Which Anti-Virus does the Microsoft PC Manager use to scan for malware?
Microsoft PC Manager uses Windows Defender each time you decide to scan your PC for malware and other threats on your PC.
Final Words
Slow PCs have long been an issue for every user worldwide. They can be annoying, hinder your workflow and prevent you from using your PC to its full potential. If you’re a gamer, then you might be looking to free up every possible resource to increase the fps of your games. The new Microsoft PC Manager app is designed to be a one-click solution when trying to boost your PC’s performance. I hope the post above helped you easily download and use Microsoft PC Manager to boost your computer’s performance with a single click.
Δ