ZIP allows for lossless data compression and has the ability to support multiple compressed directories in an archive. Sadly, this function is reportedly broken for many Windows 11 users after the latest update. If you’re facing the same issue on your system, then here are a few fixes to help you get the ZIP function working again on your PC.
Fix ZIP Function Not Working in Windows 11
The ZIP function could be broken for a number of reasons on your PC. Here are a few fixes to help fix the same and get ZIP working again on your Windows 11 PC.
1. Restart Your PC
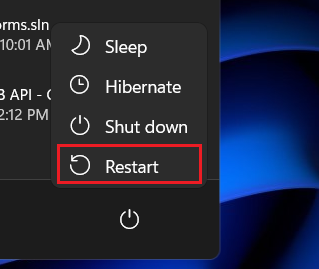
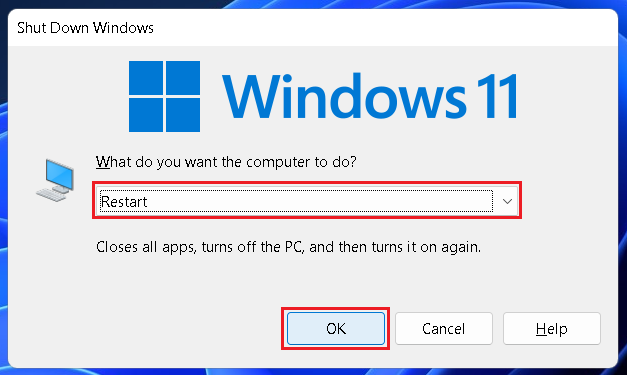
You could be facing issues due to background bugs, corrupted files, or failing background services. A PC restart can help fix the same easily and get rid of temporary files and cache that might be causing issues with the ZIP function on your system. To restart your PC, open the Start menu, click the Power icon and select Restart. You can also go to your desktop and press Alt + F4 on your keyboard to view the advanced power menu. You can then select Restart from the drop-down menu and then click OK to restart your PC. Once your PC restarts, the ZIP function should be fixed if you were facing issues due to temporary files, failing background services, and temporary bugs on your PC.
2. Try To ZIP Or Extract In A Different Location
The ZIP function can sometimes face issues if the archive is stored under multiple directories. This seems to be an inherent bug caused by folder names and characters included in them. It is likely that the ZIP function is facing issues compressing or extracting an archive in your current chosen location. We recommend you try and use the ZIP function in one of the default directories on your PC. Follow the below steps to use the ZIP function in a different directory.
- Open the directory where the archive or the folder you wish to compress is stored.
- Click and select the archive or folder and then press Ctrl + C on your keyboard to copy it to your clipboard.
- Now visit either of these directories and paste the copied archive or folder in the chosen location.
Videos Pictures Desktop Music Documents
- You can now try to use the ZIP function. If you wish to compress a folder, right-click the folder and select Compress to ZIP file.
- If you wish to extract an archive, right-click the archive and select Extract All.
- Now click Extract to extract the archive in the same location. You should now be able to extract the archive or compress a folder if you were facing issues with the ZIP function due to folder names in the old directory.
3. Disable And Re-enable ZIP Support
You can now try to disable and re-enable the ZIP support on your PC using the registry editor. This will re-register the service on your PC, which should help fix background issues that might be caused by corrupted files or installs on your PC. Use these steps to disable and re-enable the ZIP function on your Windows 11 PC.
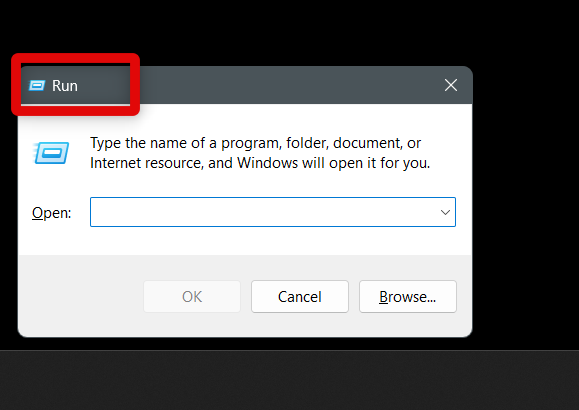
- Begin by launching the Run app on your PC using the Windows + R keyboard shortcut.
- Now type in regedit and press Enter on your keyboard to launch the registry editor.
- Once you launch the registry editor, you should first create a backup. This will help you restore deleted values when restoring and re-enabling the ZIP function on your PC. Click and select File in the top left corner.
- Click Export to back up your registry values.
- Now choose an appropriate location to store your registry backup and enter a preferred name beside the File name.
- Click and select All under the Export range in the bottom left corner.
- Click Save to save your registry backup.
- Once your registry values have been backed up, use the left sidebar to navigate to this path – HKEY_CLASSES_ROOTCLSID in the registry editor.
- Now press Ctrl + F on your keyboard. This will allow us to search the registry editor for all the necessary values. Uncheck the box for Values and Data once the Find dialog box launches on your PC.
- Type in this value beside Find what – {E88DCCE0-B7B3-11d1-A9F0-00AA0060FA31}.
- Now click and select Find Next.
- Only a single value should exist in this path in the registry editor. Once found, verify the key using this path – HKEY_CLASSES_ROOTCLSID{E88DCCE0-B7B3-11d1-A9F0-00AA0060FA31}.
- If the paths match, click and select the key and press Delete on your keyboard.
- Click Yes to confirm your choice.
- Now press Ctrl + F again and uncheck the box for Values and Data.
- As we did before, type in this value beside Find what – {0CD7A5C0-9F37-11CE-AE65-08002B2E1262}.
- Click Find Next to search for the value.
- Once found, verify it is the correct key by checking its path against this directory in your address bar at the top. – HKEY_CLASSES_ROOTCLSID{0CD7A5C0-9F37-11CE-AE65-08002B2E1262}. If the path does not match, use the left sidebar to manually navigate to the key.
- Hit Delete on your keyboard again and then click Yes to confirm your choice.
- Now close the registry editor and restart your PC.
- Once your PC restarts, navigate to the backup we created for your registry earlier. Once found, double-click the backup file and click Yes once you’re prompted to merge values.
- Your backup will now be restored. Restart your PC one more time for the changes to take effect. You should now be able to use the ZIP function on your PC once it restarts.
4. Ensure You’re Using an NTFS Drive
If you’re still facing issues using the ZIP function, you might be using a drive that is not using the NTFS format. The NTFS format is a stable file format used by Windows for its boot drive. Some user reports suggest that the ZIP function only works on NTFS drives. So if you’re still facing issues, We recommend you copy the archive or folder you wish to compress to your boot drive and try using the ZIP function again. Your boot drive will be NTFS by default, as it is a requirement for Windows 11. If you’re able to use the ZIP function on your boot drive, then your other drive is likely using a different file system format. Use these steps to check the file system of a selected drive on your PC.
- Open File Explorer on your PC using the Windows + E keyboard shortcut.
- Now click and select the desired drive and press Alt + Enter on your keyboard.
- You will now be on the Properties page, and the current file system format will be visible beside File system. You will now have checked the file system format used by a drive on your PC.
5. Restart Windows Windows Explorer
If the ZIP function is still not working, you can try restarting Windows Explorer. This is known to fix issues on Insider builds of Windows 11 that tend to experiment with Windows Explorer. This ends up introducing unwanted bugs which can cause issues with the ZIP function on your PC. Here’s how you can restart Windows Explorer on your Windows 11 PC.
- Start by pressing Ctrl + Shift + Esc to launch the Task Manager on your Windows 11 PC.
- Now click and select Windows Explorer from the list of tasks on your screen.
- Click Restart task in the top right corner of your screen or if you use an older version of Windows, right-click and select the same. Windows Explorer will now restart on your PC. Once it restarts, try using the ZIP function again. If the issue was caused by Windows Explorer bugs, then the issue will now be fixed on your PC.
6. Run Windows Troubleshooter
If you’re still facing issues, we now recommend you run the File and Folder troubleshooter. Here’s how you can run the file and folder troubleshooter on your PC.
- Start by visiting this link to download the troubleshooter from Microsoft’s official website.
- Click Download and save the troubleshooter on your PC.
- Double-click and run the file once downloaded.
- Now click Next to run the troubleshooter.
- The troubleshooter will now try to detect issues on your PC and then ask you about the issues you’re facing. Check the box for Others, or I don’t know.
- Click Next to proceed with the troubleshooting process.
- If you’re prompted to apply a fix, click Yes.
- Once the troubleshooting process completes, click Close. You will now have run the file and folder troubleshooter, which should now have fixed the ZIP function on your PC.
7. Run an SFC and DISM Scan
An SFC scan or system file checker scan can help check and repair corrupted and missing system files. A DISM scan can help fix issues with your Windows image. If your ZIP function is broken due to missing system files or a broken Windows image, then these commands can help you fix the same. Use the steps below to run these commands on your PC.
- Open Run on your PC using the Windows + R keyboard shortcut.
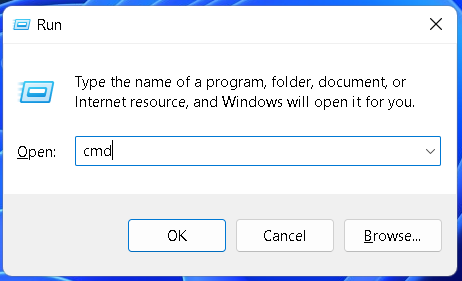
- Type in cmd and press Ctrl + Shift + Enter to launch a command prompt as an administrator.
- Now use this command to run an SFC scan – sfc /scannow.
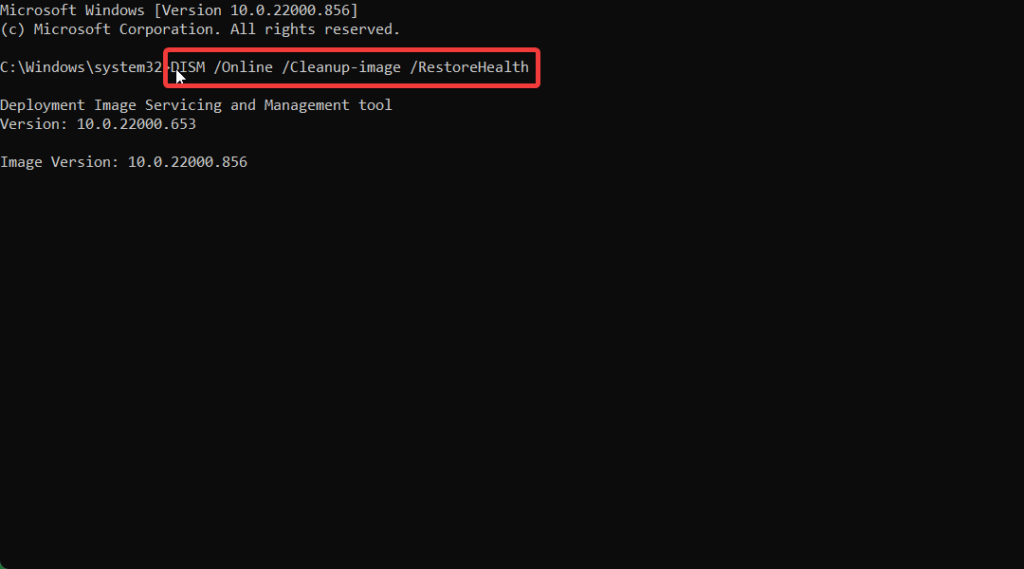
- Once the process completes, use these commands to run a DISM check and repair –
- Close the command prompt and restart your system. This will help refresh your system.
8. Run The Disk Checker
The ZIP function could also be broken due to disk errors and bad sectors. Running a disk checker command can help fix the same. Use the steps below to run the disk checker on your PC.
- Open the Run app using the Windows + R keyboard shortcut.
- Now start by typing in cmd. Once done, press Ctrl + Shift + Enter on your keyboard. This will launch the command prompt as an administrator.
- Now use this command to check and repair your boot drive. – chkdsk c: /r /scan /pref.
- Similarly, repeat the command above for all other drives on your PC. Replace c: with the corresponding drive letters of your other drives.
- Restart your PC once the process completes.
9. Reset Default App Associations
It could be that the default app associations are messed up, which prevents the ZIP function from opening as intended on your PC. Use these steps to reset your default app associations on your Windows 11 PC.
- Open the Settings app on your PC using the Windows + I keyboard shortcut.
- Now click and select Apps on your left.
- Click and select Default apps on your right.
- Now scroll to the bottom and click Reset beside Reset all default apps.
- Click OK to confirm your choice.
10. Run A Malware Scan
PC infections can also cause issues with native features, including the ZIP function. If you suspect your system is infected, we recommend you run a malware scan using Microsoft Defender. Use these steps to run a full system malware scan on your PC.
- Open the Windows Security app on your PC from the Start menu search.
- Click and select Virus & threat protection from the left sidebar.
- Click Scan options to view all available options.
- Click and select Full scan as your choice. Now click Scan now to scan your system for malware. Once the scan completes, remove any quarantined files and restart your system. If a malware infection was preventing you from using the ZIP function, then the issue should now be fixed on your Windows 11 PC.
11. Use A Third-party Alternative
Lastly, if the ZIP function is still broken, then we recommend you resort to a third-party app. There are many third-party apps out there that allow you to extract and create not only ZIP archives but also other formats. Use the links below to download the preferred unarchiver to your PC. Most of these tools will automatically add options to the right-click context menu on your PC, which will help you use these tools similarly to the native Zip function in Windows 11.
WinRAR – Download Link WinZIP – Download Link 7ZIP – Download Link
Why is the ZIP function broken in Windows 11?
The ZIP function can be broken due to many reasons. It can stem from corrupted files, missing system files, driver issues, broken third-party apps, background services, and much more. The fixes above should help fix all these issues on your PC and restore ZIP function’s functionality for you.
Should I pay for third-party Zip alternatives?
We do not recommend paying for third-party Zip alternatives, as the ones linked above are free to download and use. Unless an alternative does not offer exclusive features available in the free versions, you shouldn’t pay for unarchivers.
Final Words
Compressing and extracting archives is something everyone using PCs is used to. They allow you to transfer data, save space and ensure that all your files remain intact during this process. Being unable to use the ZIP functionality can prevent you from accessing vital files and hinder your workflow and productivity. We are hoping the post above helped you easily fix the ZIP functionality and get back to work on your Windows 11 PC.
Δ