Probable Reasons for Windows 11 Trackpad Not Working Issue
Before we begin troubleshooting, let’s understand the common causes why the touchpad is not working in Windows 11. Below are some of the most common causes that trigger the issue at hand:
Disabled TouchpadMisconfigured Settings Corrupt or outdated touchpad driverOutdated Windows build Incompatible Windows Update Broken Hardware
Now that we have a clear idea of why the touchpad is not working in Windows 11, it’s time to check out the troubleshooting methods.
1. Wipe The Touchpad Clean
If you do not clean your laptop of dust properly, then there is a good chance that your trackpad must have accumulated lots of dirt and grime. When you swipe your fingers across your laptop’s touchpad, the dead cells and body oils mix with the dust and sneak under it, causing it to respond slowly or not at all. Hence it is important to wipe the touchpad thoroughly, especially its edges. Grab a microfiber cloth and moisten it with isopropyl alcohol and start to wipe the trackpad. Use a soft-bristled toothbrush to reach the edges. When assured about the cleanliness, try using the touchpad and see if it responds.
2. Restart Your System
Rebooting electronic devices, including your laptops, can help get rid of the trivial glitches in the software that degrade its performance. It is possible to restart your laptop with the keyboard keys if an external mouse is not handy.
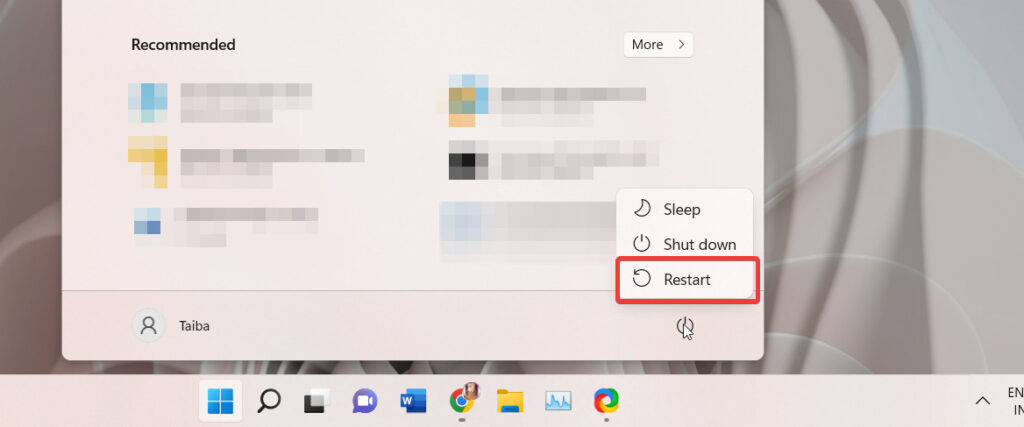
- Press the Windows key on the keyboard and use the tab key and arrow key combination to access the power icon.
- Press the power icon and choose the Restart option from the flyout menu.
- You can also use the Alt+F4 key combination to bring up the Shut Down window and use array keys to select restart in the drop-down menu.
3. Unlock Touchpad With The Keyboard Shortcut Key
If the touchpad is still non-functional, there is a probability that you might have accidentally pressed the function key configured to disable the touchpad. Nowadays, all laptops have a function key assigned to quickly enable or disable the Touchpad when the need arises without digging into the Settings. The touchpad key varies from manufacturer to manufacturer, but generally, they have a touchpad icon on it. When you locate the function key to enable/disable the trackpad, press it once and see if it enables the touchpad.
4. Enable Touchpad From Windows Settings
Windows 11 has a dedicated option in the Settings app to disable the touchpad when an external mouse is connected. Follow the below-mentioned steps using an external mouse or keyboard shortcuts to enable the touchpad from the Windows settings.
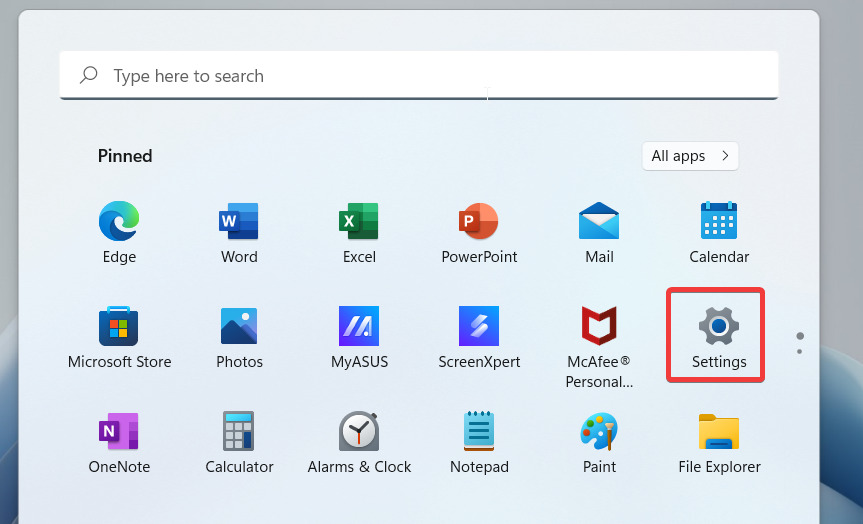
- Press the Windows key and click on the Gear icon in the pinned apps section to open the Settings app.
- Alternatively, you can use the Windows + I key combination to access Windows Settings.
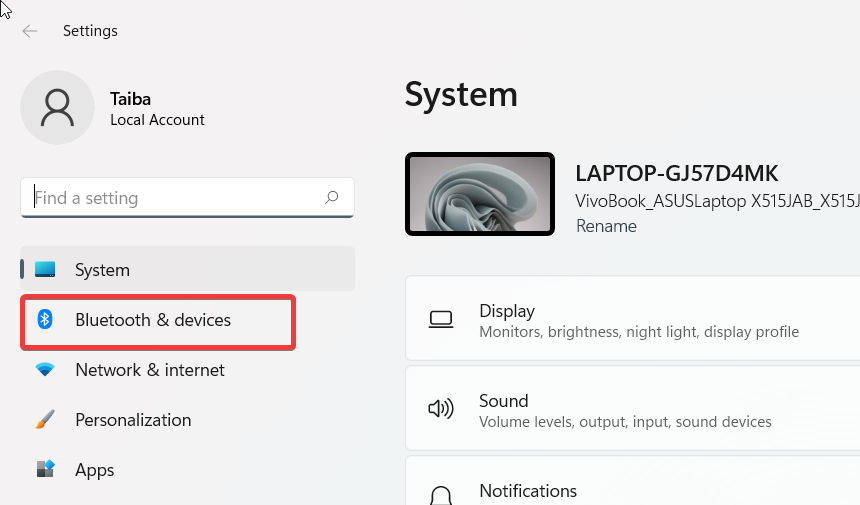
- Select Bluetooth & Devices option from the left pane.
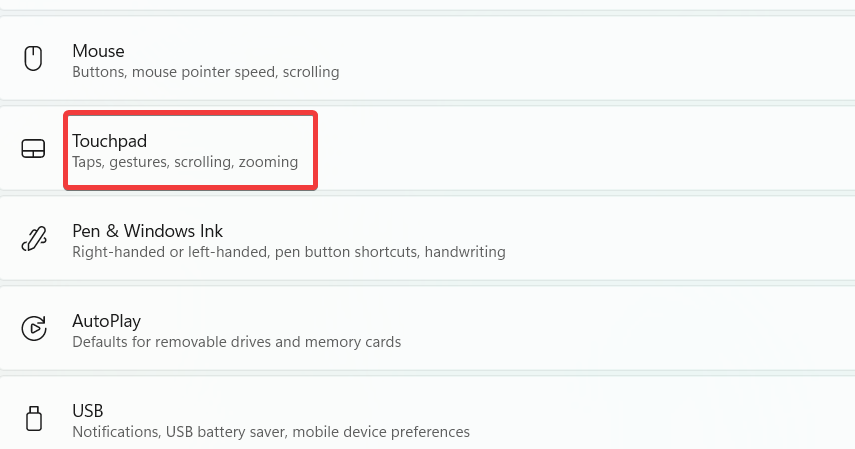
- Scroll down and click on the Touchpad option.
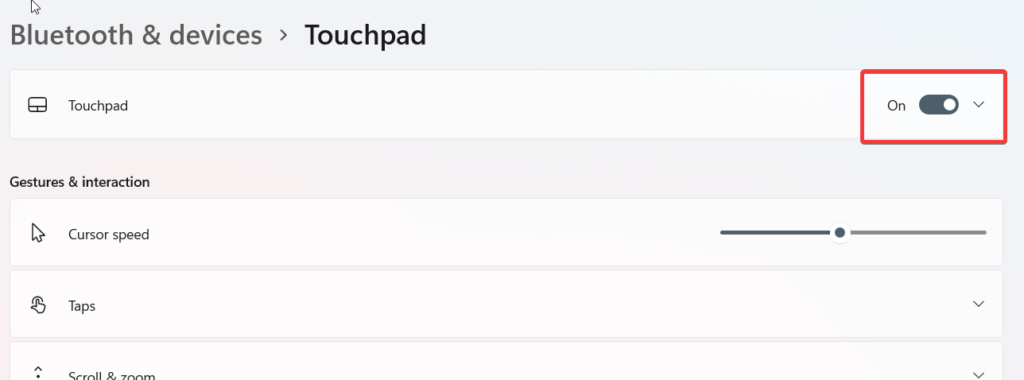
- On the next page, you will see a switch in front of the Touchpad option. If it is in an off position, tap the switch to turn it on.
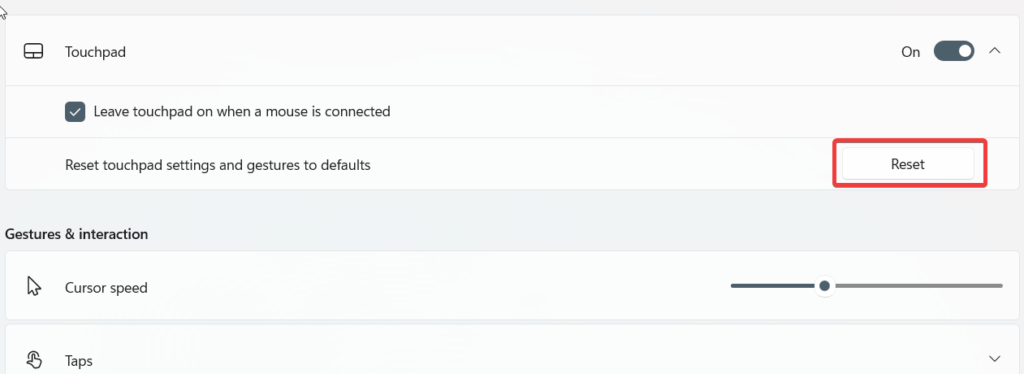
- While you are at it, click the upward arrow icon next to the toggle to reveal additional settings. Press the Reset button to revert all the touchpad settings to default and see if it does any good.
5. Run Windows Hardware and Devices Troubleshooter
If the touchpad still does not respond, it is advisable to seek help from the built-in Windows troubleshooters that will diagnose the problem and resolve it automatically. Thankfully, Windows is equipped with a dedicated troubleshooter to identify hardware-related issues. The method to run the Windows Hardware and device troubleshooter on your Windows 11 laptop is demonstrated below.
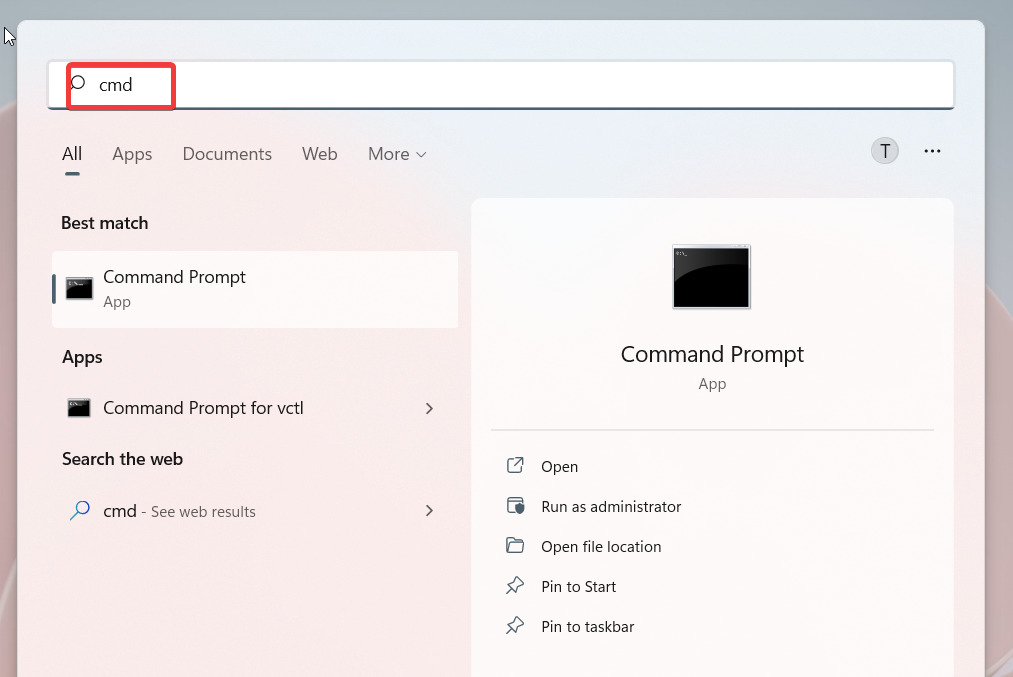
- Press the Windows key to bring up the Start Menu and type cmd in the search bar.
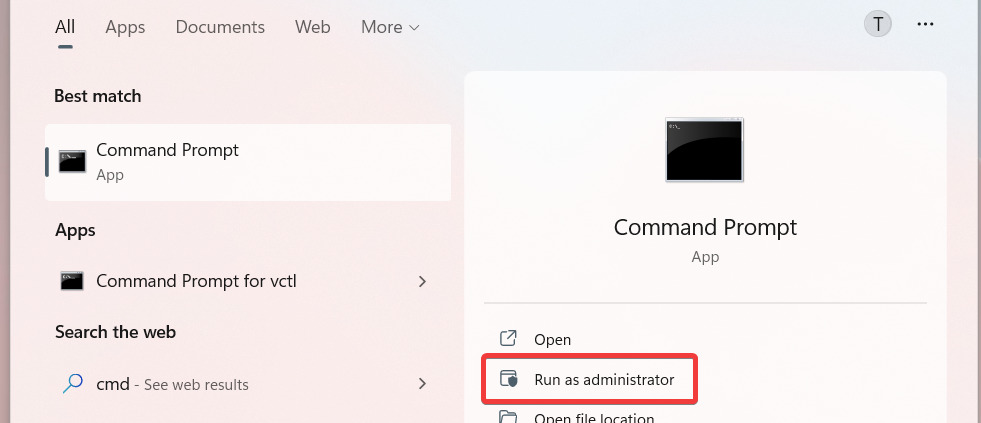
- Select the Run as administrator option from the right pane.
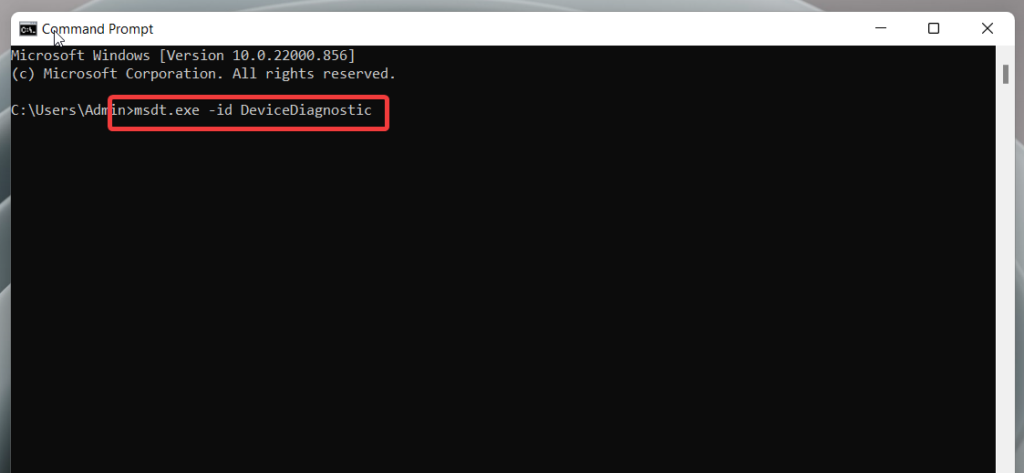
- In the Command Prompt, type or copy-paste the following command and hit the Enter key,
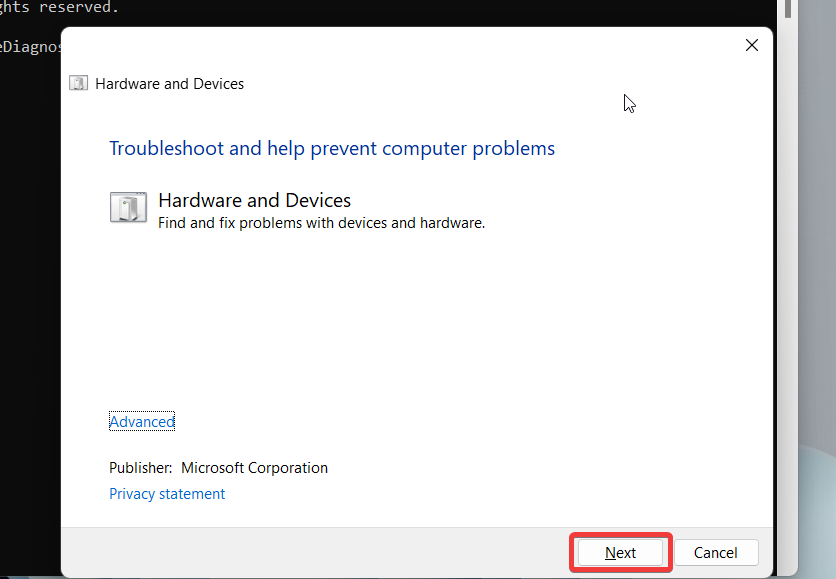
- As soon as you’ll press the enter key, the Hardware and Devices troubleshooter window will pop up on the screen.
- Press the Next button below to initiate the diagnosing process for hardware-related issues.
- Wait patiently until the troubleshooter scans for the problem. If the troubleshooter recommends Automatic Repair to resolve the underlying issue, grant permission by pressing the Apply button. After the ritual, give your laptop a quick reboot and move your fingers on the trackpad. We have high hopes that it will respond to touch and gestures.
6. Update Touchpad Driver
If the above methods could not help alleviate the situation, it’s time to pull out bigger guns. Upgrading to Windows 11 may cause the drivers to become outdated or corrupt, causing the touchpad to act up or fail to respond. Windows 11 is designed to automatically updates the drivers from time to time, but if you have disabled the automatic updates option, the drivers will get outdated over time. In such a situation, follow the steps below to update the touchpad drivers manually:
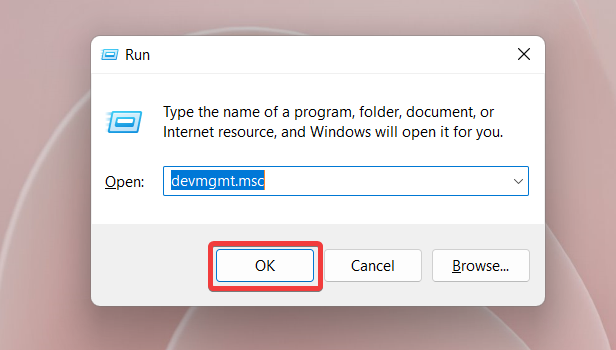
- Use the Windows + R shortcut key to open the Run Dialog box.
- Type devmgmt.msc in the text box and press the OK button.
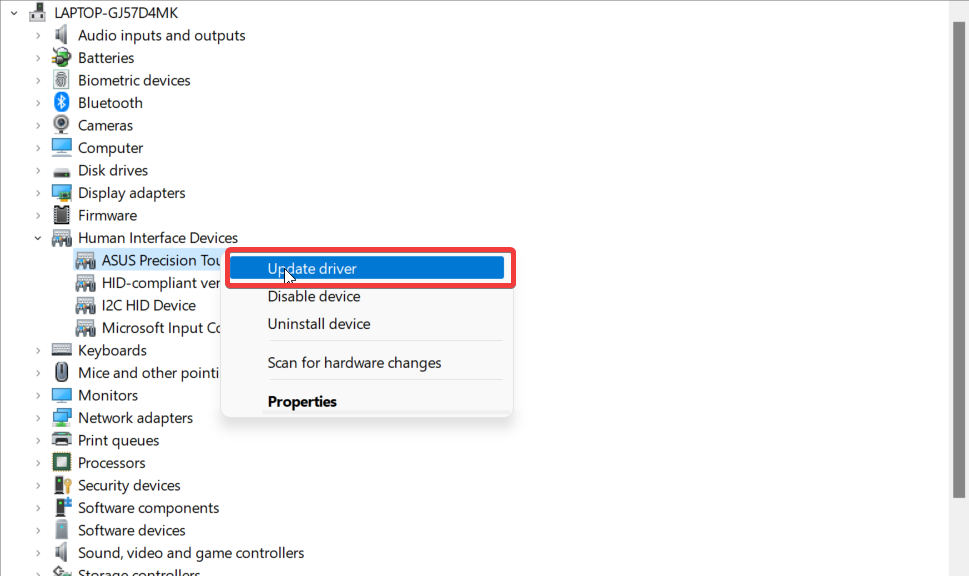
- Now, the Device Manager window will open in front of you. Scroll down the list and look for the Human Interface Devices category.
- Click on the arrow preceding it to expand the list of devices.
- Right-click the touchpad driver and choose the Update driver option from the context menu.
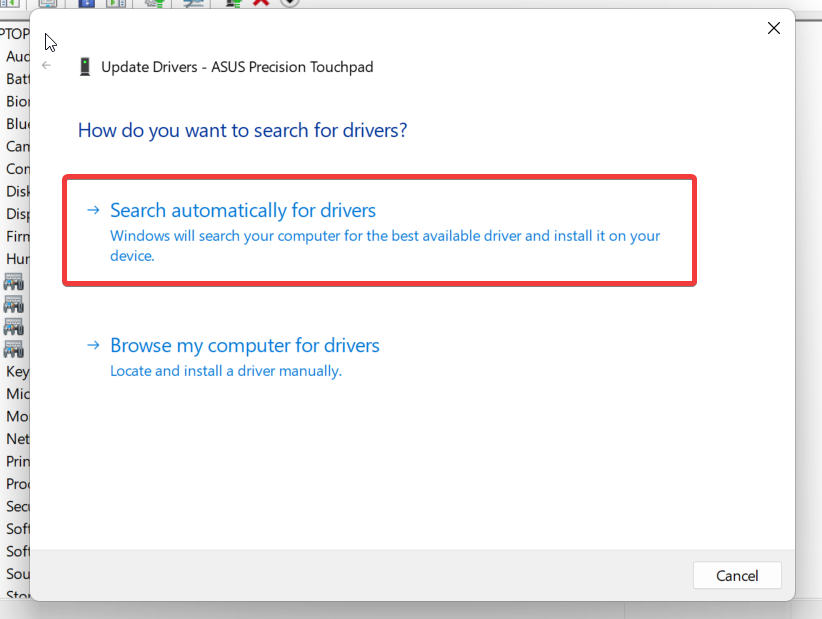
- In the update driver window, choose the Search automatically for drivers option. If the Window displays a pending driver update, download and install it.
- Restart your laptop and see if the touchpad is responding now.
7. Rollback/Reinstall Touchpad driver
If updating the touchpad driver could restore the functionality of the touchpad on your Windows 11 laptop, it is better to roll back the updates installed in the previous method. This is essential because the possibility of the driver update being buggy is very high, which will further deteriorate the touchpad functionality. So let’s roll back the driver updates for good!
- Use the Windows + X shortcut combination to bring up the Power User Menu. Choose the Device Manager option here to access the Device Manager window.
- Alternatively, you can use the Run command method explained above to go to the Device Manager window.
- Locate the Human Interface Devices list and double-click it to expand the list of drivers.
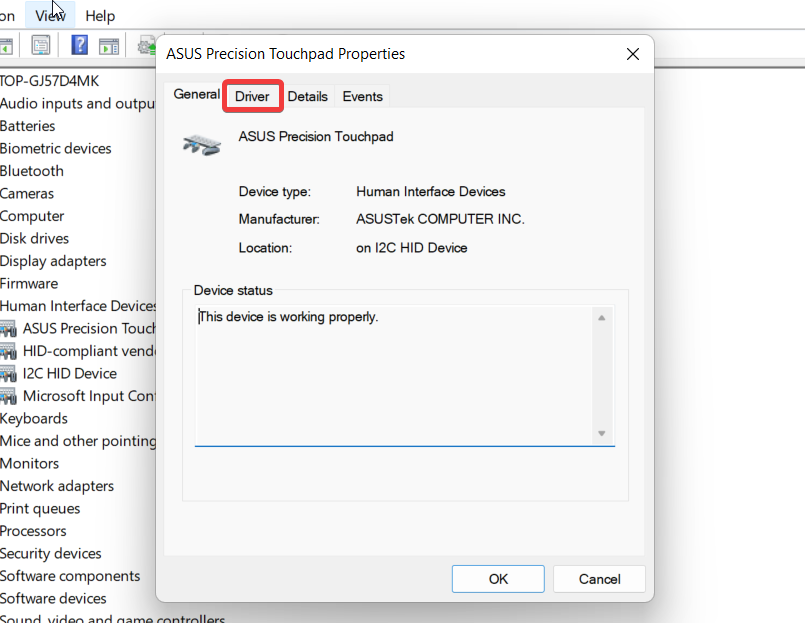
- Access the context menu of the touchpad driver and choose the Properties option.
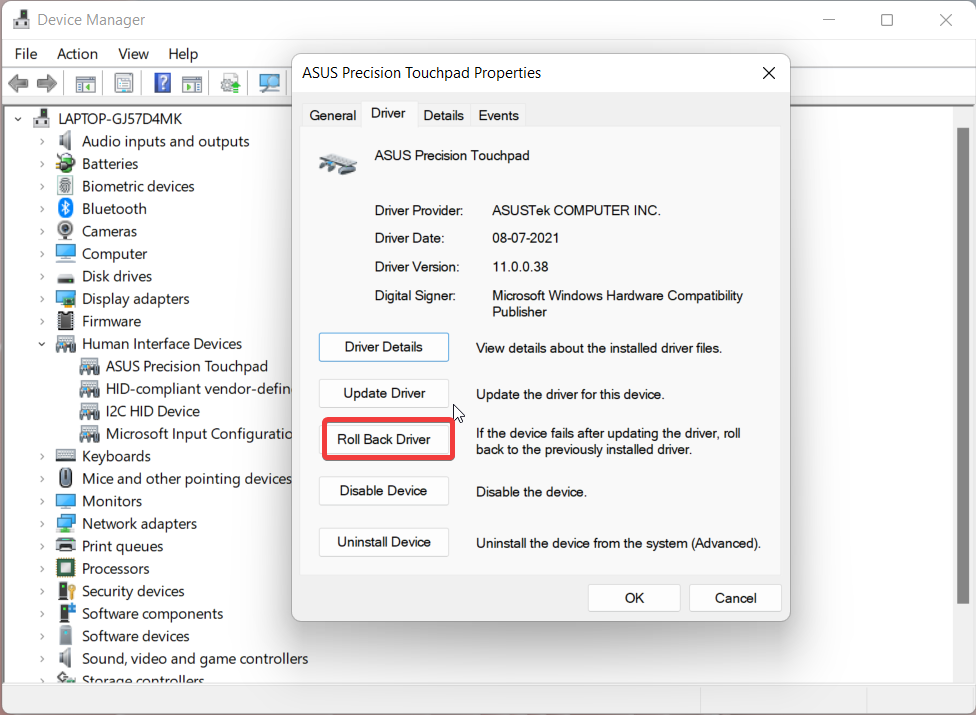
- A pop-up window will open in front of you. Switch to the Driver’s tab.
- Press the Rollback driver button to revert the touchpad driver to the previous version.
- When the rollback is successful, restart your Windows 11 laptop and see if the touchpad is functional now. If the driver rollback is unsuccessful for some unexplained reason, you should try uninstalling the driver updates. Here are the steps for it:
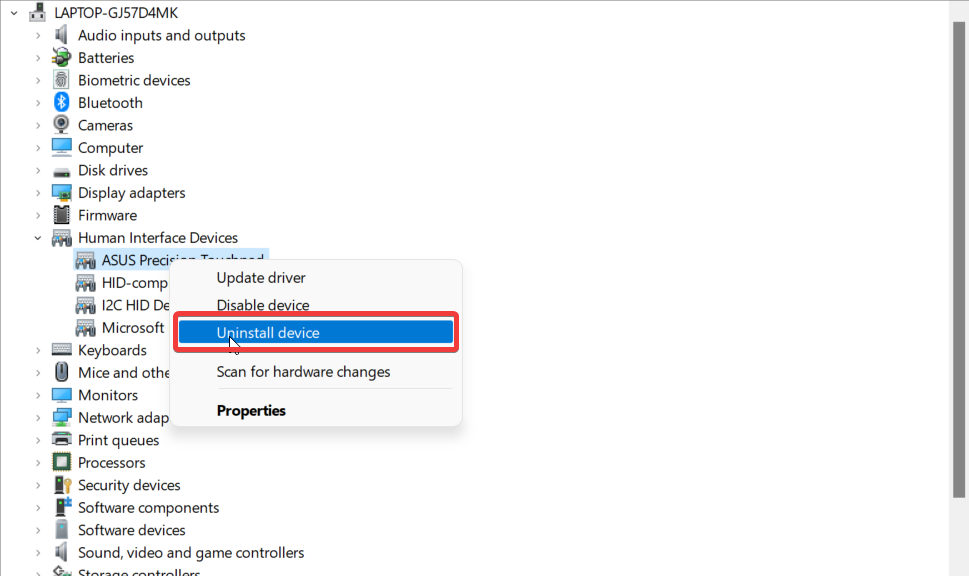
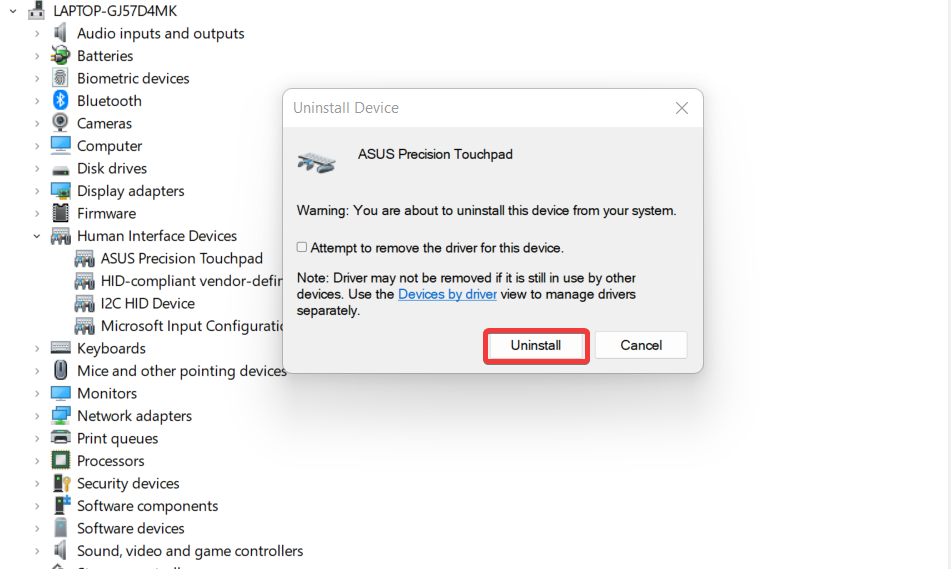
- Right-click the Touchpad driver and choose the Uninstall device option.
- A pop-up will appear, warning you about the action. Press the Uninstall button to confirm the decision.
- Immediately reboot your Windows 11 PC, and the default version of the Touchpad driver will be reinstalled automatically.
8. Install Pending Updates
Windows 11 is full of bugs that interfere with Windows resources and drivers. To overcome this problem, Windows keeps rolling out performance updates that address the bugs present in the previous updates. While Windows 11 is configured to download and install the available updates automatically, your Windows 11 PC will become outdated if you pause the updates for several weeks. Hence, it is advised to check for the pending Windows updates and install them at the earliest to restore your system’s functionality.
- Head to Windows Settings using the Windows+I key combination.
- Select Windows Update from the left sidebar.
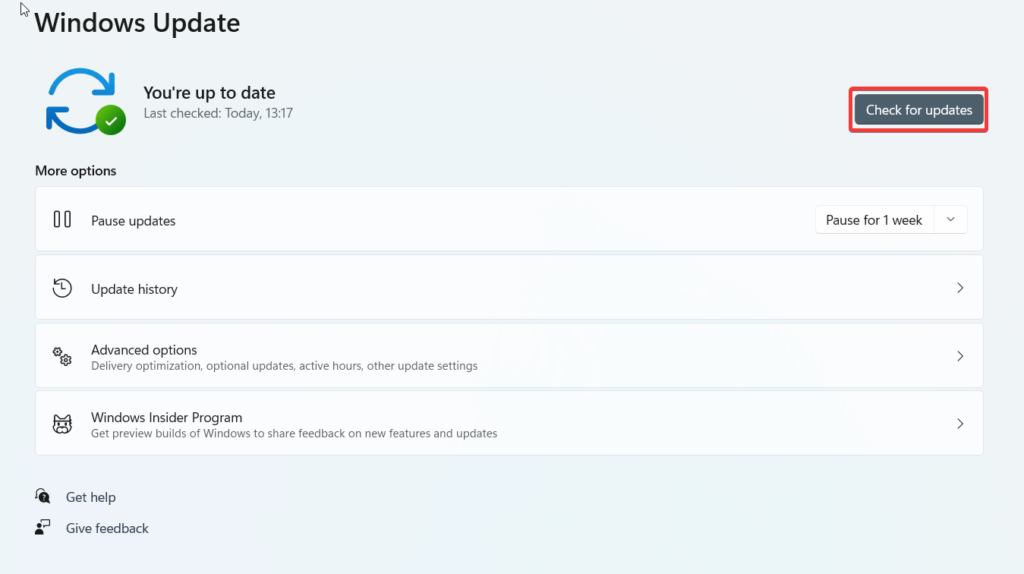
- Press the Check for updates button available on the top.
9. Enable the Microsoft Keyboard Filter Service
Microsoft has designated a relevant service for every process and program running on Windows OS. These services keep running in the background without user intervention and help them function properly. If any service is not operational at the moment, the process corresponding to it won’t function. It will not be wrong to speculate that the issue with the working of the touchpad has occurred because the service related to the peripheral has stopped running. So, let’s ensure that the services related to the laptop’s touchpad are running properly.
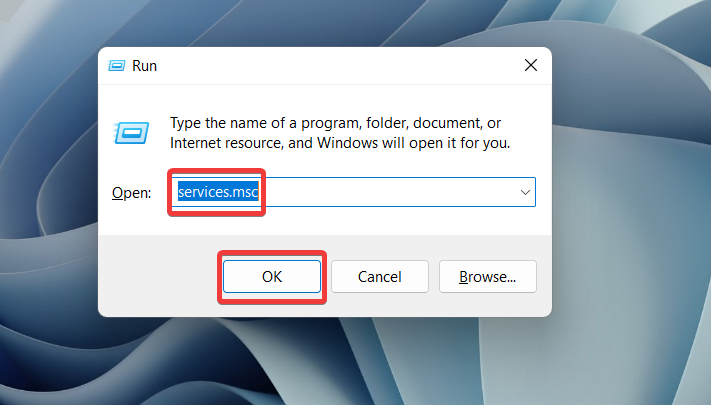
- Open the Run dialog box using the Win + R shortcut.
- Type services.msc in the text box and press the enter key.
- In the Services window, keep scrolling and look for the Microsoft Keyboard Filter service. These services are arranged in alphabetical order, so you will be able to locate them easily.
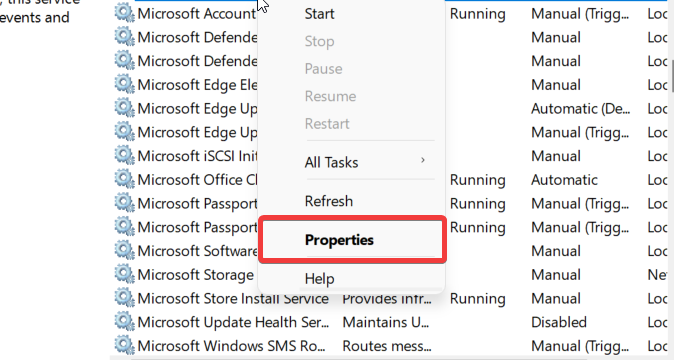
- Right-click the service and choose the Properties option.
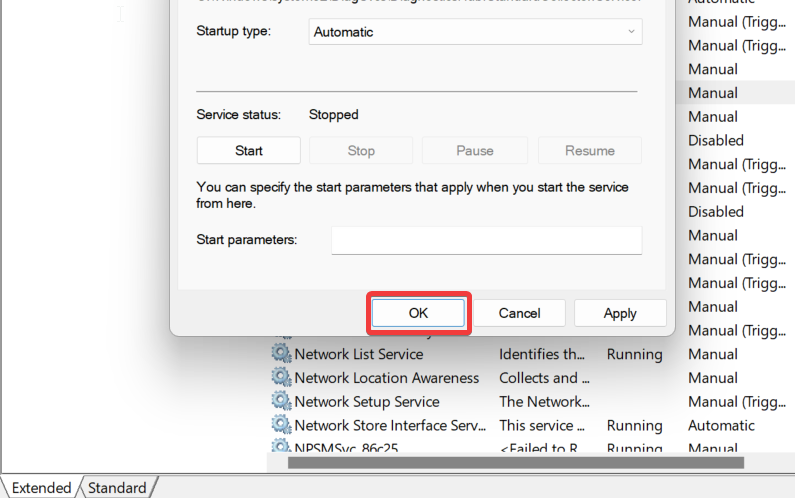
- In the pop-up window, assign the Automatic to Startup Type.
- Look for the service status. If the service is stopped, press the Start button.
- Press the OK button to close the pop-up and see if you can use your touchpad now.
10. Uninstall Conflicting Updates
Many Windows 11 users have been vocal that their touchpad is non-functional ever since they installed a recent Windows update. As mentioned before, Microsoft keeps releasing updates for different purposes from time to time- security patches and performance improvement updates are the prominent ones. Sometimes these patches get corrupted and begin to conflict driver’s functionality. The non-functional touchpad on your Windows 11 laptop can be caused by a buggy Windows update installed recently. Hence, uninstalling that recently installed update may put things straight. Here is what you need to do to uninstall the Windows Updates installed on your Windows 11 PC.
- Access the Windows 11 Settings using the Windows + I keyboard shortcut.
- Choose Windows Update from the left sidebar.
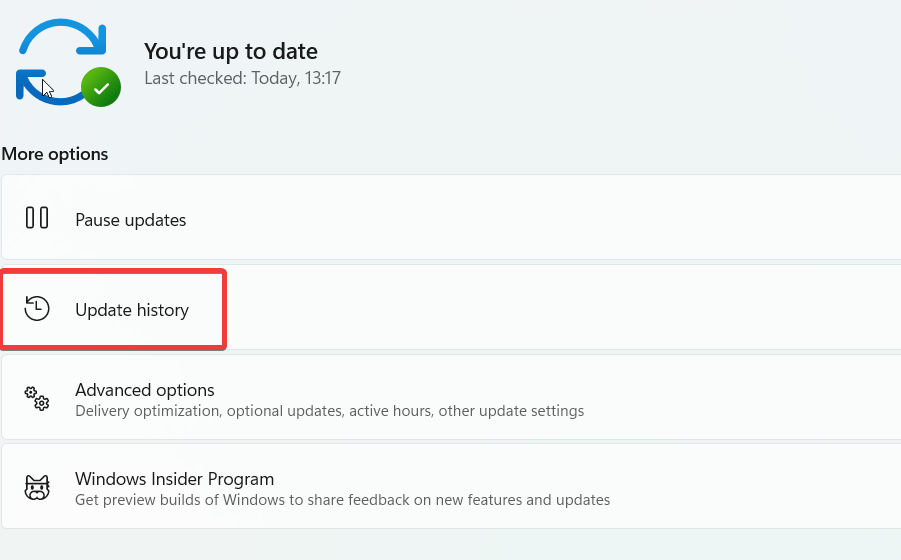
- On the Windows Update Settings page, click the Update history option.
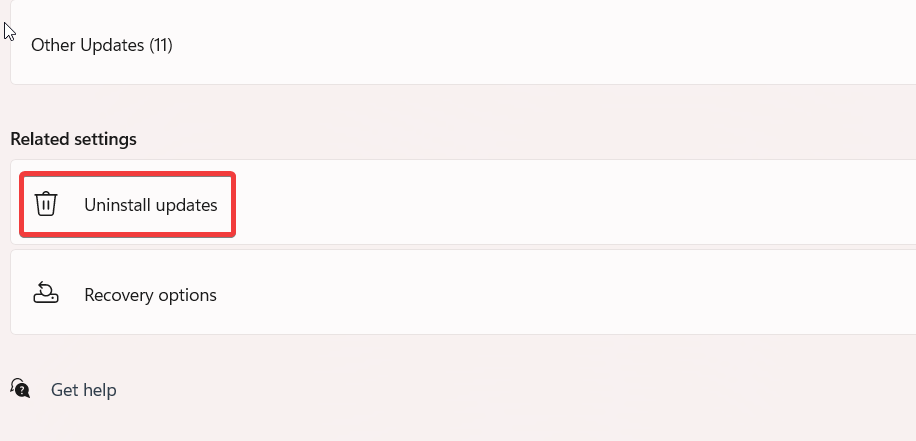
- Keep scrolling and click on Uninstall updates.
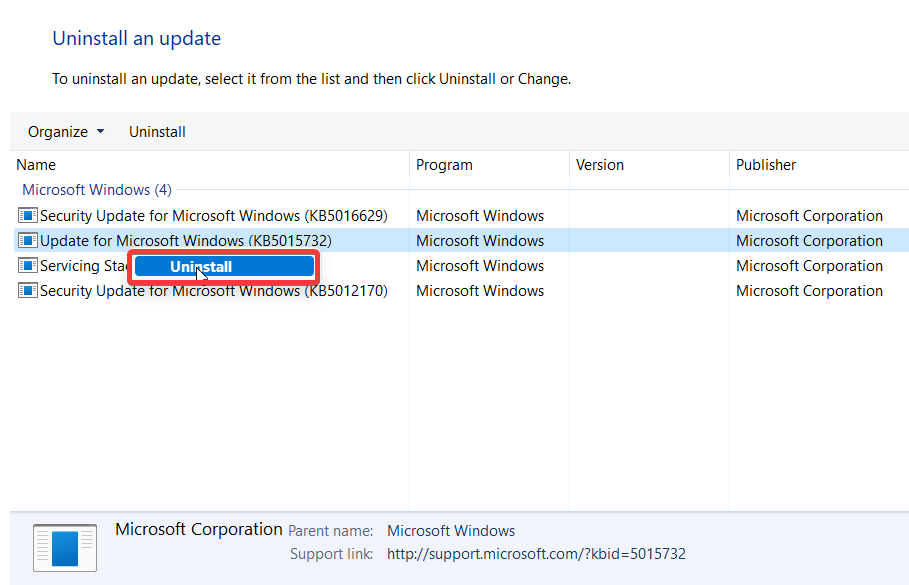
- You will now be taken to the page containing the information about all the previously installed updates.
- Right-click on the update you wish to uninstall and choose Uninstall option from the context menu.
- Follow the on-screen instructions until the conflicting update is uninstalled successfully. Reboot your laptop and see if the above method resolved the issue.
11. Reset your Windows 11 Laptop
If none of the above methods were fruitful, it’s high time to reset your Windows 11 laptop. Resetting your system will wipe out all the technical glitches and restore the settings to default. Contrary to what you think, resetting your Windows 11 laptop is a breeze. Here is how to proceed:
- Use the Windows + I shortcut key to access the Settings app once again.
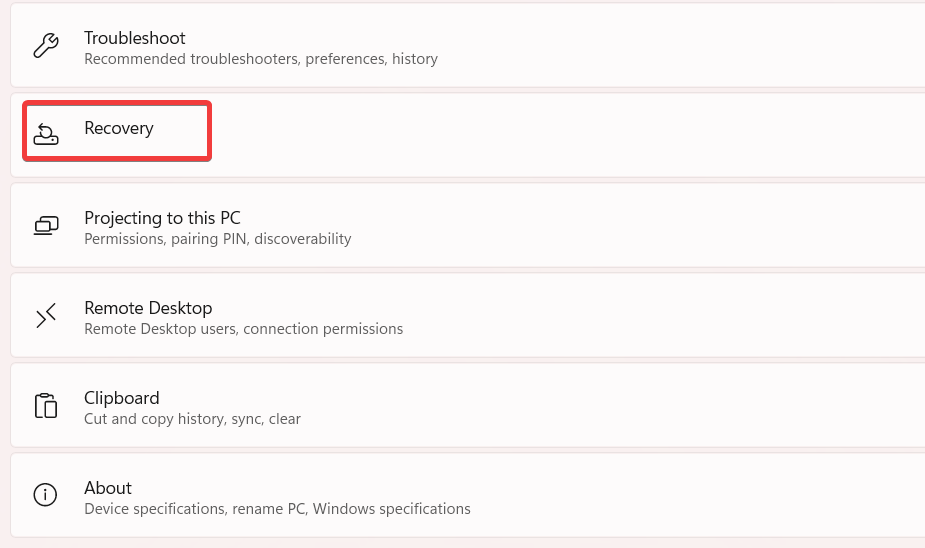
- Keep scrolling and choose Recovery on the right pane.
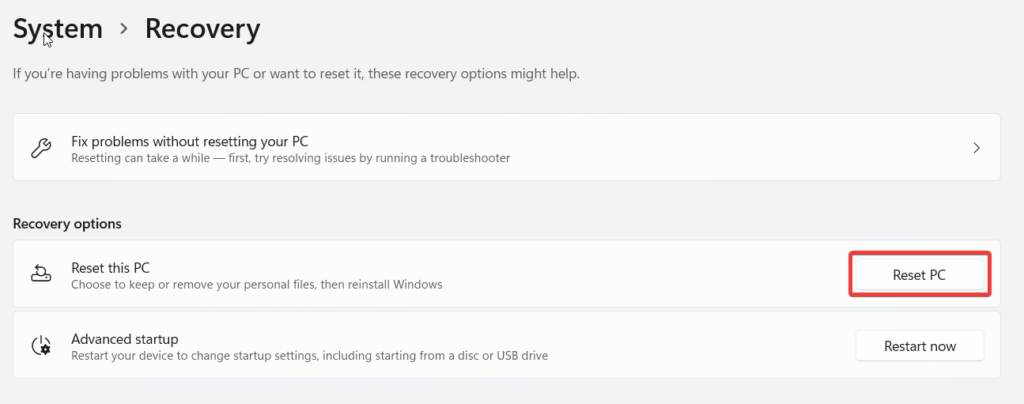
- Look for the Reset this PC option under the Recovery options section and press the Reset button next to it.
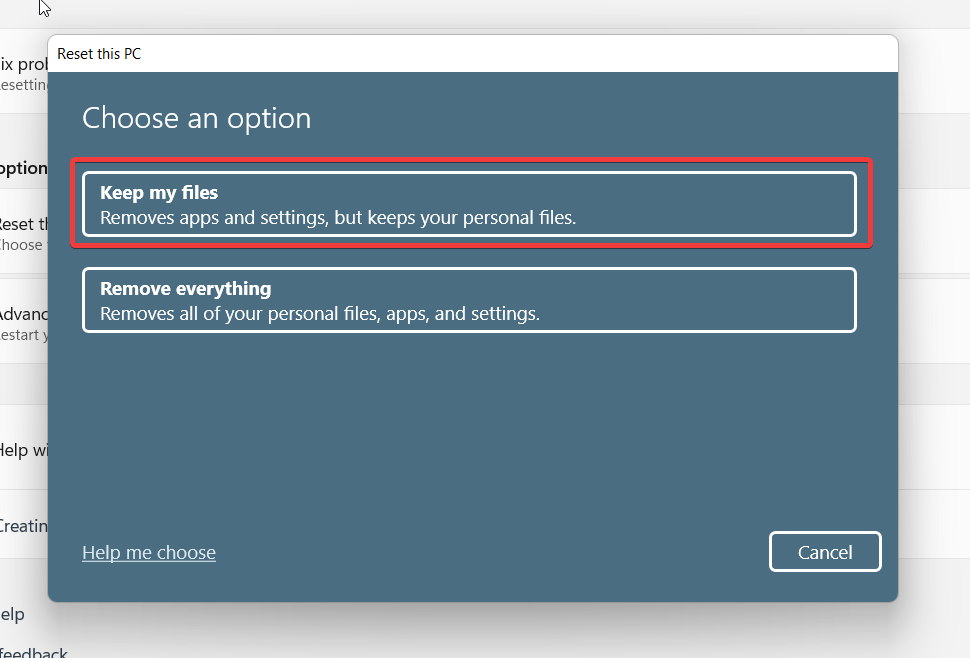
- A blue screen will open up in front of you. Select the option that says Keep my files and wait patiently until your laptop is successfully reset.
- Once your system reboots, the touchpad will be functional again.
Wrapping Up
It is no less than a nightmare when the touchpad stops working, especially if you are a working professional and have an important document to submit or have to deliver a presentation. Hopefully, you will be able to troubleshoot the touchpad-related issue by employing the above-listed methods. Which of these methods resolved the issue with your touchpad? Don’t forget to let us know.
Δ
