Fix Task Manager Not Working in Windows 11
The Task Manager could be facing issues due to bugs, installation issues, issues with your Windows image, and a lot more. You can use these fixes to identify the cause of your issue and then fix Task Manager on your Windows 11 PC.
1. Try Launching Task Manager Using A Different Method
The Task Manager can be launched using various methods. You could be facing issues with the current method, and thus we recommend you try one of the other ways of accessing Task Manager mentioned below. Method 1: We recommend you start by trying the keyboard shortcut for Task Manager. Press Ctrl + Shift + Esc on your keyboard. This will launch the Task Manager from anywhere on your PC. Method 2: You can also open the Task Manager from your Taskbar. Start by right-clicking the Taskbar click and select Task Manager to launch the Task Manager on your Windows PC. Method 3: You can also launch Task Manager from Win X menu. You can access this menu by right-clicking the start icon in your Taskbar or by pressing Windows + X on your keyboard. From the menu select Task Manager. Method 4: You can also launch Task Manager from Run. Press Windows + R to launch Run. Now type in taskmgr and click OK. It will launch Task Manager. Method 5: Lastly, you can also try launching Task Manager by searching for it in the Start menu. Shortcuts and links to the app could be broken on your PC, and using the Start menu search will allow you to access the dedicated file for the Task Manager.
2. Restart Your PC
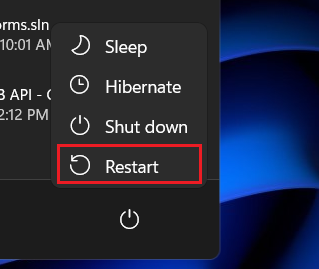
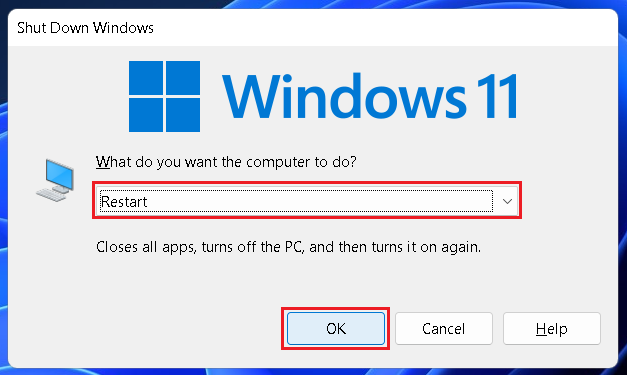
Task Manager could be facing issues due to temporary bugs or failed background services, and a PC restart should help get everything back up and running again. To restart your PC launch the Start menu, right-click the Power icon in the bottom right corner, and select Restart to restart your PC. You can also press Alt + F4 while on your desktop to restart your PC. Click the drop-down menu and select Restart, and then click OK to restart your Windows 11 PC. Once your PC restarts, use one of the methods mentioned above to try and launch Task Manager.
3. Run A Malware Scan
You could be looking at a malware, adware, or virus infection if the Task Manager fails to launch for you. This is a known symptom for an affected system, as many malicious tools tend to disable the Task Manager to prevent detection. A malware scan can help you look for malicious tools on your PC and remove them instantly. Use these steps to run a malware scan on your PC using Microsoft Defender.
- Launch the Start menu and type Windows Security.
- Click and launch the Windows Security app from your search results once Windows Security shows up.
- Now click and select Virus & threat protection from the left sidebar on your screen.
- Click and select Scan options.
- Click Full scan and then Scan now. If your PC manages to find and quarantine threats at the end of the scan remove and delete all identified threats and restart your PC.
4. Check And Install Pending Windows Updates
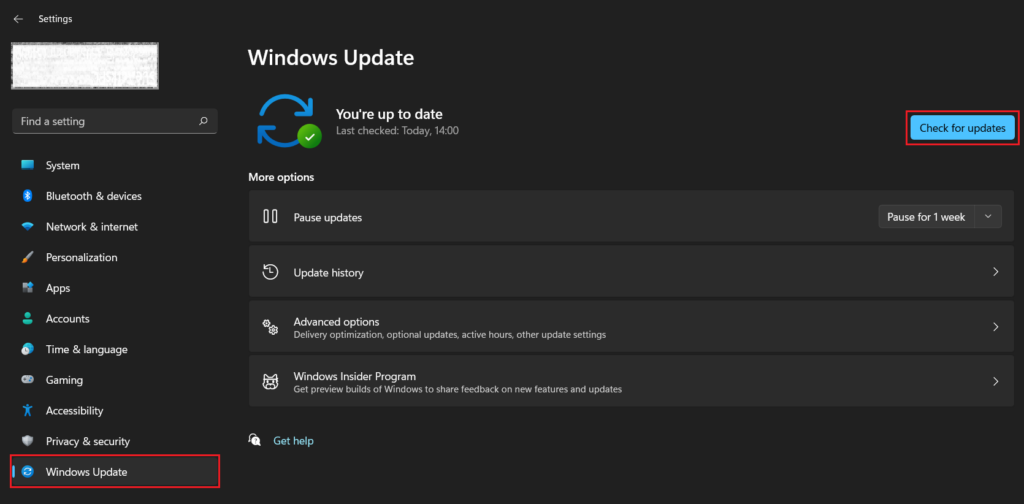
It could be a known Windows bug breaking Task Manager on your Windows 11 PC. In such cases, we recommend you to update your PC and install all pending updates. Use these steps to check and install any available updates for your Windows 11 PC.
- Open the Settings app on your Windows PC.
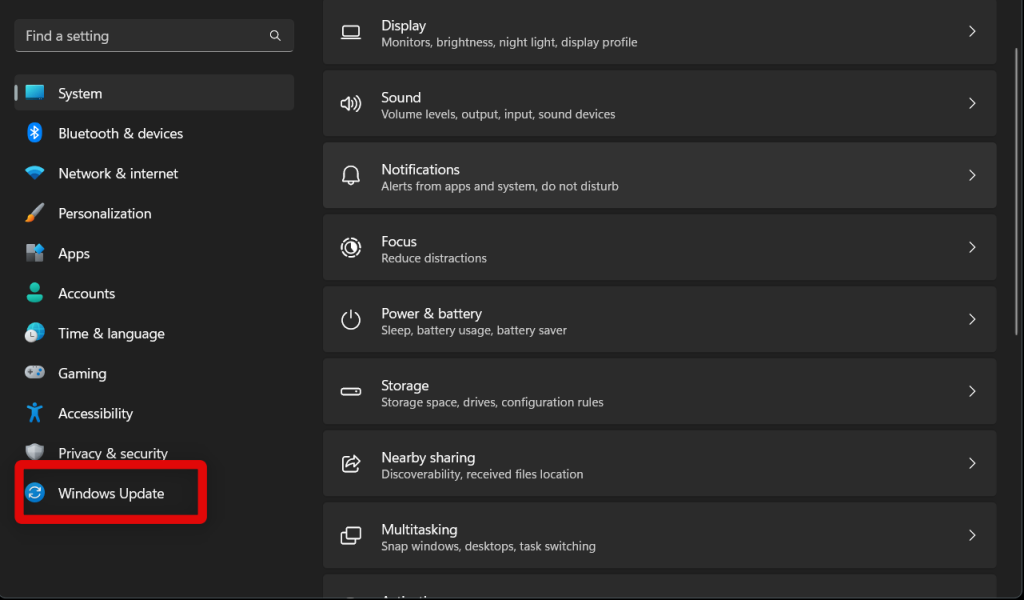
- Now click Windows Update in the left sidebar.
- Click Check for updates to check for available Windows updates.
- When updates are dowloaded restart your PC.
4. Remove Recently Installed Windows Updates
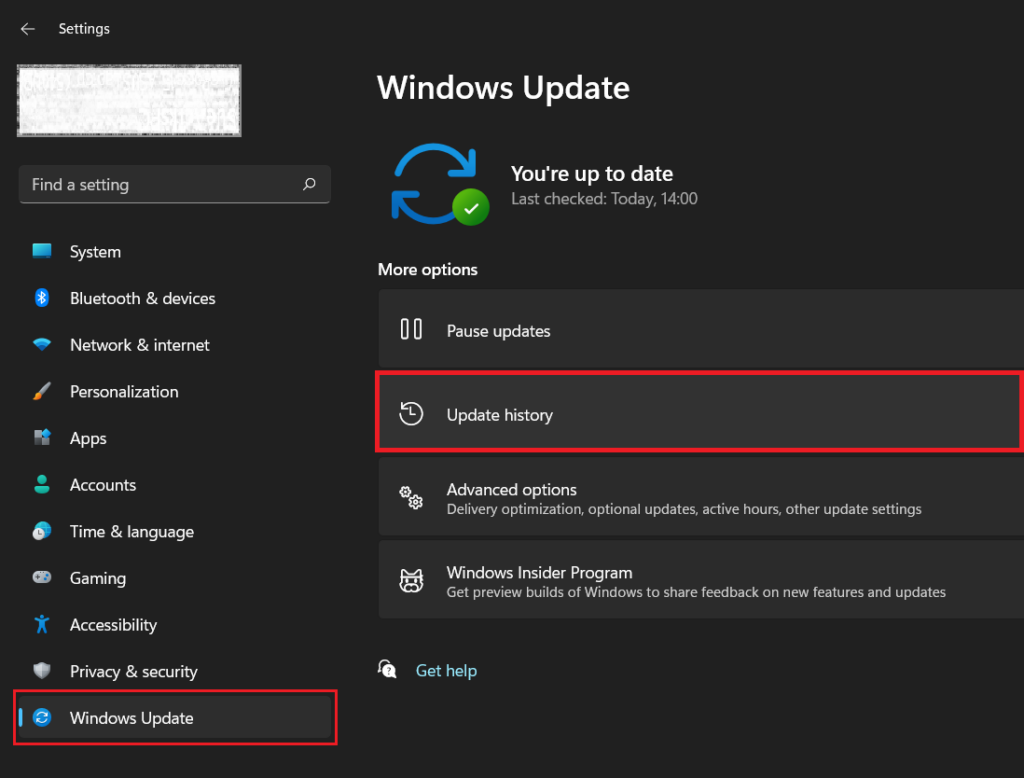
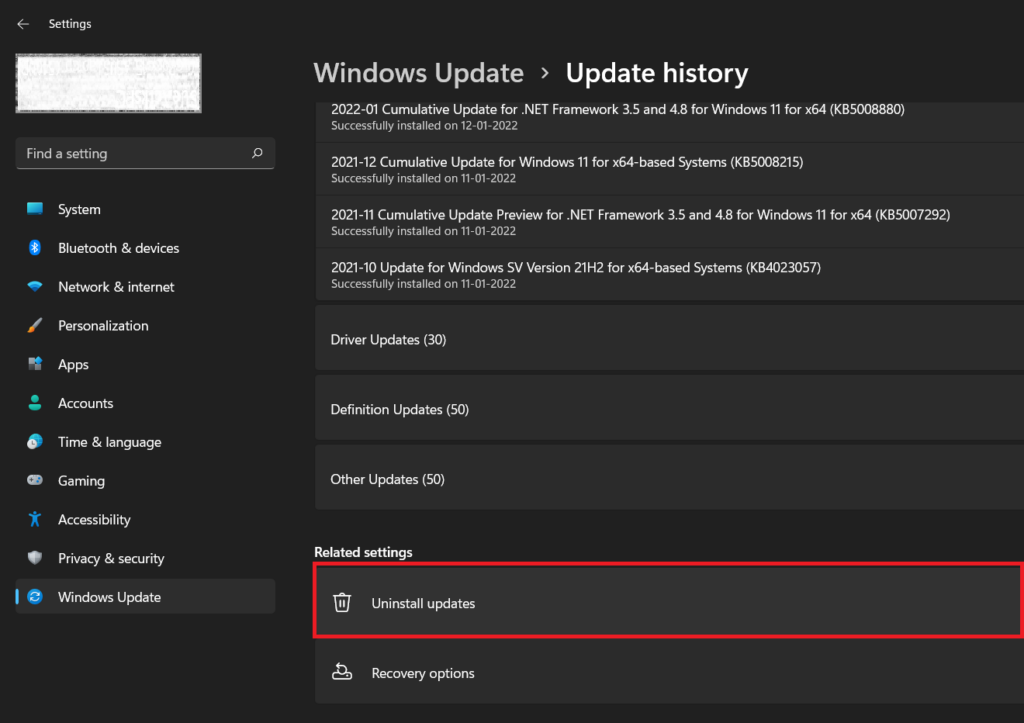
It could be that a recent Windows update has gone wrong, and files have been messed up during the installation process. This can happen if you lose power during the update process or have custom directories configured for system files on your Windows 11 PC. If that’s the case you should try uninstalling recently installed Windows updates on your PC. Use these steps to uninstall Windows updates on your PC.
- On the Windows Update page click on Update history.
- Scroll to the bottom, and tap Uninstall updates to remove recently installed Windows Updates from your PC.
- Click Uninstall beside the Windows Update that is the latest and you suspect has been causing issues on your PC.
- Click Uninstall again. Once you have uninstalled the necessary updates, Restart your PC.
6. Run System Maintenance Troubleshooter
System maintenance troubleshooter can help diagnose and fix any issues plaguing your system. It can help you fix the Task Manager if it is still not working on your PC. Use these steps to run the system maintenance troubleshooter on your Windows 11 PC.
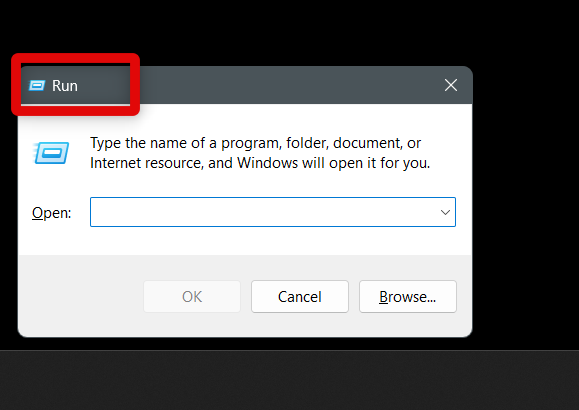
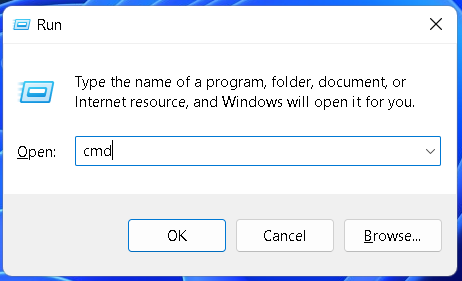
- Start by opening the Run app on your Windows 11 PC.
- Now copy the following command and paste it into the dedicated text box in the Run app.
- Click and select Advanced to change the properties of the troubleshooter.
- Click Run as administrator to relaunch the system maintenance troubleshooter as an administrator on your PC.
- Now that the system maintenance troubleshooter has been relaunched as an administrator click Next.
- The system maintenance troubleshooter will now look for any issues affecting your system and will automatically apply repairs as it detects issues.
- Once the process completes, click Close. Note: In some cases, you might be asked to restart your Windows 11 PC.
7. Run an SFC & DISM scan
An SFC and DISM scan can help repair system files and your Windows image. You could be looking at missing system files, corrupted Windows image, bugs, and a lot more on your PC. An SFC and DISM scan will help check for such errors and fix the same automatically on your Windows PC. Follow the below steps to run an SFC and DISM scan on your Windows 11 PC.
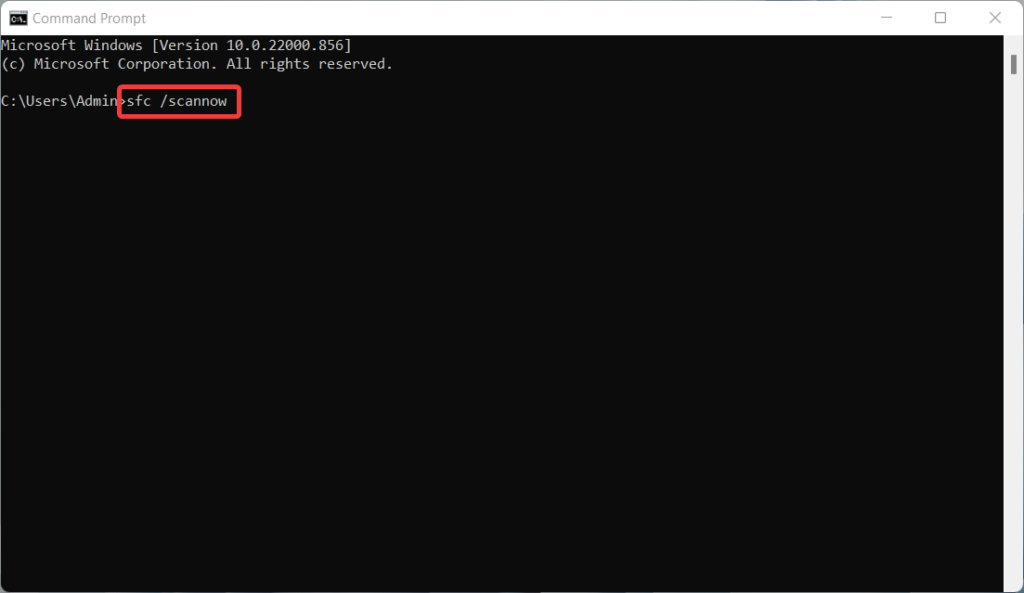
- Open the Command Prompt on your Windows PC as an administrator.
- Now use the command sfc /scannow to run an SFC scan on your PC.
- Once the process has been completed, use exit to close CMD on your PC.
- Restart your PC before running the DISM command.
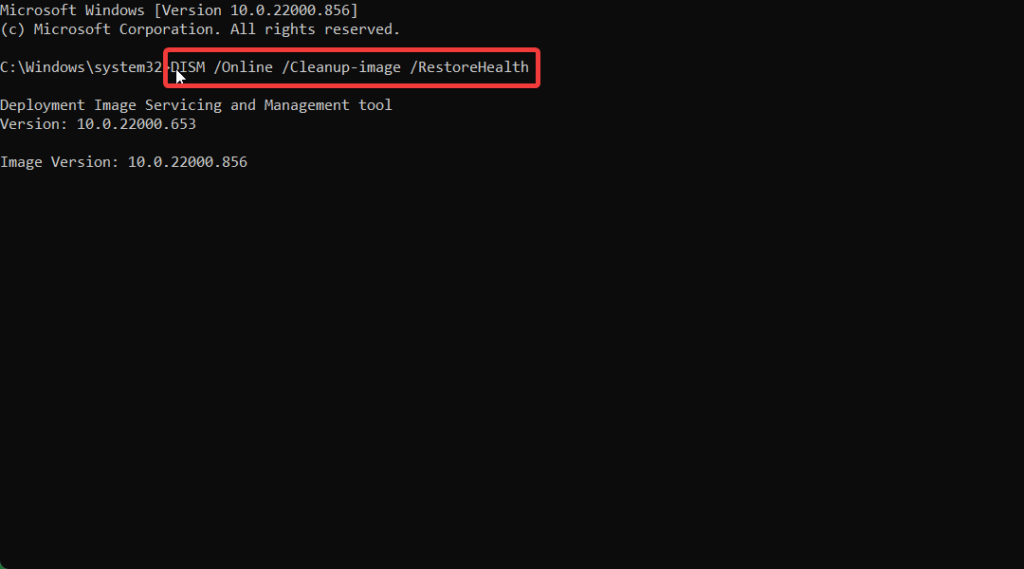
- When your PC restarts and boots up, launch Command Prompt as an administrator again and enter the following command.
- Once the scan is complete, Restart your PC.
8. Run a Chkdsk Scan
A Chkdsk scan can help check and fix disk errors. Badly written data or damaged sectors can often make stored data inaccessible. It could be that the Task Manager has been stored on one such bad sector, and chkdsk scans can help diagnose and fix the same. Use these steps to run a chkdsk scan on your Windows 11 PC.
- Launch Command Prompt with administrative access.
- Enter the following command. Note: Replace c: with the drive letter of your drive. If you have multiple drives on your PC, run the command mentioned for all the drives.
9. Restart The Iris Service
The Iris service is a new service introduced in Windows 11 that manages a lot of background activity and tools in Windows 11. This service can sometimes face issues, and restarting the same can help fix common problems with your Windows 11 PC, including the Task Manager. Use these steps to restart the Iris service on your Windows 11 PC.
- Start by launching the Command Prompt as an administrator.
- Enter the following command. When the process completes, your PC will automatically restart on its own. Try using Task Manager now.
10. Run Disk Cleanup
You could be looking at a broken Task Manager due to leftover third-party app files and temporary Windows files on your Windows 11 PC. Disk Cleanup can help get rid of all such files and allow you to start afresh. You can use the below steps to run a disk cleanup on your Windows 11 PC.
- Open the Settings app on your Windows 11 PC.
- Now click and select Storage on your right.
- Click and select Temporary files at the top.
- Now check the box for all the temporary files you wish to remove from your Windows 11 PC.
Previous Windows installation(s) Delivery Optimization Files Temporary Internet Files
- Once you’ve checked the necessary boxes, click Remove files at the top.
- Click Continue to delete all the necessary files.
11. Check and Enable Task Manager Using Registry Editor
It could also be that the Task Manager has been disabled on your PC. It could be done by your organization if you’re using a work-issue Windows 11 PC. You can check and edit the necessary Registry value to enable and use the Task Manager on your PC if that happens to be the case. Use these steps to check and enable Task Manager in the Registry Editor on your Windows 11 PC.
- Open Run on your PC.
- Now type regedit in the dedicated text box and press Enter on your keyboard.
- Start by navigating to the following path.
- Now right-click Policies on your left and select New.
- Click and select Key. Name the key System and save the changes.
- With System selected on your left, right-click the empty area on the right side of the registry editor and select New.
- Click and select DWORD (32-bit) Value to create a new DWORD value under System.
- Name the new value DisableTaskMgr and save it.
- Now double-click the newly created value to edit its value data.
- Set the value data for the DWORD value to 0 and click OK once you’re done.
- Restart your PC to apply the registry changes. If the Task Manager was disabled via the Registry Editor on your Windows 11 PC, then you should now be able to access and use it again.
12. Register Task Manager Again Using PowerShell
You could also be facing registration issues with system apps. This can happen due to misconfigured settings or malicious third-party apps. Use these steps to register Task Manager again on your PC using PowerShell.
- Open PowerShell as an administrator.
- Now copy and paste the following command in the PowerShell window
- Once the process completes, type in exit and press Enter to close PowerShell.
- Restart your PC to apply the changes made to your Windows 11 PC. If Task Manager was not registered on your PC, then it should now be registered, and you should now be able to get it working on your PC.
13. Use System Restore
We now recommend you restore your system using a system restore point to a time when Task Manager was working on your PC. Use these steps mentioned below to use system restore on your Windows 11 PC.
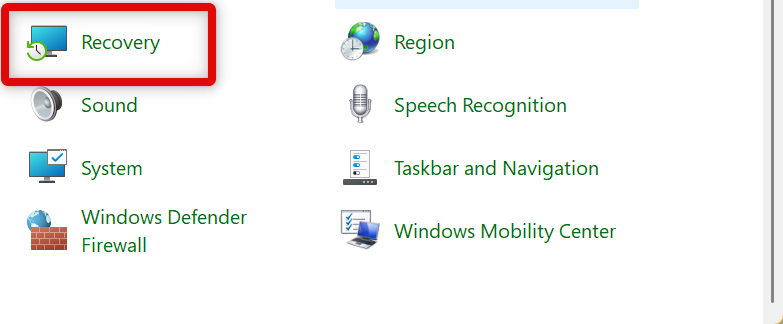
- Open Control Panel on your PC.
- Click and select Recovery to view recovery options available on your PC.
- Now click and select Open System Restore.
- Click and select Next to view available system restore points on your system.
- Click and select a restore point from the time when you had the Task Manager working on your Windows 11 PC.
- Click Next to continue with the selected restore point.
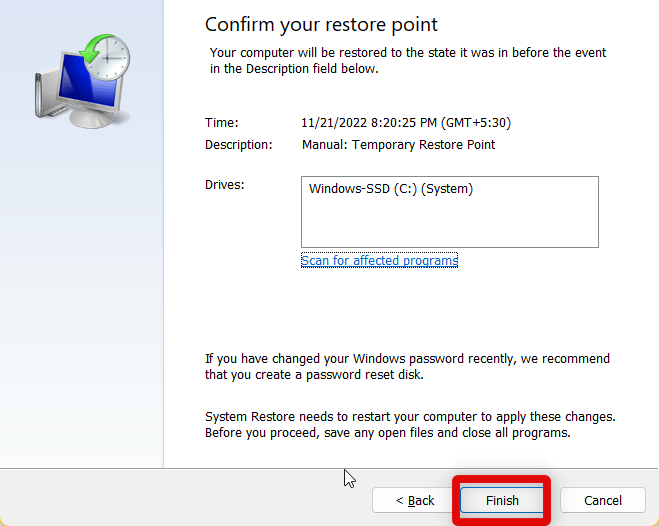
- Finally, click Finish to restore your PC using the selected restore point.
15. Try using Task Manager In Safe Mode
Safe mode is a diagnostic mode in Windows that disables all third-party apps and services, including unnecessary Microsoft services and apps, when booting up. It can help you determine if the issue lies with your Windows installation or a third-party app that you have installed on your PC. Here’s how you can boot your Windows 11 PC in safe mode.
- Start by opening the Run app on your Windows 11 PC.
- Now type in msconfig in the dedicated text box and press Enter on your keyboard.
- Click and switch to the Boot tab at the top of your screen.
- Now click and check the box for Safe boot under Boot options. Additionally, click Minimal to boot with minimal services.
- Click OK to save the changes made to your PC.
- Restart your PC, and you should automatically boot in safe mode.
- Now try launching the Task Manager. If you can launch the Task Manager, then you can troubleshoot your third-party apps to find the culprit. If, however, you can’t launch Task Manager, then use the section below to reset your Windows 11 PC.
16. Reset Your PC
You can now try resetting your PC. A reset will delete all configurations and system files and create a fresh installation which will help get Task Manager working again on your PC. Use these steps to reset your Windows 11 PC.
- Open the Settings app on your Windows 11 PC.
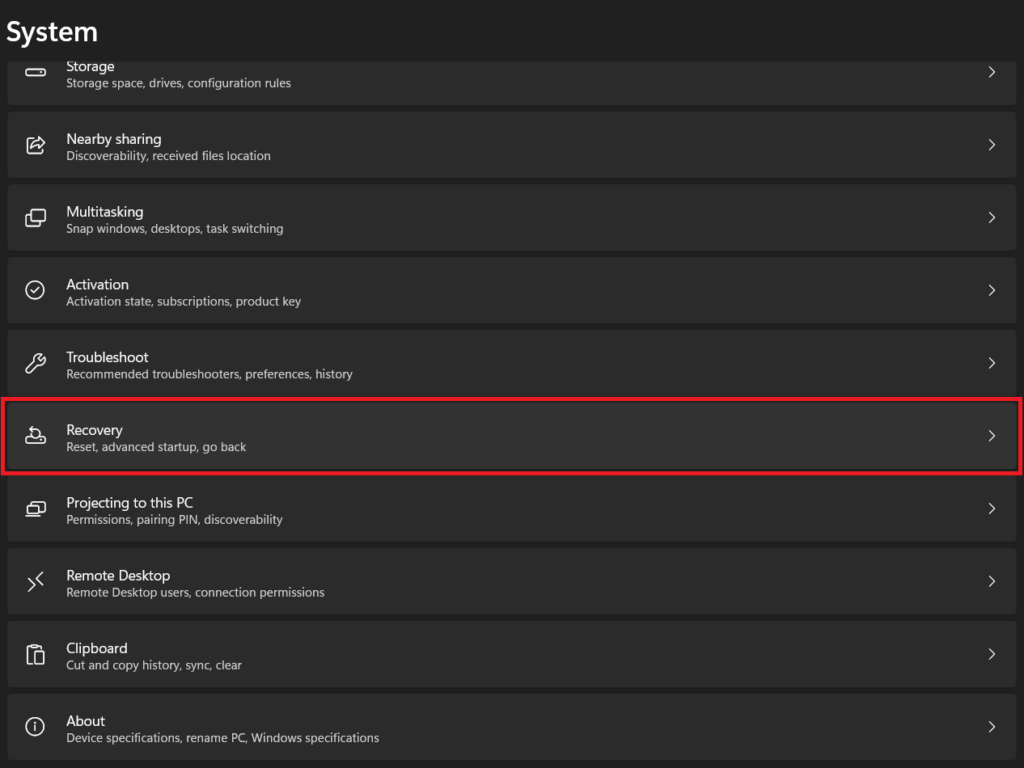
- With System selected on your left, scroll the options on your right and click and select Recovery.
- Click and select Reset PC beside Reset this PC.
- Click Keep my files to preserve your personal files while resetting Windows 11. If you wish to delete everything and start anew on your PC click Remove everything.
- Select Cloud download to download a fresh copy of Windows 11 to reset your PC.
- Click Local reinstall if you wish to use local files to reset your PC.
- You will now be briefed on the data and process that will happen when you reset Windows. Click Next to proceed with the reset process.
- You will now be briefed about all the data, files, details, and more that will be removed from your PC. Click Reset to confirm your choice. Task Manager should be working once your PC resets itself and you set it up again.
Why is the Task Manager not working?
Task Manager may not be working due to a Windows bug, due to a third-party app, due to driver issues, corrupted files, leftover files, missing Windows services, and a lot more. The fixes above should help deal with most of these issues and fix the Task Manager on your PC.
Can third-party apps cause issues with the Task Manager?
Yes, third-party issues can cause problems with the Task Manager, especially apps used to manage and view your PC’s performance. We recommend you uninstall such apps in an attempt to fix the Task Manager on your Windows 11 PC.
Can you delete and reinstall the Task Manager?
Unfortunately, Task Manager is a system app, and it thus can not be deleted and reinstalled unless you decide to use third-party apps.
Final Words
The Task Manager is a vital part of Windows 11. It helps you view ongoing tasks, manage services, view performance statistics, view resource usage, and much more. Having the Task Manager not working can be a huge issue, especially if your system is experiencing bugs and BSODs. We hope the post above helped you easily get the Task Manager working again on your Windows 11 PC.
Δ




![]()







![]()






![]()
