Well, in that case, the option of using a Wi-Fi network is always there. However, if you feel wired internet is more stable, fixing Ethernet problems isn’t too difficult unless the port itself is broken or damaged. In this article, we will guide you through various methods to fix the problem of Ethernet not working on your Windows 11 computer.
Fix Windows 11 Ethernet Not Working
Ethernet may not be working on your Windows 11 PC due to issues as trivial as a loose cable connection to more complex ones such as outdated drivers. We have covered all potential causes for the problem below, with step-by-step guides for the respective fixes. Depending on the problem in your case, you may have to try one or more fixes.
1. Check The Ethernet Cable Connection
When Ethernet is not working on your Windows 11 PC, the first thing you should do is check if the cable is connected properly. Unplug the cable and plug it back again. Make sure the cable is attached firmly. If you’re using an adapter, try switching the ports. Switch the Ethernet port on your router as well. And when you’re at it, clean the ports and cable ends. You may even try replacing the cable or the adapter.
2. Restart Your Router
If the cable or ports aren’t the culprits, maybe a temporary system error with your router is causing the Ethernet problem on your Windows 11 PC. In that case, restarting the router should help. If it has a power switch, turn it off. If not, unplug or disconnect the power cable from the source. On battery-powered routers, remove the batteries. Now, wait for a couple of minutes before turning the router on again. You may also want to replace the batteries.
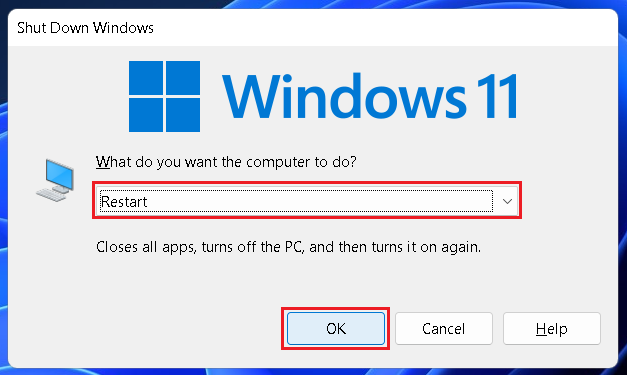
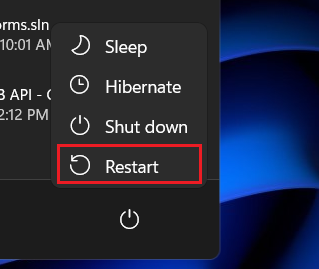
3. Restart Your Computer
The Ethernet problem on your Windows 11 PC could be because of a temporary system error on the computer itself. You should try restarting your PC. Use the keyboard shortcut Alt+F4 to open the power window and select Restart from the drop-down menu. Now click on OK. Alternatively, you can click on the Start button (Windows icon on the taskbar) and then on the Power button at the bottom right corner of the Start window. Now select the Restart option from the Power menu.
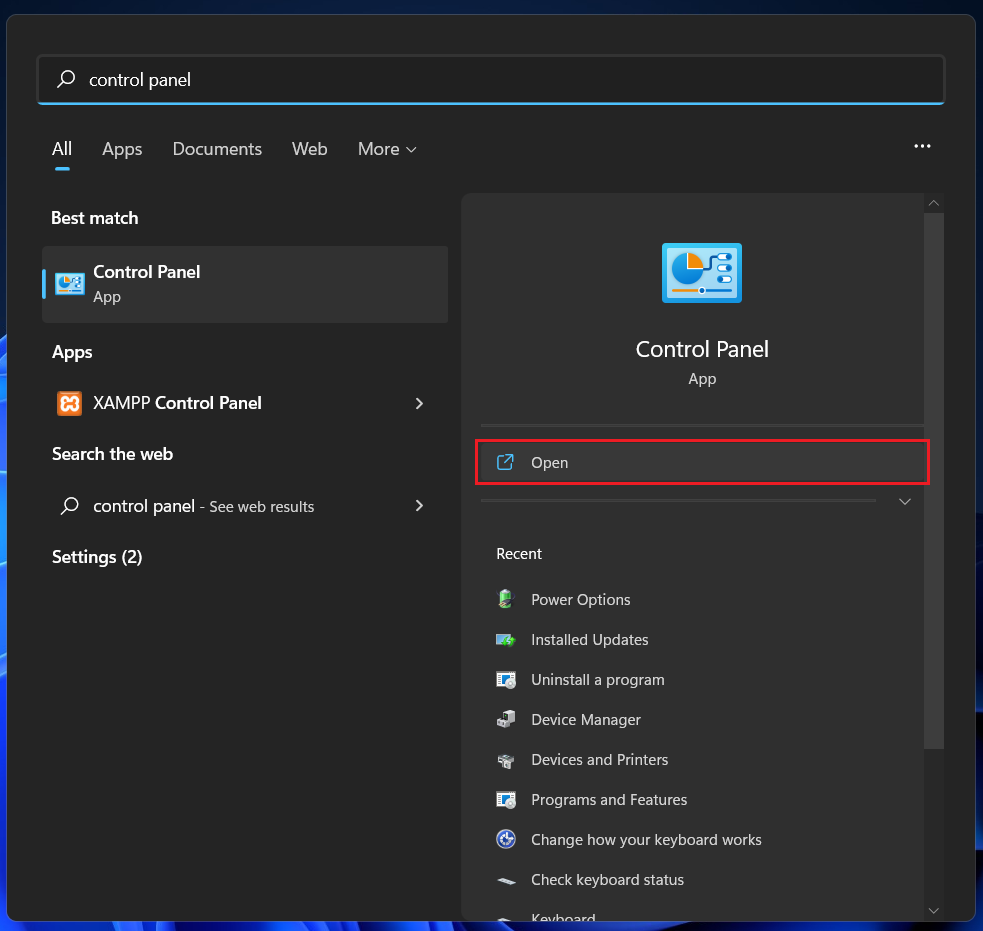
4. Check Ethernet Adapter Settings
If these basic fixes did not get the Ethernet working again on your Windows 11 PC, you need to move to more complex methods. Let’s begin by checking if the Ethernet adapter is disabled. Below are the steps for it.
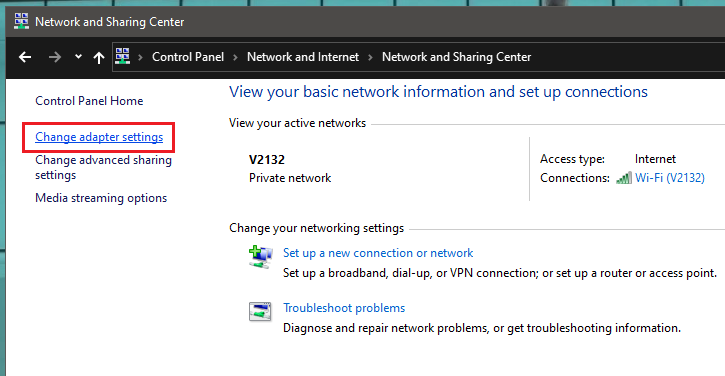
- Press the Windows key on your keyboard and type Control Panel. Open the app.
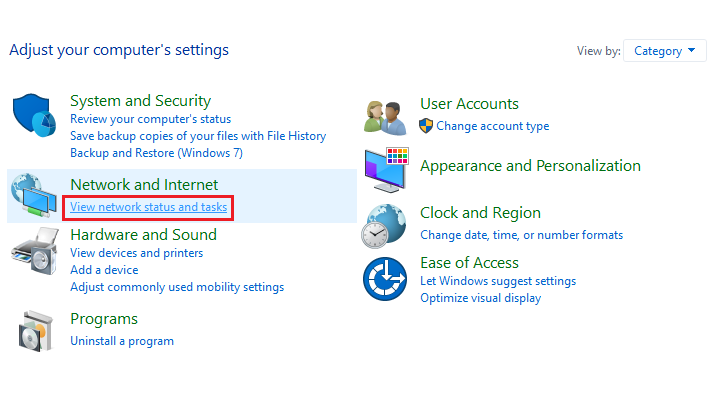
- Under the Network and Internet menu, click on View network status and tasks. If you don’t have the latter option, click on the main menu (Network and Internet). You should find View network status and tasks there. Click on it.
- Click on Change adapter settings on the left panel.
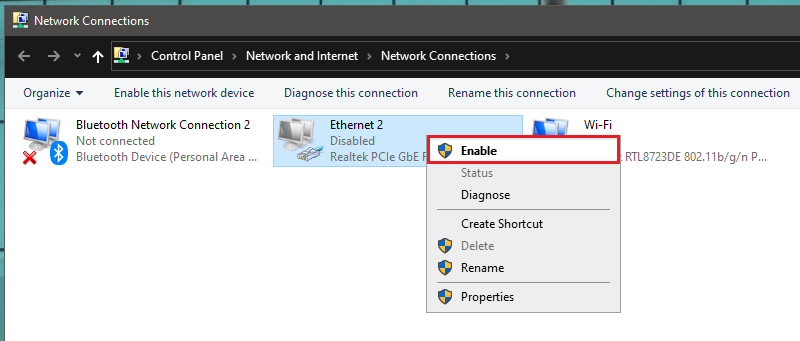
- A new window will open. Locate Ethernet and see if it is disabled. If Ethernet is disabled, right-click on it and select the Enable option. Wait until Ethernet is enabled and close the Window. If Ethernet is already enabled, you don’t need to do anything. Note: If enabling the Ethernet adapter doesn’t solve the problem for you, do not disable it. Instead, move on to the fixes listed below while keeping it enabled. Also, if you don’t see Ethernet in step 4 above, this method does not apply to you. Try the below fixes.
5. Update The Ethernet Driver
An outdated Ethernet driver can also cause problems with our wired internet connection. You can easily update the driver following these steps.
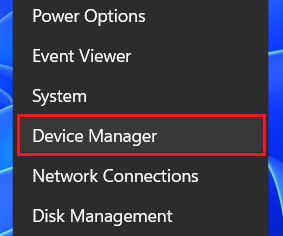
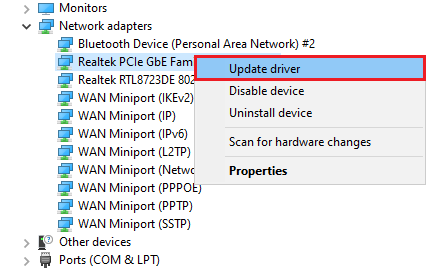
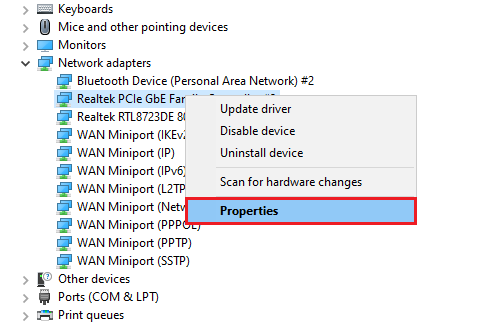
- Right-click on the Start button (Windows icon on the taskbar) and select Device Manager.
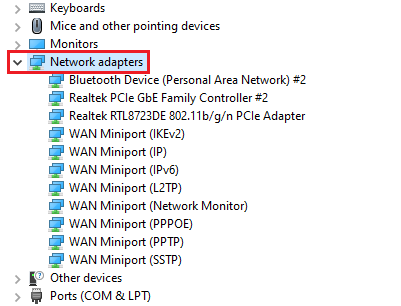
- In the new window, double-click on Network adapters.
- Locate your Ethernet driver. Look for an item with Ethernet or GbE in the name. Right-click on it and select the Update driver option.
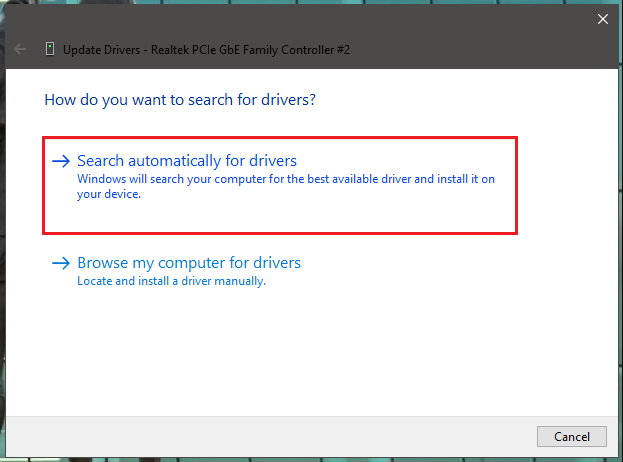
- Click on Search automatically for drivers. Your computer will automatically install the best available driver for the Ethernet adapter. If the driver is already updated to the latest version, the same will be reflected on the screen.
6. Re-install The Ethernet Driver
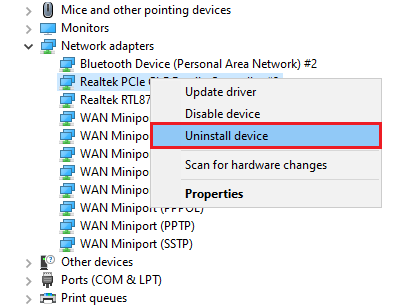
If updating the Ethernet driver doesn’t help, go a step further and re-install the driver. A fresh install may do the trick. Check out the steps below.
- Repeat the first two steps of the fifth method above. In step 3, select the Uninstall device option instead of Update driver. Check the Attempt to remove the driver for this device box in the pop-up menu and click on Uninstall to confirm your decision.
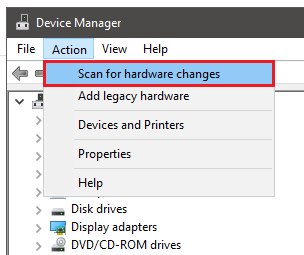
- Restart your Windows 11 PC. This should automatically install the Ethernet driver. You should see the same driver listed under Network adapters in the Device Manager. But if it is not there after a restart, click on the Action tab at the top and select Scan for hardware changes. The driver should now be re-installed.
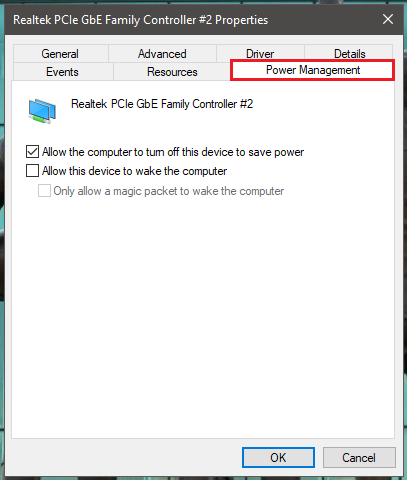
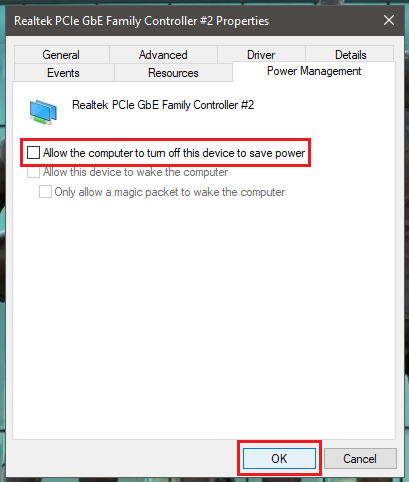
7. Check Ethernet Power Management Settings
Windows 11 has built-in functionality that can turn off idle connected devices to save power. It could be messing up with your system’s Ethernet connection. You can disable this feature by following these steps.
- Repeat the first two steps of the fifth method above. In step 3, select the Properties option instead of Update driver.
- Go to the Power Management tab.
- Uncheck the Allow the computer to turn off this device to save power box and click on OK.
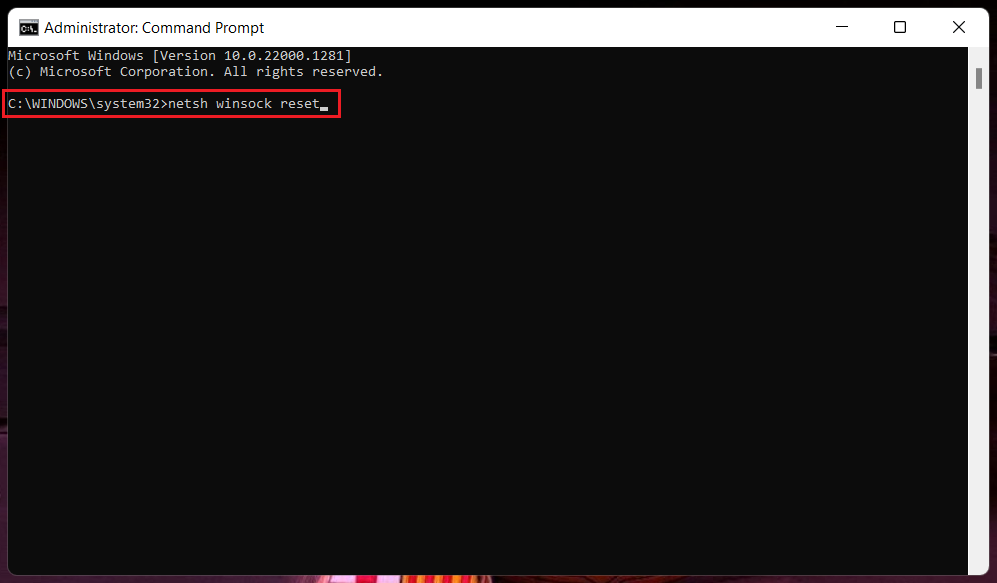
8. Run Network Commands
Running network commands to release and renew the IP address and flush and reset the DNS client resolver cache may also help solve the Ethernet problem on your computer. Here’s how you can do that.
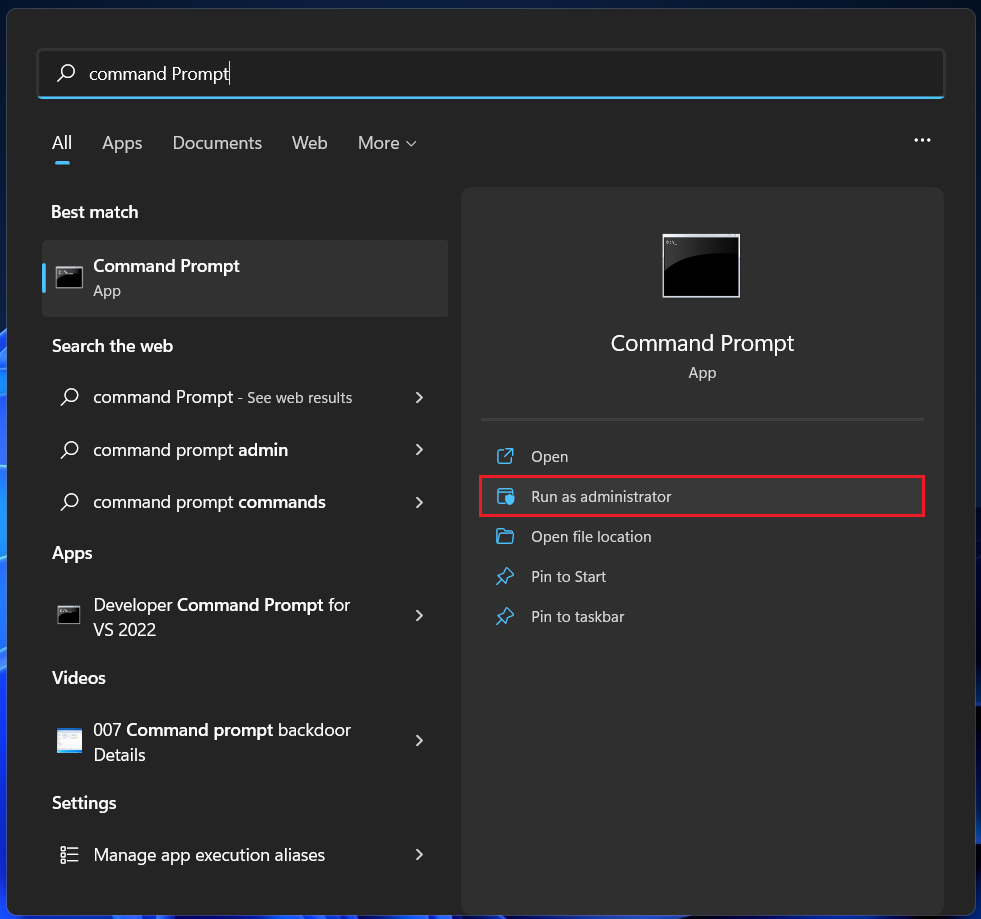
- Press the Windows key and type Command Prompt. Select the Run as administrator option. If prompted, click on Yes.
- In the new window, copy and paste the following command and press Enter.
- Repeat the second step for the following commands one after the other. No check if the Ethernet is working on your Windows 11 computer. If not, continue below.
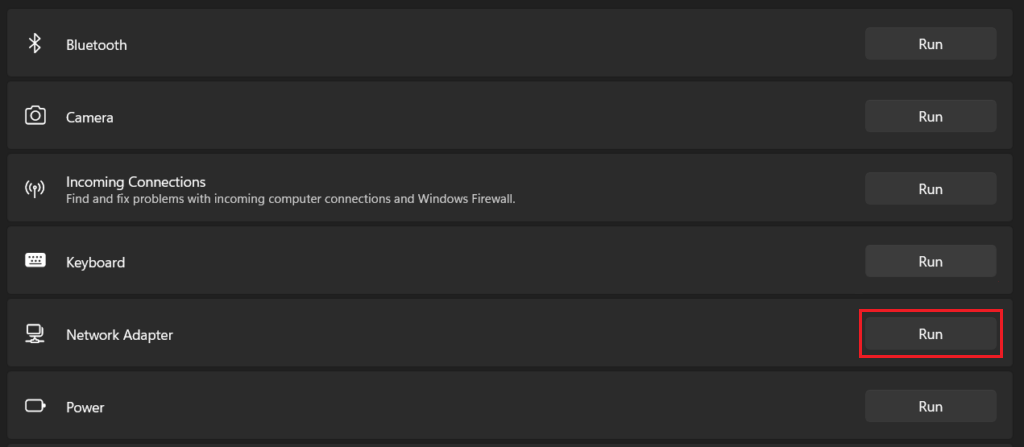
9. Run The Network Troubleshooter
Windows OS comes with built-in troubleshooters to identify various system issues. Running the network troubleshooter may help fix the problem of the Ethernet not working in Windows 11. Follow the steps below.
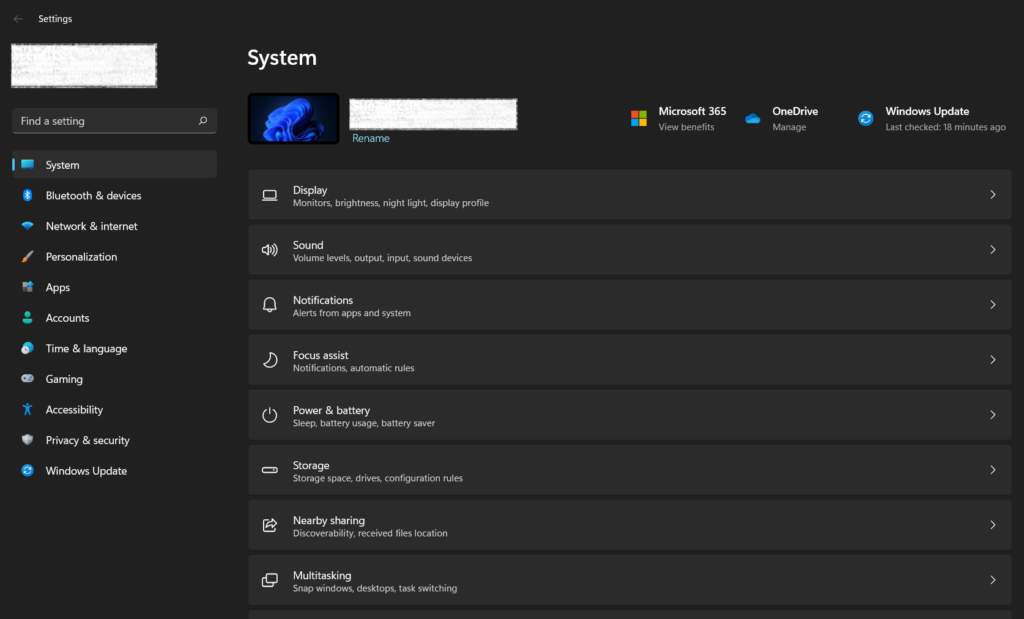
- Use the keyboard shortcut Windows key+I to launch Settings.
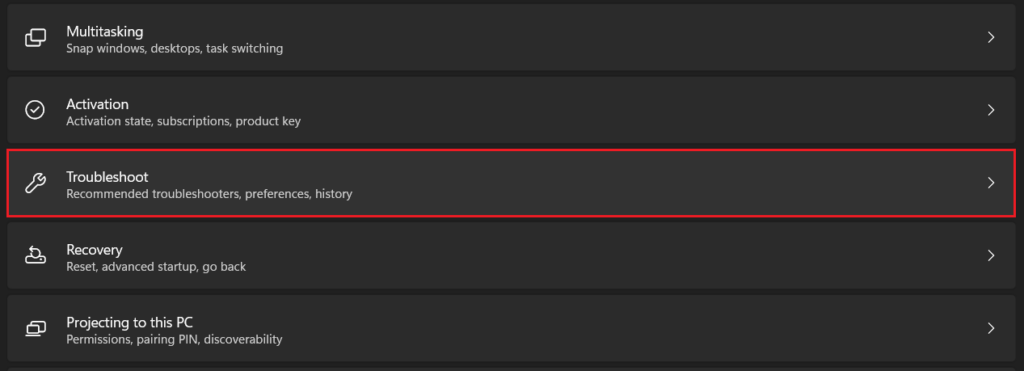
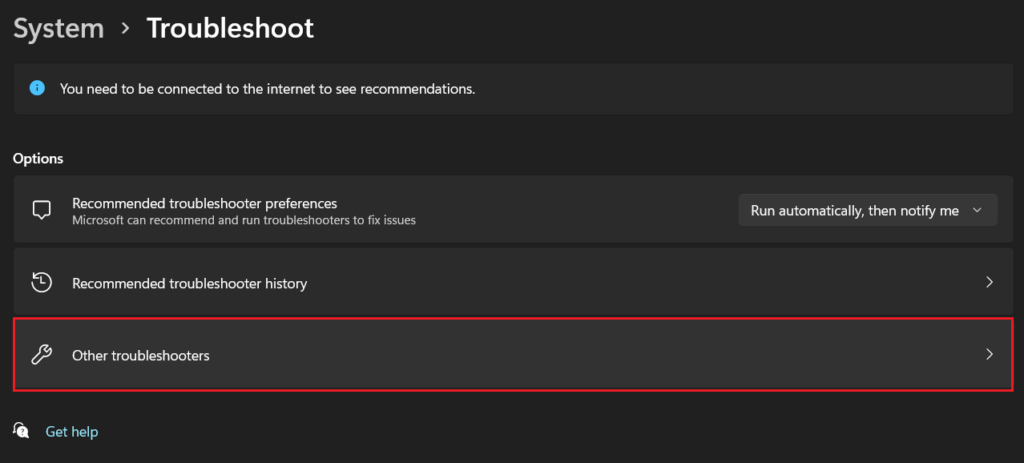
- Click on Troubleshoot under the System menu.
- Go to Other troubleshooters.
- Click on the Run button next to Network Adapter. This will initiate troubleshooting to find any potential issues with the network adapter. If an issue is detected, you will be guided to complete troubleshooting. If your Windows 11 computer does not detect any problem and the Ethernet is still not working, move to the below solutions.
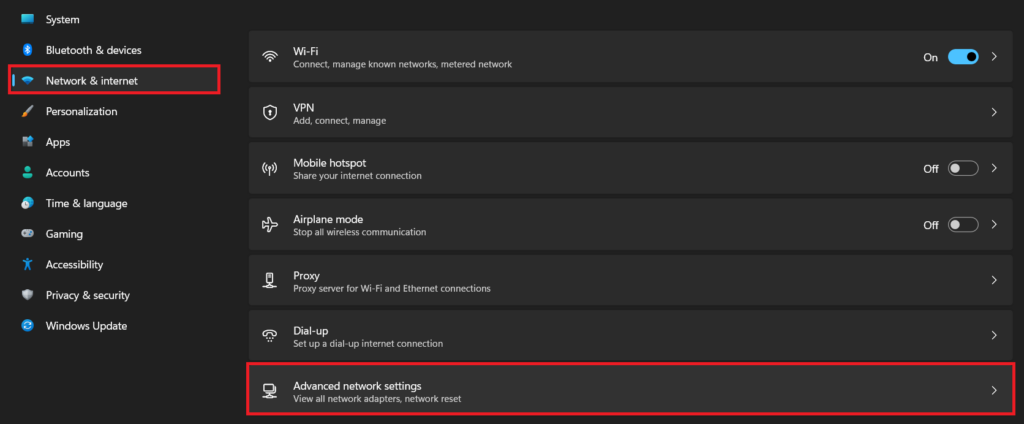
10. Reset The Network Settings
Resetting Network settings may help solve your Ethernet connection problems, particularly if the problems cropped up after upgrading from Windows 10 to Windows 11. Follow the steps below.
- Use the keyboard shortcut Windows key+I to launch Settings.
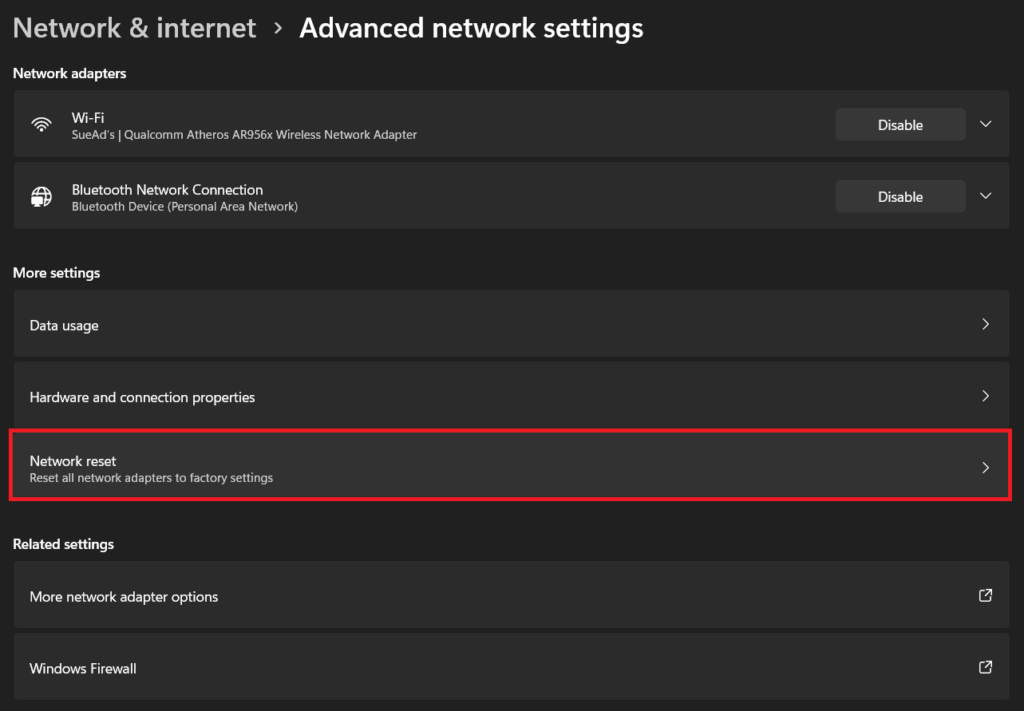
- Go to the Network & internet menu and click on Advanced network settings.
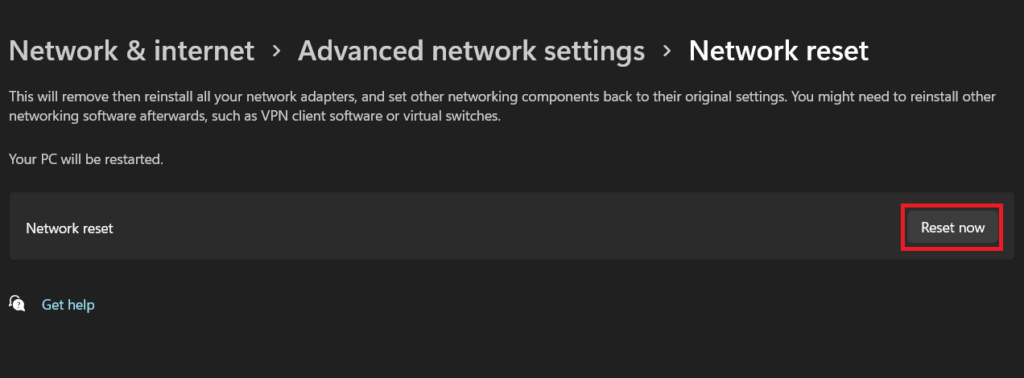
- Click on Network reset.
- Click on the Reset now button. Select Yes to confirm your decision.
How do I get Ethernet to work on Windows 11?
If your Windows 11 computer has an Ethernet port, plug one end of the Ethernet cable into the port and the other end into your router. If your computer lacks a dedicated Ethernet port, you can use a USB to Ethernet adapter for a wired internet connection. Try these fixes if you facing Ethernet problems.
Why won’t my Ethernet connect?
Anything from a loose connection and damaged cable to outdated drivers and misconfigured settings may cause Ethernet connection problems. This article will guide you through fixes for all potential causes.
Why does my Ethernet keep disconnecting Windows 11?
If the Ethernet keeps disconnecting automatically on your Windows 11 computer, maybe the cable isn’t plugged in properly or the ethernet adapter driver is the culprit. Try these fixes to get back your wired internet connection.
Final Words
People prefer Ethernet connections over Wi-Fi due to the reliability of the former. If the wired connection runs into a problem, switching to Wi-Fi may feel like a downgrade in terms of reliability and speed. We hope this guide helped you fix the problem of the Ethernet not working on your Windows 11. It’s advisable to regularly clean your computer’s USB and Ethernet ports.
Δ