Among these new changes is the new and improved Task Manager. Task Manager has been a long-standing process management solution since the early days of Windows. It allows you to manage running processes, services, apps, programs, and much more from a single app. So if you’re wondering how you can enable and get the new Task Manager on your Windows 11 PC, then this is the perfect post for you.
Enable New Task Manager in Windows 11
You can get the new Task Manager in two ways on Windows 11; you can either choose to update to Windows 11 22H2 from your PC or decide to use ViveTool to activate it on older versions of Windows 11. So use either of the sections below depending on your preferred method to get and use the new Task Manager on Windows 11.
1. Update to Windows 11 22H2
To install the new Windows update, you can use the Settings app on your PC. Use these steps to install Windows 11 22H2 on your PC.
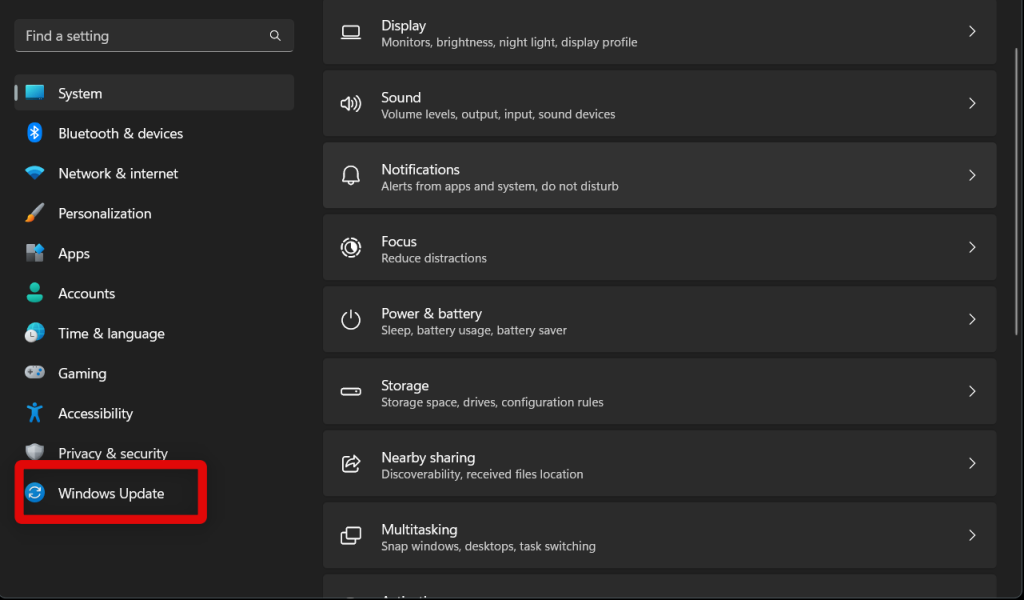
- Open the Settings app and click on Windows Update. This section allows you to manage Windows Update settings and install available updates for your Windows 11 System.
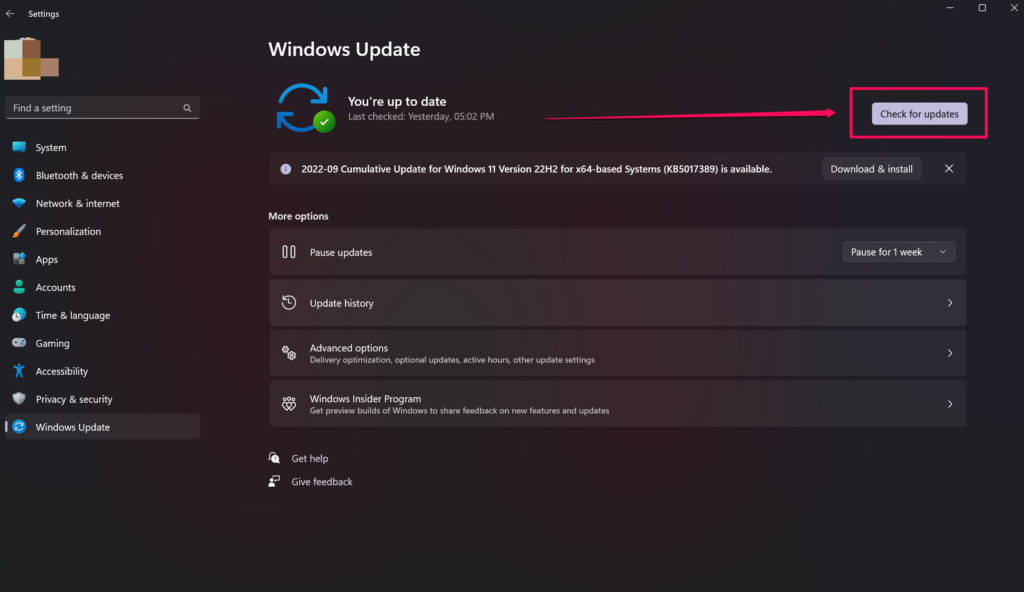
- You will now have access to the Windows Update settings page. You can manage and access advanced Windows update settings from here. For now, click Check for updates in the top right corner of the screen. Windows will then use your connection to check for available updates for your system.
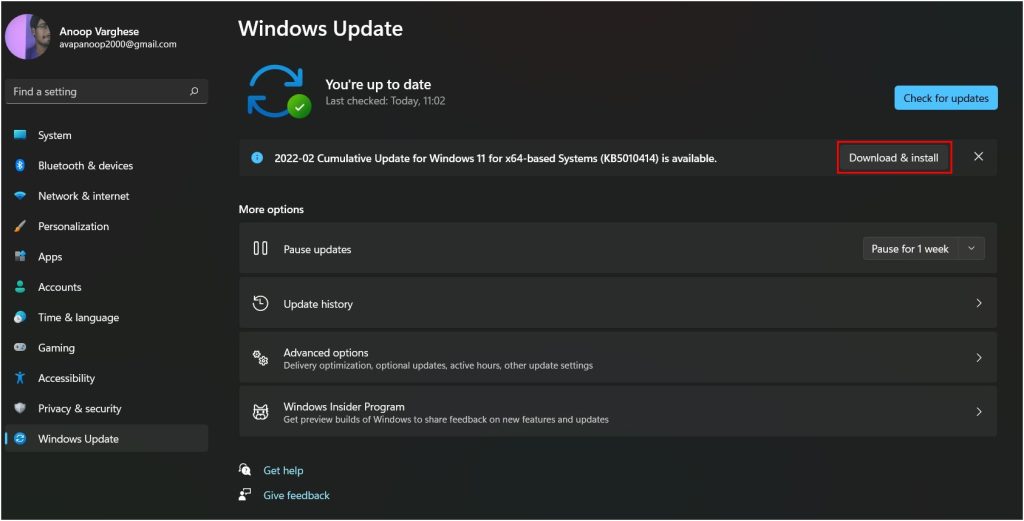
- When any available updates show up, they should automatically install on your PC. However, if you’re on a metered connection, you will have to click Download and Install to install the necessary updates on your system.
- You will be prompted to restart your PC once Windows 11 22H2 is installed on your system. If you have been avoiding Windows updates for your system for a while, Windows might install a few previous builds before showing and installing Windows 11 22H2 on your system. If that happens to be the case, simply update and restart your system until Windows 11 22H2 shows up and is installed on your system. You will now have updated your Windows 11 PC to Windows 11 22H2. You can now use the subsections below to access, use and familiarize yourself with the new Task Manager.
2. Get New Task Manager On Older Versions Of Windows 11
If you haven’t been a fan of the new Windows 11 22H2 update and have decided to stay with the older install of Windows 11, then you can use the open-source program named ViveTool to enable the new Task Manager on your Windows 11 PC. Here’s how you can use ViveTool to enable the new Task Manager on your computer. Requirements: Ensure that you’re running the following Windows 11 build or higher. Additionally, use the link below to download ViveTool beforehand on your Windows 11 PC.
Windows 11 build 22557 or higher ViveTool Download Link
Here’s how you can enable the new Task Manager on your Windows 11 PC using ViveTool.
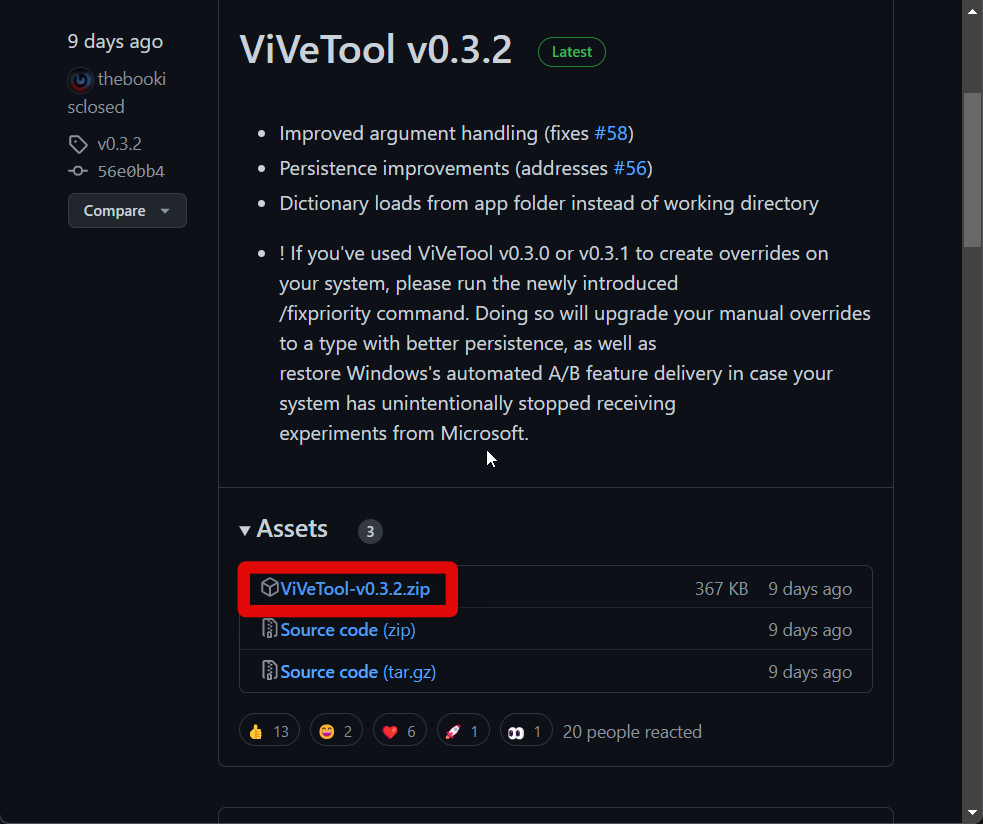
- Start by downloading the latest version of ViveTool on your PC by visiting the link above. Click and download the latest ZIP file linked under the latest release. You will always find the latest release linked under the top post on the Releases page for ViveTool on GitHub.
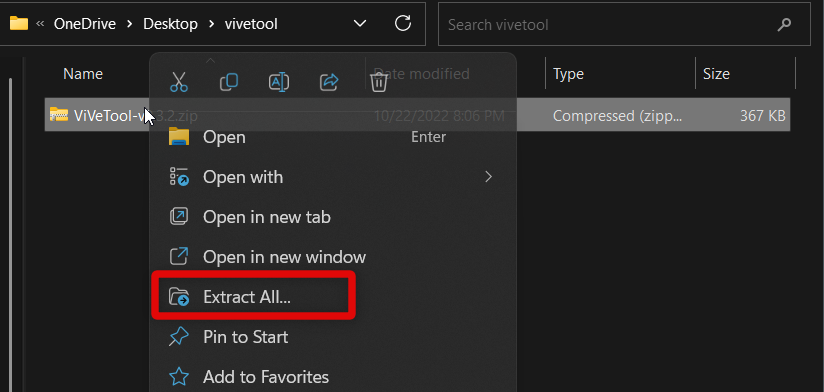
- Once the file is downloaded, extract the ZIP archive using your favorite unarchiver. If you don’t use a third-party unarchiver, then right-click the file and click Extract All. You can also click on Extract All in the ribbon menu in File Explorer.
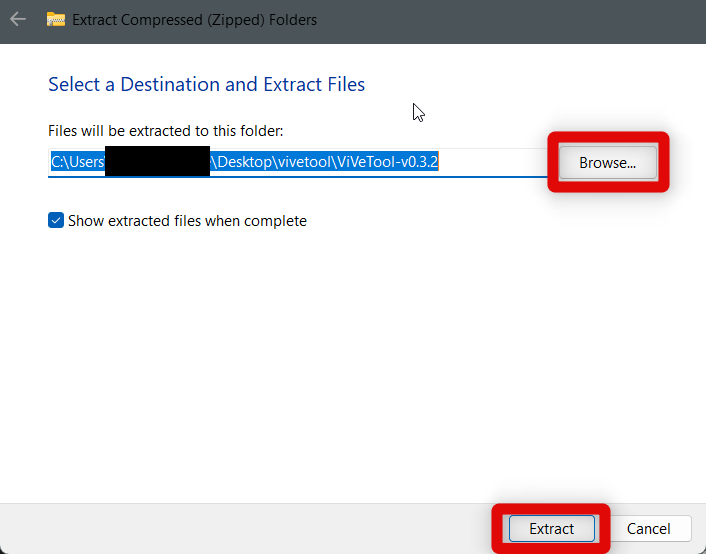
- Now click Extract to extract ViveTool in the same location. You can also choose to extract it in a different location. Click Browse… at the top and choose your preferred location. Once you’re done, click Extract at the bottom.
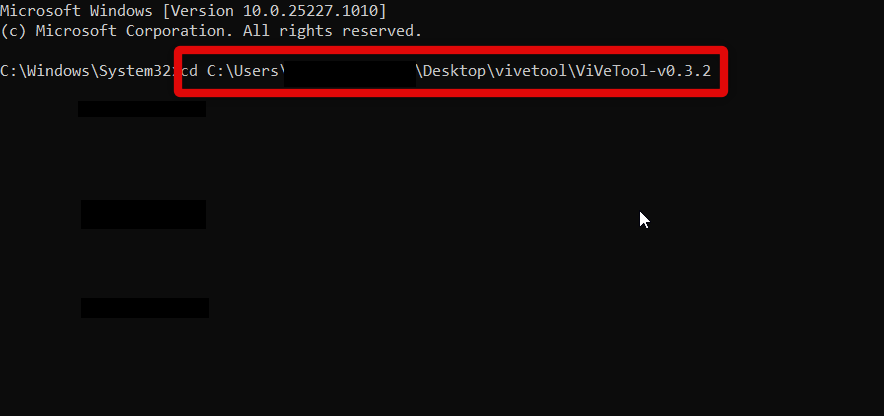
- Now click on the address bar at the top and press Ctrl + C on your keyboard to copy the path of the current location to your clipboard. This will help us open a CMD window where we extracted ViveTool.
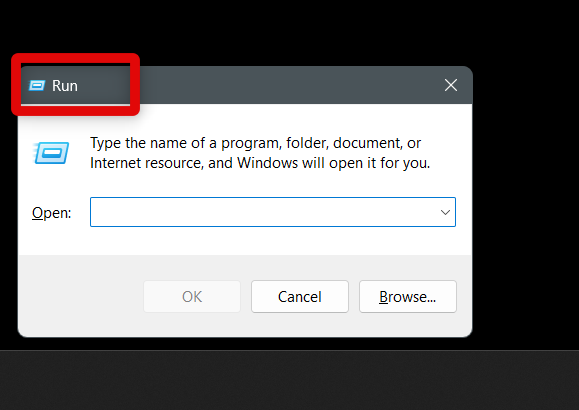
- Launch the Run app on your PC. You can search for the app in the Start menu or choose to use the Windows + R keyboard shortcut, depending on your preferences.
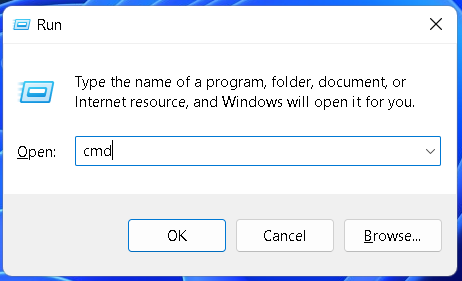
- Once the Run app is launched, type in cmd and press Ctrl + Shift + Enter on your keyboard. This will help us launch CMD on your Windows 11 PC as an administrator.
- Once CMD is launched as an administrator on your PC, type in cd and paste the path we had copied to your clipboard. Press Enter once you have pasted the path.
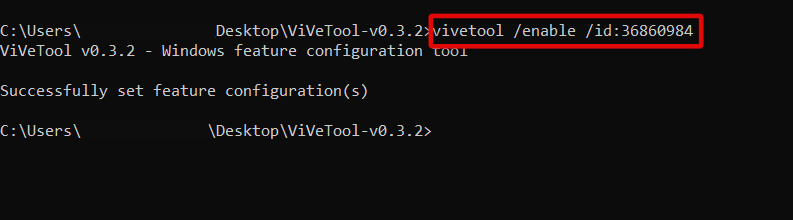
- Now use this command vivetool /enable /id:36860984 to execute ViveTool and enable the new Task Manager on your Windows 11 PC. You should see a successful message once the command has been executed successfully.
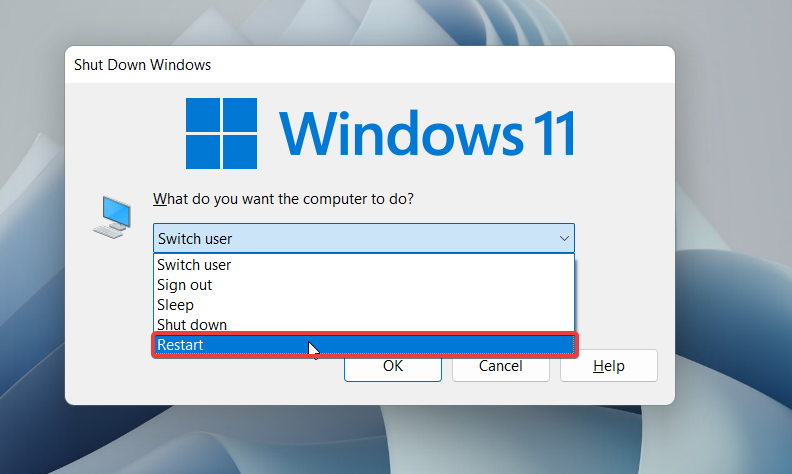
- Now use the exit command to close CMD on your PC.
- Lastly, go ahead and restart your PC using your preferred method.
- Once your PC restarts, the new Task Manager will be enabled on your Windows PC. You can now use the subsections below to use the new Task Manager.
Final Words
The new Task Manager has been a great addition to Windows 11 with the 22H2 update. Not only does it introduce a more seamless aesthetic to match the overall look of Windows 11, but the easy-to-access UI also ensures that new users can intuitively use the Task Manager. The added ability to use the efficiency mode also makes it a must-have for users with under specced and low-powered PCs. We hope the post above helped you quickly enable and get the new Task Manager on your Windows 11 PC.
Δ