Enable End-to-End Encryption on Zoom
We have covered enabling Zoom’s E2E Encryption for both individual users and groups and enterprise users in different sections. We have also mentioned some notable points that you should keep in mind. Use table of content below to quickly move to the section you want.
Notable Points on Zoom’s E2E Encryption
Before moving to the steps, there are a few points that you should make a note of. With E2E turned on, you won’t be able to use many of Zoom’s features such as cloud recording, streaming, live transcription, join before host and more. Also, users won’t be able to join an E2E meeting through the telephonic medium. Zoom says as End-to-End encryption is currently in Technical Preview so it will take more than a year to bring all the features with ironclad encryption. Apart from that, both free and paid users have E2E support, but free users have to verify their identity through a mobile number or need to add a valid billing option. Next, End-to-End encryption on Zoom is currently available on the official clients only. Basically, E2E encryption is available on the dedicated apps of Windows, macOS, Linux, Android, iOS and Zoom Rooms. As of now, E2E encryption is not supported on the web. Also, all participants must have E2E encryption enabled to join an E2E meeting. Lastly, as we noted in our Zoom vs Google Meet comparison, End-to-End encryption is the same GCM encryption that was deployed earlier on Zoom. However, this time, the decryption keys are generated locally on users’ computers — instead of Zoom’s servers — which was decrypting and managing the keys earlier. In tandem, the packets can only be decrypted at the receiver’s end which makes it a secure End-to-End channel.
Enable End-to-End Encryption on Zoom for Individuals
You can enable End-to-End encryption on Zoom only through the web portal. So first off, open the Settings page of Zoom and move to the “Meeting” tab.
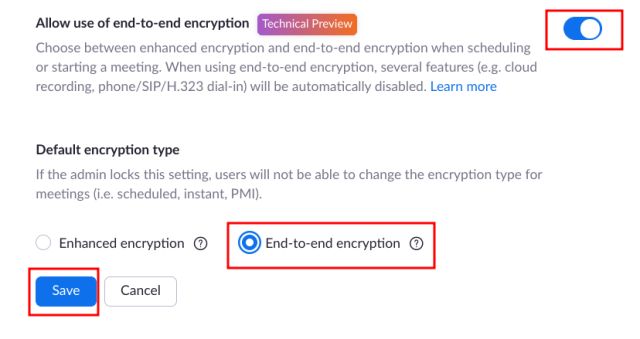
Here, scroll down and enable the toggle for “Allow use of end-to-end encryption”.
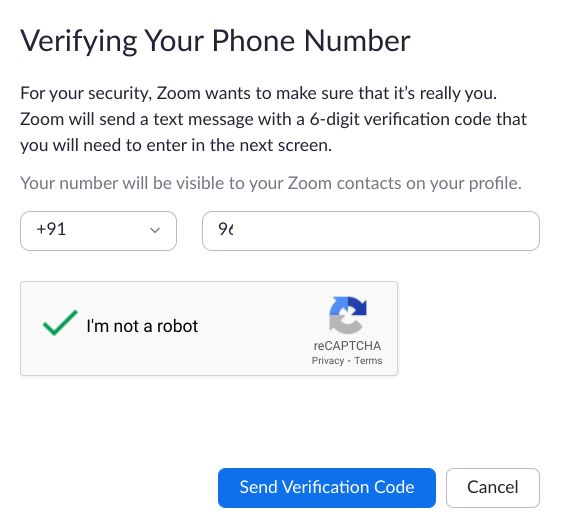
It will then ask for your phone number. Enter it and click on “Send Verification Code”.
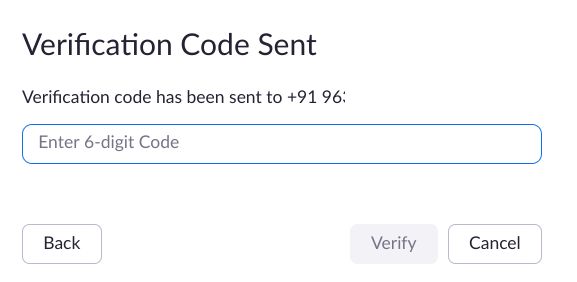
Next, enter the one-time code that you will receive on your phone number and click on “Verify”.
Finally, the option for End-to-End encryption on Zoom will be enabled. Now, simply select “End-to-End encryption” as the default encryption type and click on “Save”. You are done.
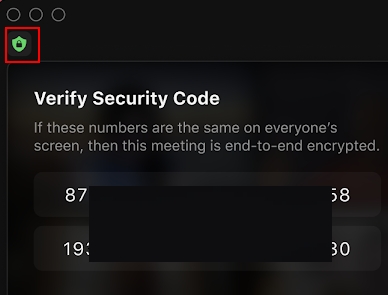
To verify if the Zoom meeting is End-to-End encrypted, you will find a green shield logo on the top left corner. Keep in mind, GCM encryption also has a green shield, but it features a checkmark sign. But with E2E enabled, you will find a padlock symbol inside the green shield along with a security code.
Enable End-to-End Encryption on Zoom for Group and Account Admins
- Open Zoom’s Settings page by clicking on the link and move to Account Management -> Account Settings.
- Here, click on “Meeting” and move to the “Security” tab. Now, enable the toggle for “Allow use of end-to-end encryption”.
- Next, choose “End-to-End encryption” as the default encryption type and click on “Save”.
- If you want to make E2E encryption mandatory for all users in your group or account, click the Lock icon to confirm the changes. That’s it.
Make Your Zoom Meetings Secure with E2E Encryption
So that is how you can enable End-to-End encryption on Zoom and make your web meetings secure from all kinds of security attacks. As the feature is in Technical Preview, many essential features are not available and that is understandable. So I would suggest you that use E2E encryption only when the meeting is extremely confidential. To get all the features, you will have to wait for quite some time. Anyway, that is all from us. You can learn more such Zoom tips and tricks from our linked article.


