Enable and Use Tabs In File Explorer On Windows 11
File Explorer tabs allow you to open multiple tabs in the same window. This allows you to open different directories in the same window and switch between them as you like. Here’s how you can enable and use File Explorer tabs on your Windows 11 PC.
Enable File Explorer Tabs
Microsoft has bundled and released File Explorer tabs with the Windows 11 22H2 update. Thus you don’t need to do anything to enable File Explorer tabs on your PC. Tabs should be enabled by default in File Explorer. You can check for tabs by opening a random folder and then checking the Title bar. If an X shows beside the current folder and a + sign indicating Add Tabs, then you already have File Explorer tabs available on your PC. Use the next section to help you use and navigate the same on your Windows 11 PC.
Use File Explorer Tabs
You can use and interact with File Explorer tabs in a couple of ways. Depending on your preference, you can either choose to use your mouse or keyboard shortcuts. Here’s how you can use File Explorer tabs on your Windows 11 PC.
Interact With File Explorer Tabs Using Your Mouse
Here’s how to use your mouse to interact with File Explorer tabs on Windows 11.
- Open a folder on your PC. You can use a folder on your desktop to open it temporarily. You can also choose to use the folder icon in your taskbar or the Windows + E keyboard shortcut.
- Once a folder is open, click the + icon in your Title bar to add a new tab. Depending on your File Explorer Settings, you will either be taken to the This PC page or the Quick Access page.
- Similarly, if you wish to open a folder or item in a new tab, right-click on it and select Open in a new tab. This will open the selected item in a new tab in the current window.
- You can switch between open tabs on your screen by clicking on them.
- You can also rearrange your tabs by clicking and dragging a tab from left to right on your screen.
- Similarly, you can detach a tab and open in it its independent window by clicking and dragging it out of the current window.
- If you have more tabs open in your window than can be shown in your Title Bar, then click the right arrow to view other tabs currently invisible.
- To close a File Explorer tab, simply click the X beside a tab to close it in the current window.
- Additionally, you can also right-click on a tab and select Close other tabs to close all other tabs in the current window.
- You can also right-click a tab and select Close tabs to the right to close all tabs to the right of the current tab. Tabs to the left of the selected tab won’t be closed when selecting this option.
- Lastly, if you wish to move files or folders between tabs, click and drag the concerned file or folder over the tab’s name in your Title Bar.
- Once the tab you’re hovering over opens in the current window, simply drop the file in the opened tab to move the file or folder to the selected tab. You will now have managed and interacted with File Explorer tabs using your mouse on your Windows 11 PC.
Interact with File Explorer Tabs Using Your Keyboard
You can also use dedicated keyboard shortcuts to interact with your File Explorer tabs. Here’s all you need to know about interacting with File Explorer tabs using your keyboard on your Windows 11 PC.
- Firstly, you can open File Explorer on your PC using the Windows + E keyboard shortcut. Use this shortcut to open File Explorer on your PC.
- Now add new tabs to the current window by using the Ctrl + T keyboard shortcut. Depending on your File Explorer settings, the new tab will either open up in the Quick Access or This PC section.
- Similarly, if you have multiple tabs open in the current window, you can switch between them using the keyboard shortcut Ctrl + Tab. This will move you to the next tab on your right. You can use this shortcut to switch to tabs on the right of your current tab.
- Additionally, if you wish to switch to tabs on the left of your current tab, then press Ctrl + Shift + Tab on your keyboard. This will allow you to switch to tabs on the left in the current window.
- Another way to switch between tabs using the keyboard is by using the keyboard shortcut Ctrl + Number (1-9). The numbers one to nine will allow you to switch between the first to the ninth tab in the current window. The unfortunate disadvantage is that you can’t switch to more tabs if you have more than nine tabs in the current window. A good trick to navigate multiple tabs in such a scenario is to use Ctrl + 9 to switch to the ninth tab and then use Ctrl + Tab to switch to the tenth, eleventh tab, and so on.
- Lastly, you can close tabs in your File Explorer using the Ctrl + W keyboard shortcut. This keyboard shortcut will help close the currently open tab on your screen. You will now have interacted with File Explorer tabs using the keyboard on your Windows 11 PC.
Fix File Explorer Tabs Not Showing In Windows 11
There have been a few reports where users have been unable to use or enable File Explorer tabs on their Windows 11 PC. If you’re facing a similar issue, then here’s how you can fix the same and use File Explorer tabs on your PC.
1. Get Windows 11 22H2
As discussed in the introduction, File Explorer tabs are a new feature in Windows 11 22H2, and thus you will need the latest update to enable and use File Explorer tabs on your PC. It is likely that the update isn’t available in your region yet, which is why you haven’t been able to use File Explorer tabs yet. Microsoft is gradually rolling out the Windows 22H2 update in all regions around the world, and you should receive the update in the upcoming days. Until then, use the steps below to check the current version of your Windows 11 PC.
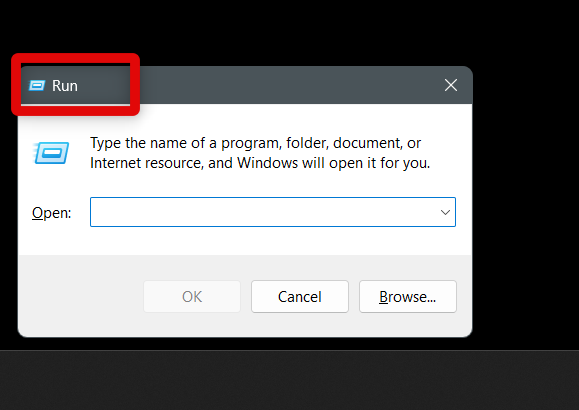
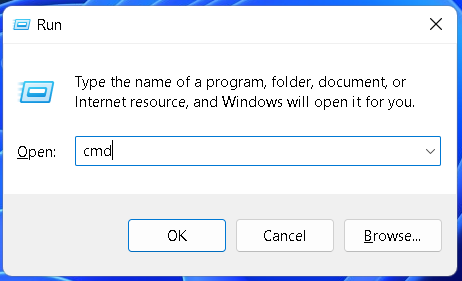
- Open Run on your PC. You can search for Run in the Start menu or use the Windows + R keyboard shortcut.
- Now use the Winter command to view the current version of your Windows 11 installation.
- You can now view the current version of your Windows 11 installation at the top of the current window. If you aren’t running Windows 11 22H2, then it is likely the reason you aren’t able to use File Explorer tabs on your PC. We recommend you keep checking for updates and install Windows 11 22H2 once the update is available to get File Explorer tabs on your Windows 11 PC.
2. Get File Explorer Tabs on Older Versions Of Windows
If you don’t wish to install the Windows 11 22H2 update, then here’s how you can get File Explorer tabs on previous versions of Windows 11. You can use this guide on Windows 11 22H2 as well if File Explorer tabs aren’t available to you. Use the steps below to help you along the way.
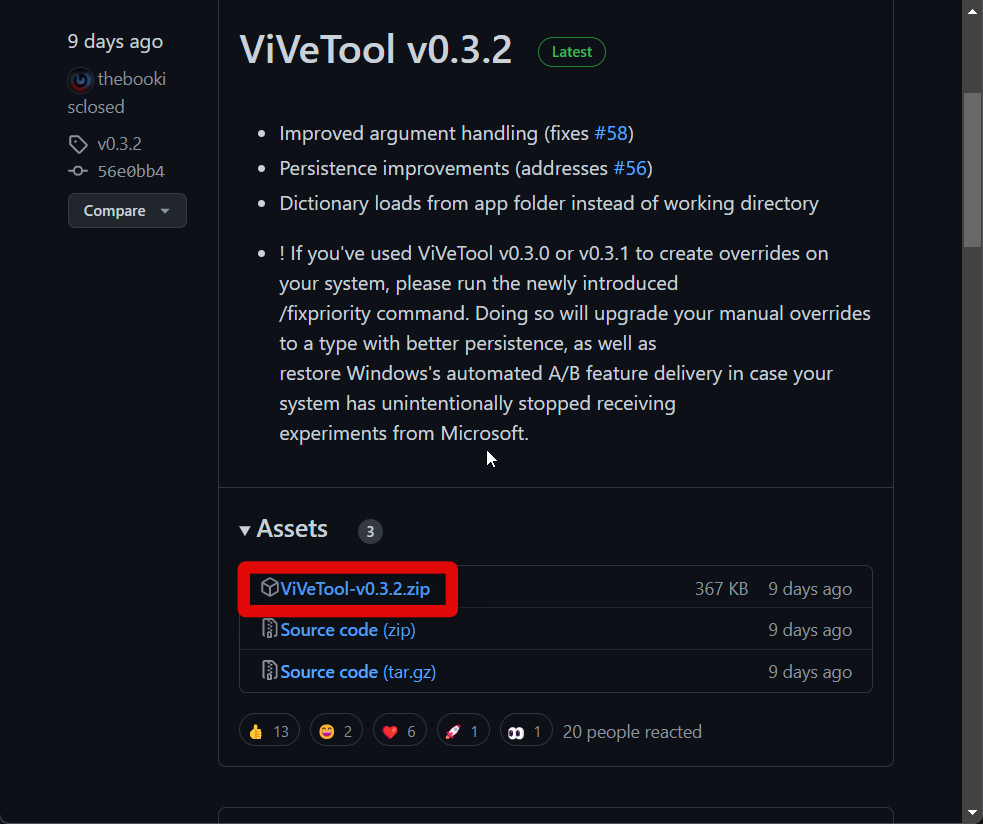
- Open this link to visit the GitHub page for ViveTool. ViveTool is an open-source tool that allows you to enable experimental features in Windows 11. We will use this to our advantage to enable File Explorer tabs on your Windows 11 PC.
- Now download the ZIP file linked under the latest release version of ViveTool. Click on the latest release ZIP to download the file to your PC.
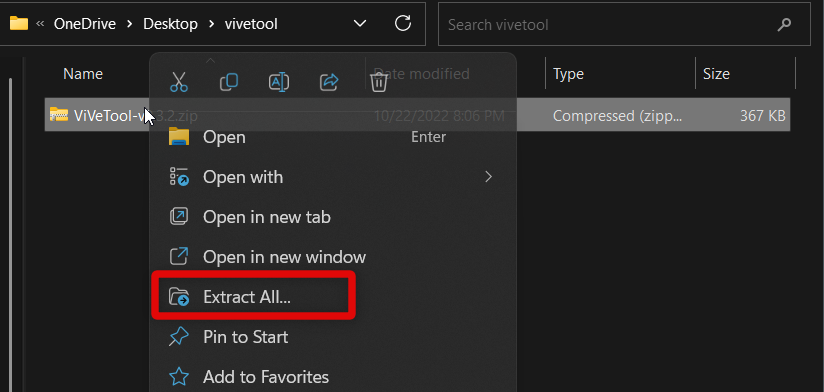
- Extract the downloaded archive using your preferred unarchiver. If you don’t have an unarchiver, right-click the ZIP file and select Extract All.
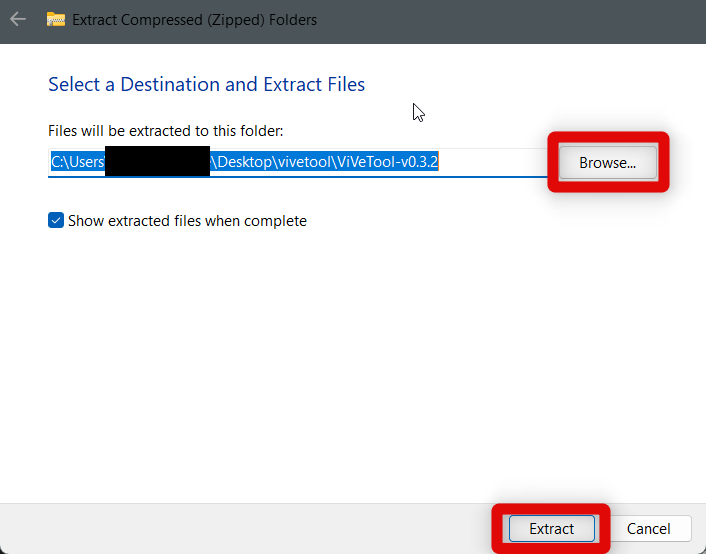
- Click Extract to extract the ZIP file in the same location. Click Browse and choose a different location on your PC if you wish to extract contents in a different location.
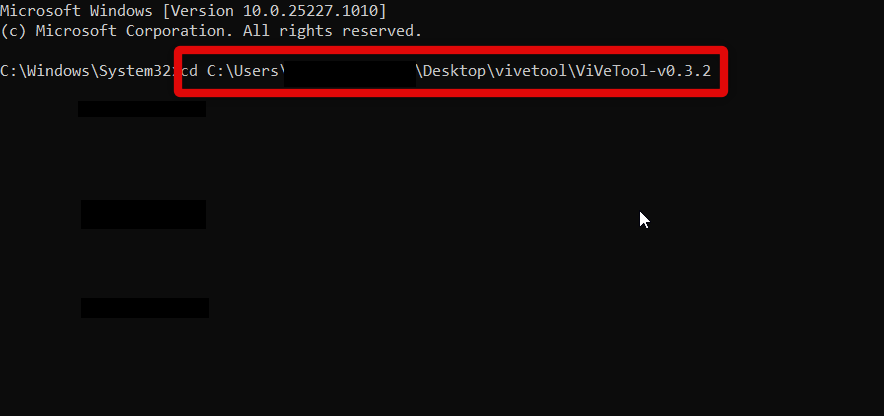
- Now open the folder with the extracted files from the archive we downloaded earlier. Click in the Title bar and copy the path of the folder to your keyboard using Ctrl + C.
- Now open Run on your PC. You can open Run from the Start menu or use the Windows + R keyboard shortcut.
- Once open, type in cmd and press Ctrl + Shift + Enter on your keyboard. This will open CMD as an administrator. You can also open CMD as an administrator by searching for it in the Start menu. When CMD appears in your search results, click Run as administrator.
- Now type in cd and use Ctrl + V to paste the path we had copied to your clipboard earlier. Once pasted, press Enter on your keyboard to execute the command.
- We can now enable the ViveTool. Use the command vivetool /enable /id:36354489 to enable ViveTool. Type in the command in CMD and press Enter on your keyboard.
- We now need to enable the Navigation pane first so that File Explorer can enable and use File Explorer tabs. Use the command vivetool /enable /id:37634385 to enable the navigation pane on your PC. As we did before, type in the command in CMD and press Enter on your keyboard.
- We can now finally enable File Explorer tabs. Type in this command in CMD and press Enter to enable File Explorer tabs, vivetool /enable /id:39145991.
- Now restart your PC to apply the changes made to your Windows 11 PC. You can now open File Explorer to check for tabs. File Explorer tabs should now be enabled on your PC.
Can you turn off File Explorer tabs once enabled?
No, on Windows 11 22H2, you can’t disable File Explorer tabs. However, if you used the workaround we discussed above, you can disable tabs by replacing enable with disable in each CMD command.
Is there a keyboard shortcut to open a folder in a new tab?
No, unfortunately, there isn’t a dedicated keyboard shortcut to help open a folder in a new file explorer tab. You will need to use the right-click context menu instead.
Final Words
Productivity features have always been a welcomed addition in Windows, especially by professionals that regularly switch between windows and tabs. File Explorer tabs help simplify your desktop experience by allowing you to reduce the number of windows open on your desktop and use tabs instead. I hope this post helped you easily enable and use File Explorer tabs on your Windows 11 PC.
Δ