Dual Boot Chrome OS and Windows 10 (Updated February 2021)
Before we go ahead, I want to make it clear that the tutorial is quite technical in nature so proceed only if you are well-versed with operating multiple systems. Apart from that, this tutorial will not touch any of your Windows files, but as a matter of precaution, you should back up all your important files. One never knows when things go south. Finally, I would recommend you to go through the guide step by step and for that, we have created multiple sections for easier navigation.
Requirements
UEFI support in the motherboard Support for legacy BIOS has also been added, but there are a few limitations. You can read the documentation here. Intel-based CPU and GPU Support for AMD CPU and GPU has also been added, but currently, it only supports AMD Ryzen 3XXX and AMD Stoney Ridge processors A USB flash drive with at least 16GB of storage space
Downloads
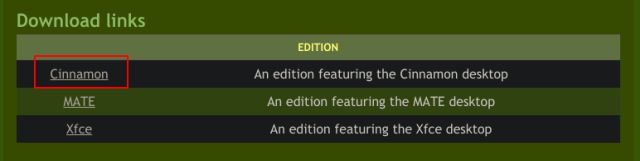
First off, download the Linux Mint Cinnamon image. You can also use other Linux distros such as Ubuntu or Debian, but since Linux Mint is pretty lightweight, I am using it in this tutorial.
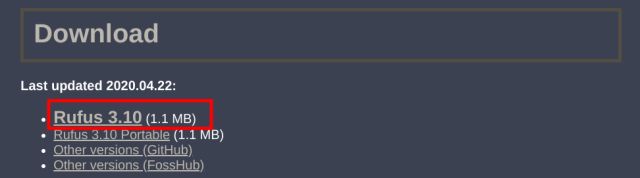
Next, download Rufus (Free) so that we can flash Linux Mint Cinnamon on the USB drive.
After that, download the official Chrome OS recovery image from here. If this link is not working then you can download the image from here as well. Open the website and search for “rammus”. Now, click on the latest recovery image to download it (right now it’s 87, but it may change in the future). Here, I am recommending “rammus” because it works on modern Intel processors. However, you should follow the below rule and download the specific image based on your processor.
“rammus” is the recommended image for devices with 4th generation Intel CPU and newer. “samus” is the recommended image for devices with 3rd generation Intel CPU and older. “zork” is the image to use for AMD Ryzen 3XXX. “grunt” is the image to use for AMD Stoney Ridge.
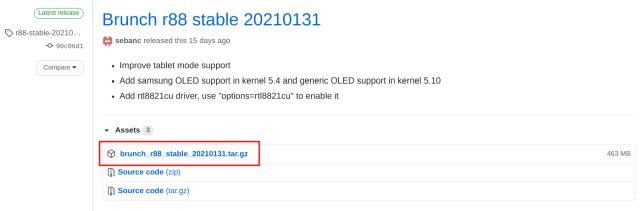
Now, download the most important file: Brunch. It’s a framework built by a developer named sebanc so huge thanks to him for making this project possible. The framework creates a generic Chrome OS image from the official recovery image so it can be installed on any Windows PC. To download the file, click here and look for the latest stable build and then click on “Assets”. Now, download the “tar.gz” file.
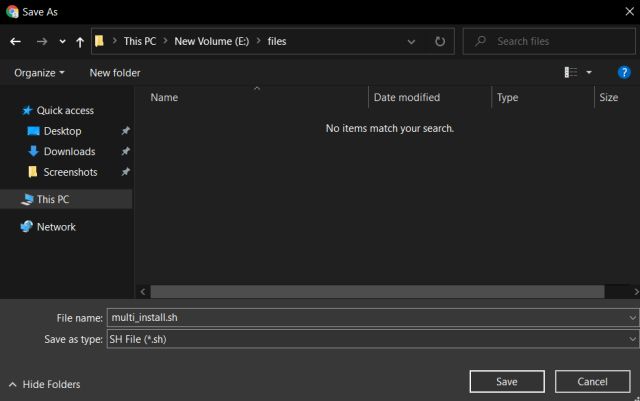
Finally, download the “multi_install.sh” script which magically installs Chrome OS on a Windows partition. The script has been written by Kedar Nimbalkar. To download it, click here and press Ctrl + S to save the file. If the above link is not working then you can click on this alternative link to download the “multi_install.sh” script. Now that we are done with the downloads, let’s jump to the steps, shall we?
Manage Files
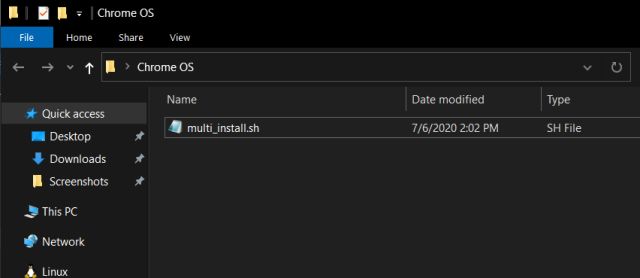
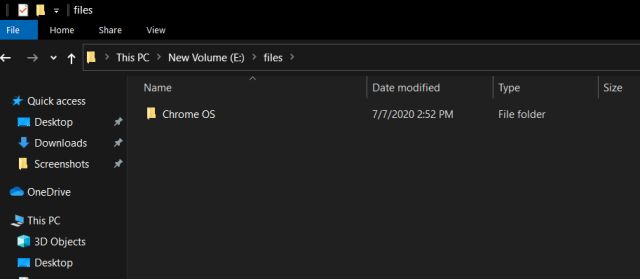
First of all, create a folder named “Chrome OS” on a drive that has ample space. After that, move the “multi_install.sh” file to the “Chrome OS” folder.
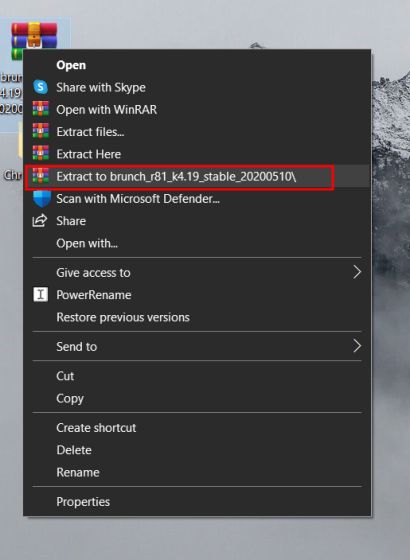
Next, right-click on the Brunch file and choose “Extract to Brunch…”. All the files will be extracted in a folder.
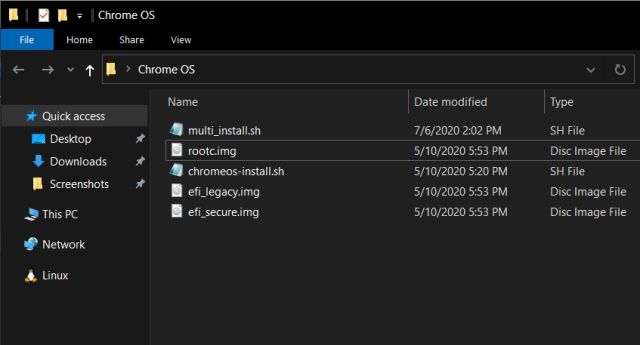
Now, move all the extracted Brunch files to the same “Chrome OS” folder.
Similarly, extract the official Chrome OS recovery image and you will get a folder on the desktop. Open it and rename the file to rammus_recovery.bin. If you have downloaded another image then rename it accordingly. For example, if you have downloaded the “samus” image then rename it to samus_recovery.bin.
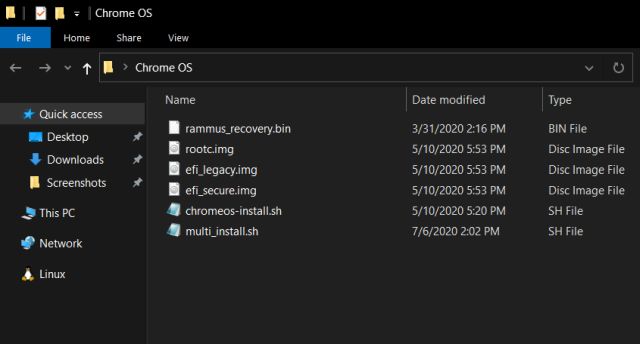
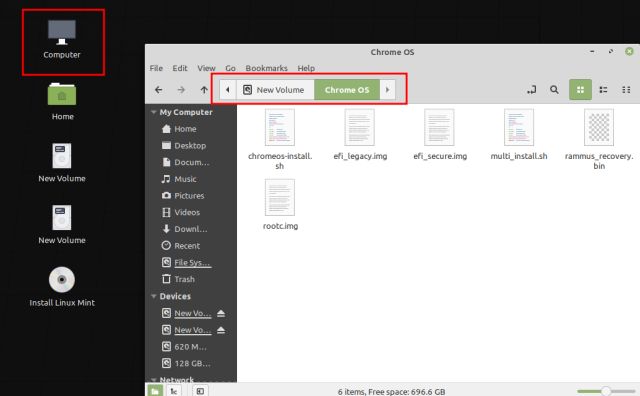
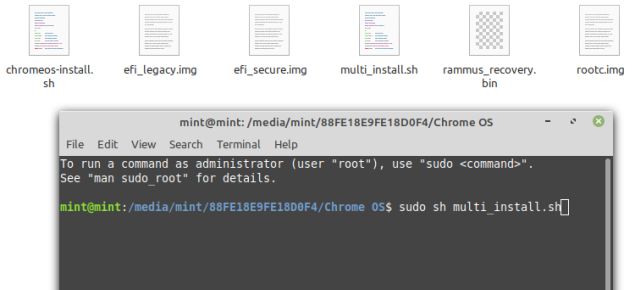
Finally, move the “rammus_recovery.bin” file to the “Chrome OS” folder. By the end, you should have these 6 files inside the “Chrome OS” folder. Make a note of where you have kept the “Chrome OS” folder.
Create Partition
You need to create an “Unallocated” partition on Windows 10 which should at least have 14GB or more space. I have provided 100GB of space, but you can choose your own partition size. Having said that, make sure to follow these rules so that you don’t encounter errors during the installation process.
Make sure the Chrome OS partition (unallocated) size is less than the drive where you have stored the Chrome OS folder. For example, I have stored the Chrome OS folder in the C drive which has 120GB of free space so I assigned 100GB to the Chrome OS partition. Although I have created a 100GB partition in this tutorial, I would recommend you to assign partition size in this fashion: the partition size should be divisible by 11. For example, 99000MB (99GB), 88000MB (88GB), 77000MB (77GB) and so on. I know this sounds weird, but it has worked for many users.
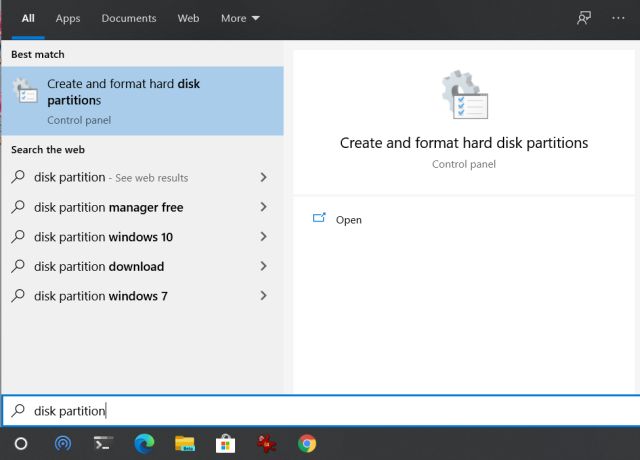
Press the Windows key once and search for “disk partition“. Now, click on the first result.
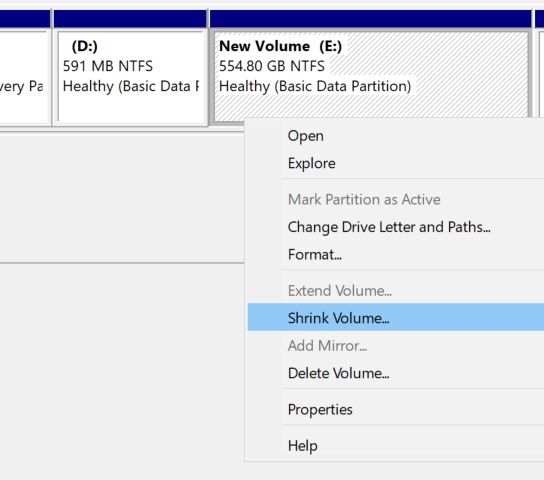
Here, right-click on the last drive and select “Shrink Volume”.
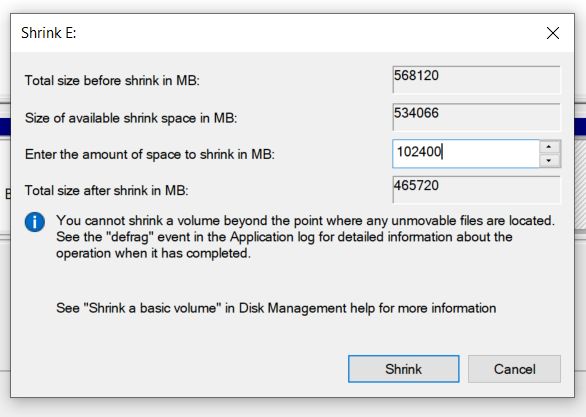
Now, enter 102400 MB which equals 100 GB or whatever your preferred size is (must be above 14GB). After that, click on “Shrink“.
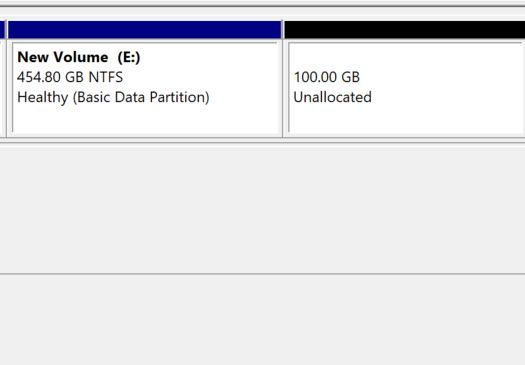
You have successfully created an “Unallocated” partition. In the next few steps, you will be installing Chrome OS to this unallocated partition.
Flash Linux Mint Cinnamon
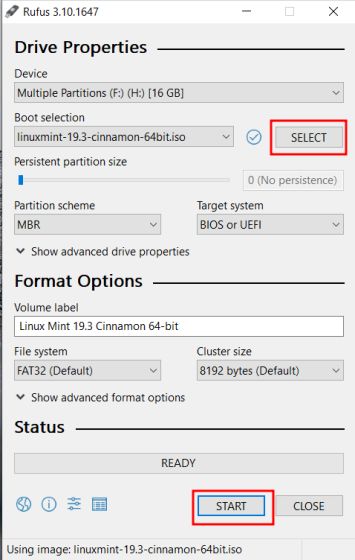
Connect your USB flash drive and open Rufus. Next, click on the “Select” button and choose the Linux Mint Cinnamon ISO image. Now, just click on “Start”. You will get a few prompts so click on “Yes” and “OK” to continue the flashing process.
After Rufus is done with flashing, close it. Now, plug the USB flash drive into the PC on which you want to install Chrome OS. If you are installing Chrome OS on the same PC then keep it plugged in.
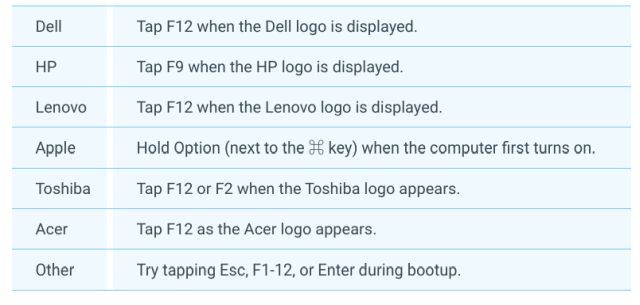
Next, restart your PC and press the boot key continuously to boot into the UEFI/BIOS menu. If you don’t know the boot key of your PC then you can find it from the below table.
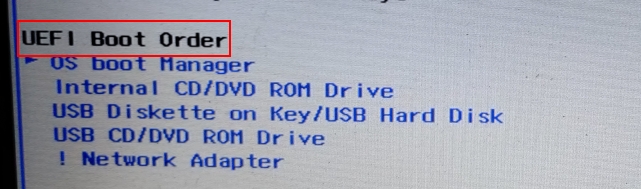
Once you have entered the BIOS, move to the “Boot” tab and select “UEFI” from the Boot List Option. If this option is not available then don’t worry, move to the next step.
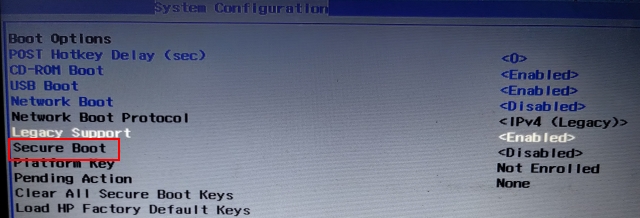
After that, move to the “Security” tab and disable “Secure Boot”. Keep in mind, every BIOS has its own interface so the menu placement might differ from one PC to another. Nevertheless, look for “UEFI” and “Secure Boot” under Security, Boot, or System Configuration tabs and make the changes accordingly. Keep in mind, disabling Secure Boot is mandatory.
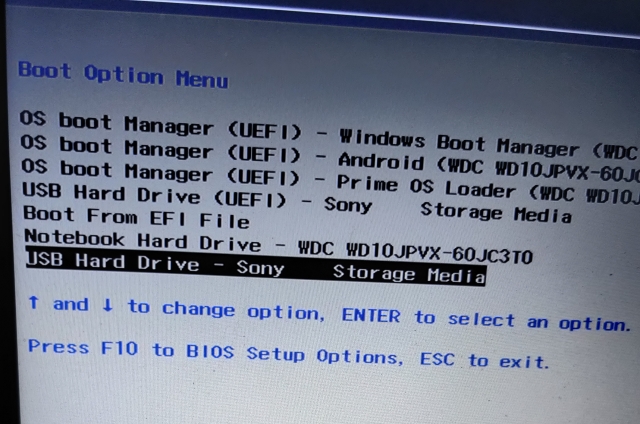
Finally, move to the “Exit” tab and choose “Exit Save Changes“. Immediately, after that, start pressing the boot key again. You will be asked to choose your boot device. Select the “USB drive” and hit enter.
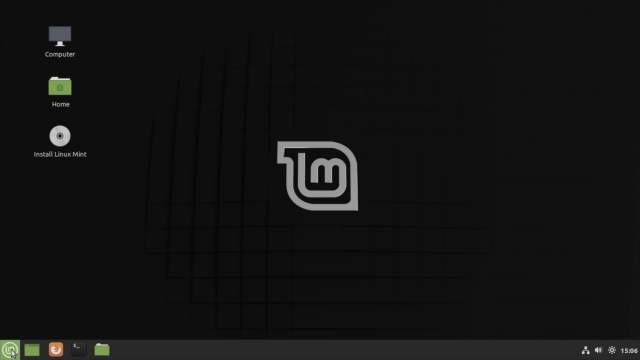
You will boot straight into Linux Mint Cinnamon. If you are prompted with a splash screen, choose the default option: “Start Linux Mint“.
Install Chrome OS
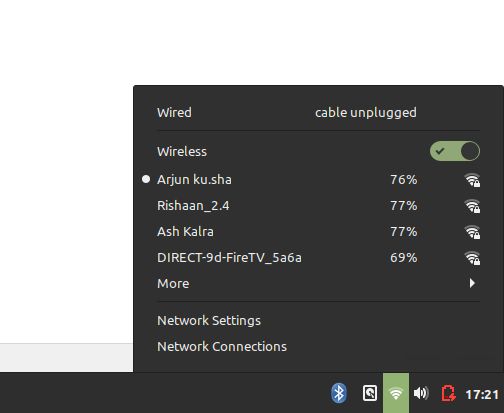
Now that you have booted into Linux Mint, click on the network icon at the bottom-right corner and connect to WiFi or Ethernet. The Chrome OS installer will need an active internet connection to download some necessary libraries and dependencies.
Now, open “Computer” on the desktop and move to the drive where you have stored the “Chrome OS folder“.
Here, right-click anywhere on the window and open Terminal. Now, type sudo sh multi_install.sh and hit enter. Note: If you are getting “read-only” or any kind of error then head over to the Troubleshoot section for help.
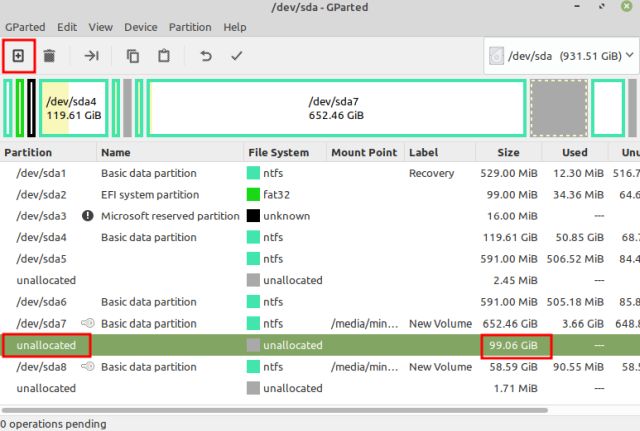
It will start downloading the necessary libraries. After that, a GParted window will automatically open up. Here, scroll down and select the “unallocated” partition (100GB). After that, click on the “Plus” button at the top menu bar.
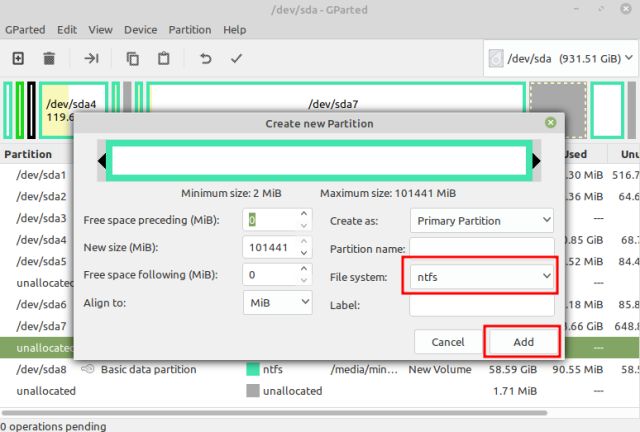
Next, choose “ntfs” as the file system and click on “Add”.
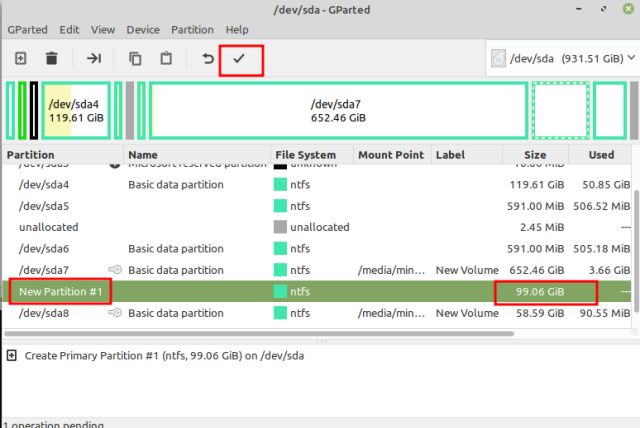
After that, click on the “Done” button at the top menu-bar.
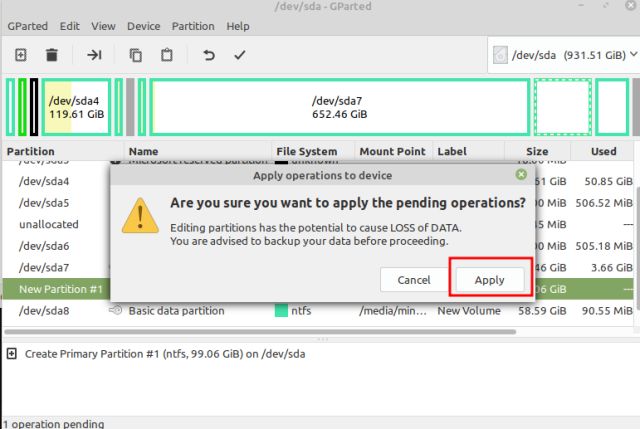
Next, click on the “Apply” button.
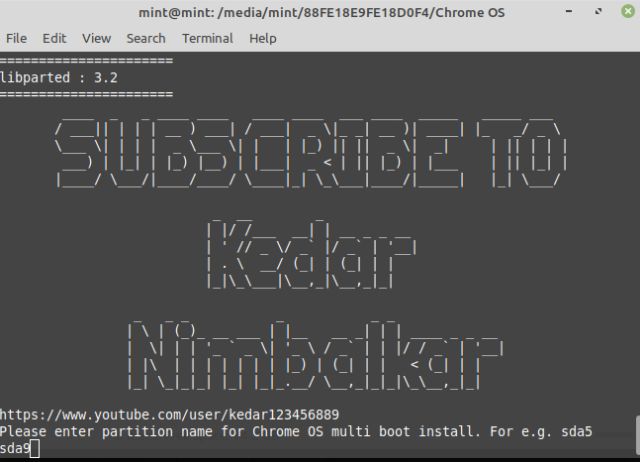
Now, make a note of partition number which starts with “sda”. For instance, mine is sda9. Finally, close the GParted window.
On the Terminal window, enter the partition number that you noted above and hit enter.
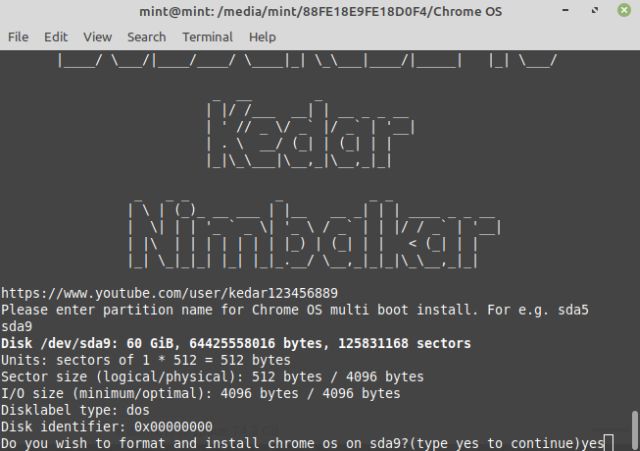
It will show you the partition detail and will ask for your confirmation. If the partition selection is correct, type yes and hit enter. Note: If you face any error then go through the Troubleshoot section to find the solution.
Finally, Linux Mint will start installing Chrome OS on your Windows partition.
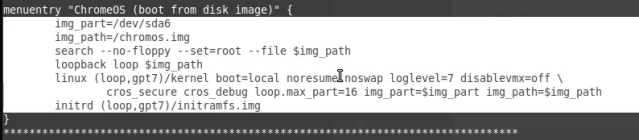
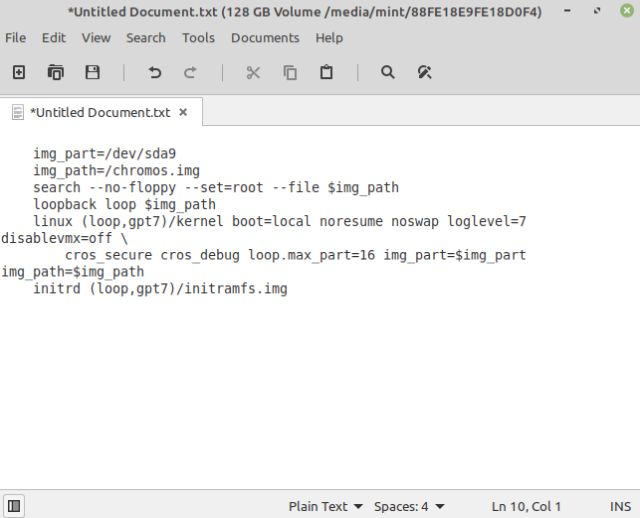
After the installation is complete, on the Terminal window, scroll up a bit and you will find a “menuentry” section. Now, select whatever is inside the “menuentry” section and copy it. You can right-click on the Terminal window to copy it.
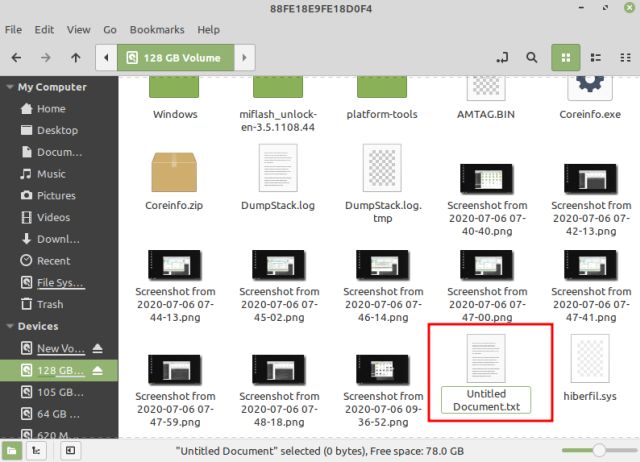
Open “Computer” from the desktop again and move to C drive or any other Windows partition. Right-click and select New Document -> Empty document. Here, add .txt at the end and save it.
Now, open the text file and paste the commands that you copied from the terminal window. After that, save the text file.
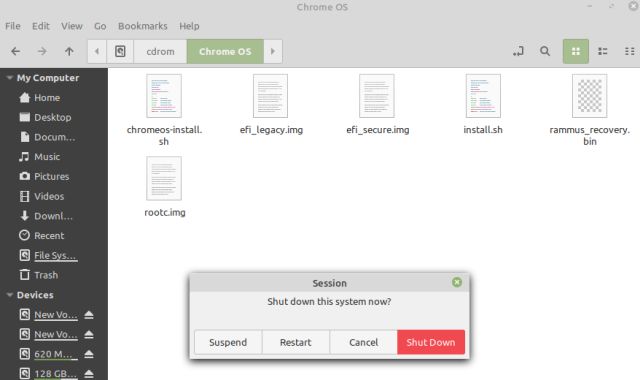
You are finally done with the installation. Now, click on the start menu of Linux Mint and restart your computer. Immediately after that, remove the USB drive and you will boot directly into Windows 10 as we have one more step to do.
Dual Boot Chrome OS and Windows 10
You have successfully installed Chrome OS on a Windows partition, but you need to add Chrome OS as a bootable OS during the startup. And for that, we will use the Grub2Win application.
Boot into Windows 10 and download Grub2Win (Free) application. Keep in mind, the application is slightly slow so keep patience while handling it. If Grub2Win is not working then you can try EasyUEFI (Free trial for 15 days) as well.
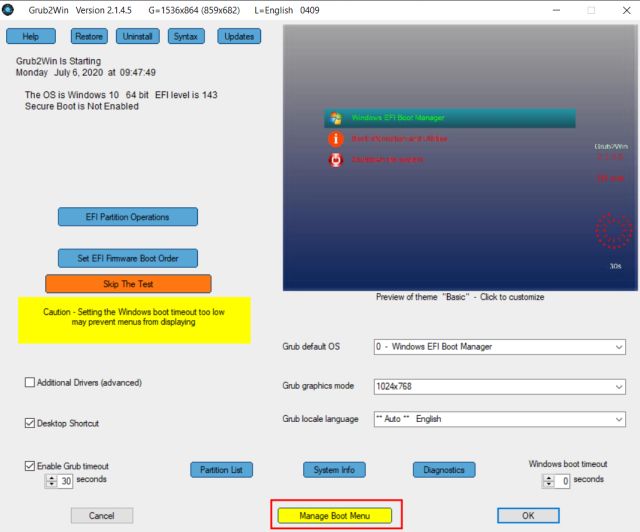
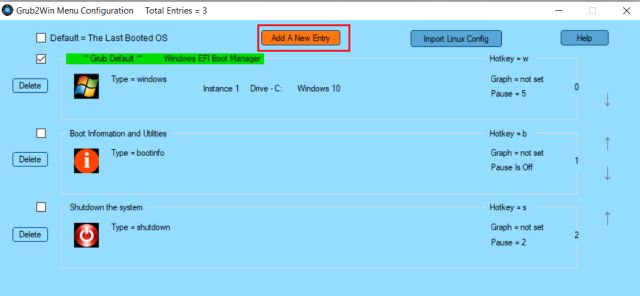
During the setup on Grub2Win, keep everything as default and move forward. After that, click on “Manage Boot Menu“.
Here, click on “Add a New Entry“.
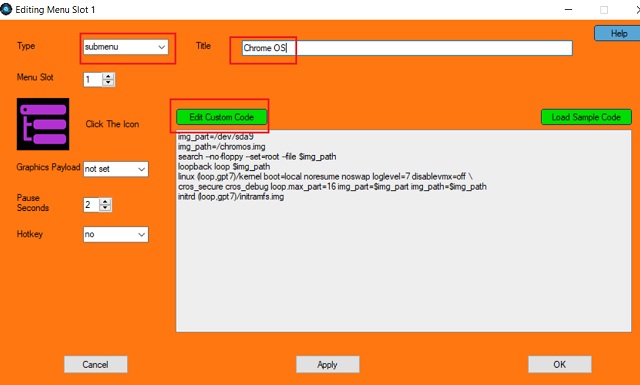
From the drop-down menu, select “submenu” and type “Chrome OS” under the Title field. Next, click on “Edit Custom Code“.
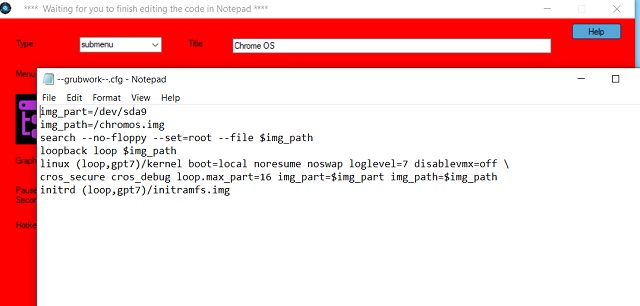
Here, paste the command that you copied from the Terminal and saved it in a text file. It should start with “img_part” and make sure there is no “}” at the end. Now, click on “Apply” and “OK”.
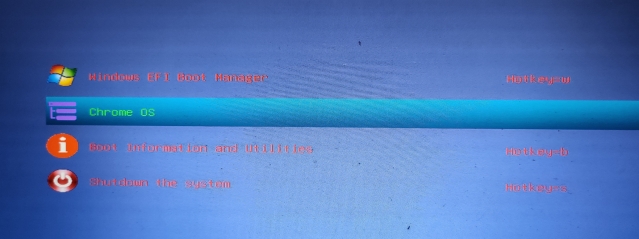
You have successfully added Chrome OS to the boot menu along with Windows 10. You can also move Chrome OS to the top by clicking on the “arrow” icon. Finally, click on “Apply”.
Now, restart your computer, and this time, you would find both Chrome OS and Windows 10 in a Grub2Win interface. Select “Chrome OS” and it will take some time to set up everything on the first run. Note: If the Grub2Win interface is not showing up after a few bootups then move to the Troubleshoot section for resolving the issue.
You can now set up your Google account and enjoy Chrome OS along with Windows 10. In case, WiFi or any other hardware device is not working on Chrome OS then move to the Troubleshoot section to find a solution. Note: Before logging into your Google account, keep in mind, you are officially not allowed to run Chrome OS with Play Store support on non-certified machines. In some ways or the other, you might be violating Google’s terms and conditions. So, I would recommend you to sign in with a secondary Google account so that your primary account remains safe.
Uninstall Chrome OS From Windows 10
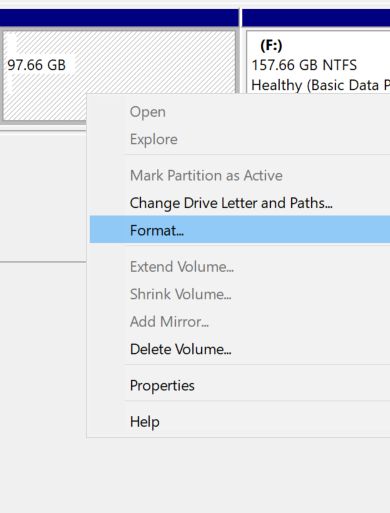
If you want to uninstall Chrome OS from Windows 10 then the steps are quite easy. Just boot into Windows 10 and open Disk Management. After that, right-click on the Chrome OS partition and format it. Next, open Grub2Win and remove the Chrome OS entry and save changes. You are done.
Troubleshoot
If you are getting a “Not enough space to create image file” error then I would recommend you to follow my partition rules in “Create Partition” section. It has seemingly worked for many users.
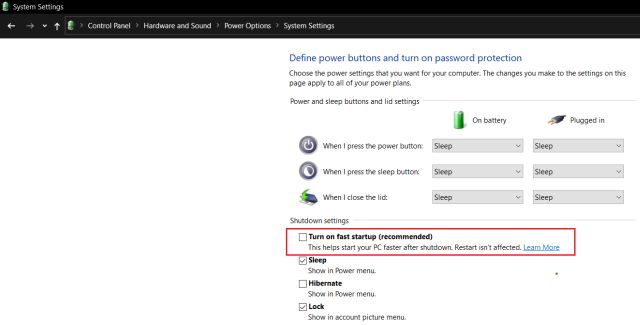
For users who are getting “failed-to-get-canonical-path-of-cow” error, I would recommend you to not worry and move to the next step. Many users have reported that despite the error Chrome OS dual boots with Windows 10 successfully. And if you are getting “read-only file system” error then you have most probably put the “Chrome OS” folder in the USB drive. You should store the folder in your computer’s drive. You should also disable the “Fast Startup” option in Windows 10 from Control Panel and check if you are still getting this error.
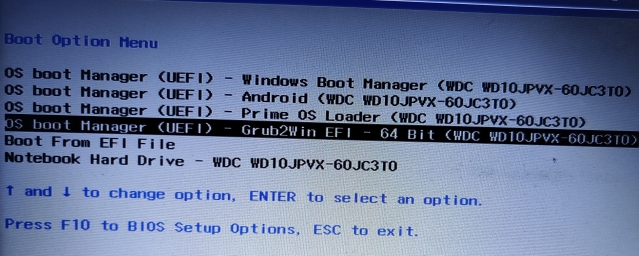
In case, you are still getting all kinds of errors then just create one more unallocated drive in Disk Management (14GB or more) and install Linux Mint on this partition. After the installation, boot into Linux Mint without the USB drive and locate the “Chrome OS” folder, and execute the script from there. I am pretty sure, you won’t face any error this time. Apart from that, many users have complained that after the initial few bootups, the Grub2Win interface does not show up and the computer directly boots into Windows 10. It happens because Windows is overriding other EFI interfaces.
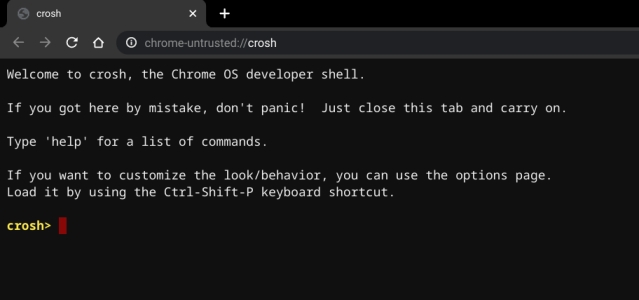
For a quick solution, you can press the boot key (F7, F8, F9, etc.) during the startup, and from there, you can select the Grub2Win EFI interface. After that, you will be presented with a multi-boot option. I know it’s a hassle to press the boot key every time during startup, but it’s a quick solution and one that works. If you are having issues with WiFi, Bluetooth, touchscreen display, etc. then you can try adding support for your specific hardware device from the Crosh terminal. Just open Chrome on Chrome OS and press Ctrl + Alt + T to open the Crosh terminal. After that, enter shell and hit enter. Now, run sudo edit-grub-config. Here you can add support for your hardware device. You can find the complete list of commands from here.
For example, if you have an RT3290/RT3298LE Bluetooth device then you can add “options=rtbth” (with quotes) at the end of “cros_debug” and before loop.max…. Now, press Ctrl + X and press “Y”. Next, hit enter to save the file. Finally, restart your computer, and this time Bluetooth should work fine.
Enjoy Chrome OS and Windows 10 on a Single Machine
So that is how you can install Chrome OS on a Windows partition and boot both the operating systems on a single machine. While the steps are quite lengthy and complex, if you have dealt with Linux systems before then you can easily dual boot Windows 10 and Chrome OS. Anyway, that is all from us. If you are facing any issues then do comment down below and let us know. We will definitely try to help you out.