Control Android TV From Windows 10 PC (2021)
Before we begin, make sure you have a WiFi router at home, to which both your Windows 10 PC and Android TV are connected. It allows you to wirelessly control the Android TV from anywhere on the home network. Now having cleared that, let’s jump to the guide.
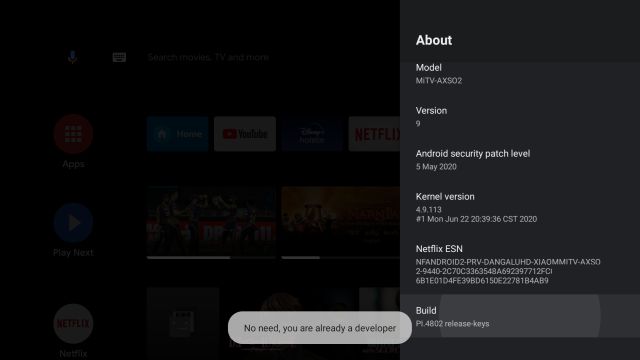
First of all, enable Developer Options and then USB debugging on your Android TV. To do so, open Settings -> Device Preferences -> About and scroll down to the “Build” option. Now, click on the”Build” option 7-8 times continuously. It will enable Developer Options on your Android TV.
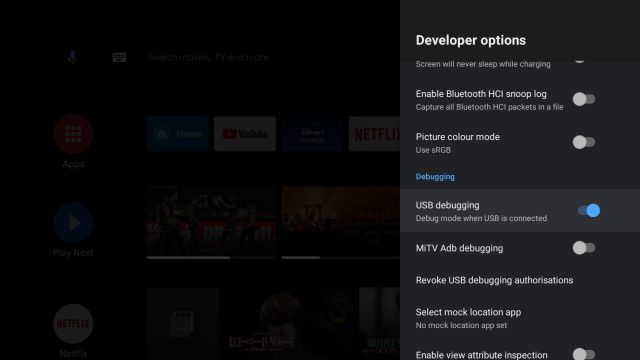
Next, go back to Device Preferences and scroll down. Find “Developer Options” and open it. Here, scroll down and enable the toggle next to USB debugging.
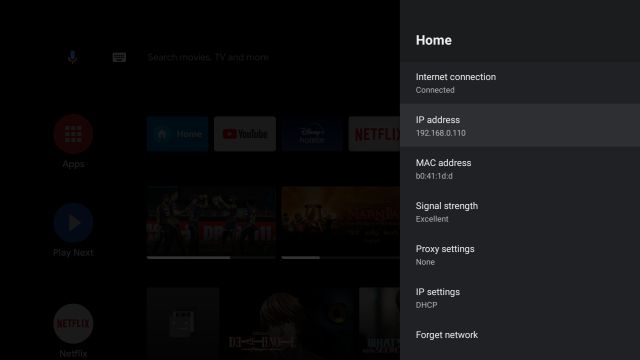
Once you have done that, open Settings again and go to Network and Internet -> [Your WiFi network] and click on it. Here, make a note of your IP Address. You will need it later.
Now move to your Windows 10 PC and download the scrcpy tool from the link here. It’s an open-source tool that allows you to display and control any Android device over an ADB connection (both wired and wireless). Once downloaded, extract the zip file to a folder. The best part about scrcpy is that it comes with all the ADB files, so you don’t need to set up ADB platform-tools separately.
Next, open the folder and type cmd in the address bar of the folder up-top, and hit enter. It will directly open a Command Prompt window in that folder.
Now run the ADB command to connect to the Android TV wirelessly. Enteradb connect ipaddressand hit enter. Make sure to replace ipaddress with the actual IP address that you noted above in step #3. As I said above, for this to work, both your Android TV and Windows 10 PC should be connected to a common WiFi network.
You will then get an “Allow USB debugging?” prompt on your Android TV. Enable the checkbox for “Always allow” and then click on the “OK” button. As a side note, if you get this dialog box out of the blue, especially when you have not triggered any command, then “Cancel” it immediately. This permission virtually allows anyone connected to the home network to control your TV.
If everything goes fine, then Command Prompt will output ‘connected to ipaddress’ response. Finally, run the adb devicescommand to confirm if your computer is indeed connected to your Android TV. Note: If the TV is not connected, then perform step #6 again, and this time, the TV will surely be connected.
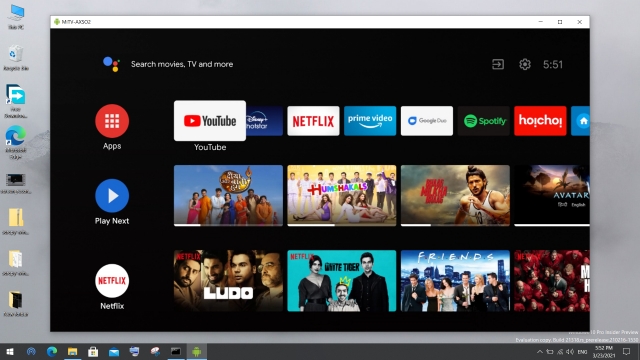
Finally, enter scrcpy in Command Prompt and hit enter. Within seconds, your whole Android TV screen will pop up on your Windows 10 PC. That’s amazing, right?
Now, you can perform all sorts of Android TV operations right from your Windows 10 PC. Click once to open anything, right-click once to go back (you can also press the Esc key on the keyboard), scroll vertically using the mouse, type in search boxes from the keyboard, and much more. You have all the Android TV controls right on your Windows 10 PC.
Use Android TV From Your PC Through Wi-Fi
That is how you can control and navigate around your Android TV from your Windows 10 PC without moving away from your desk. I love this feature and rely on it whenever I have to open an app or play some music in the background. Once you have set up everything, you need to run the adb connect and scrcpy commands to re-establish the connection. You can control your Android TV from your Windows PC anytime now. Anyway, that is all from us. If you want to learn more about such nifty features, go through our article on the best Android TV tips and tricks. And if you are facing any issues, then let us know in the comment section below. We will surely try to help you out.


