However, with prolonged use, the computer stores too many cache files that end up eating a significant chunk of your storage space. Corrupted or outdated files may also lead to performance glitches. Hence periodic clearing of cache is recommended to improve your PC’s overall performance. There are several ways to clear cache in Windows 11. Let’s dive in.
Clear Cache in Windows 11
Clearing cache means deleting those temporary files your computer stores for the quicker rendering of data on subsequent access. Some apps, folders, or websites may take longer to load after you clear the cache in your Windows 11 computer, but if you’re running out of storage space, this may also speed up the overall performance. All cache files aren’t stored in the same location. So you’ll need to delete caches from multiple locations to remove them all. Let’s check out all the ways you can clear cache in Windows 11.
1. Clear Cache from the Temp Folder
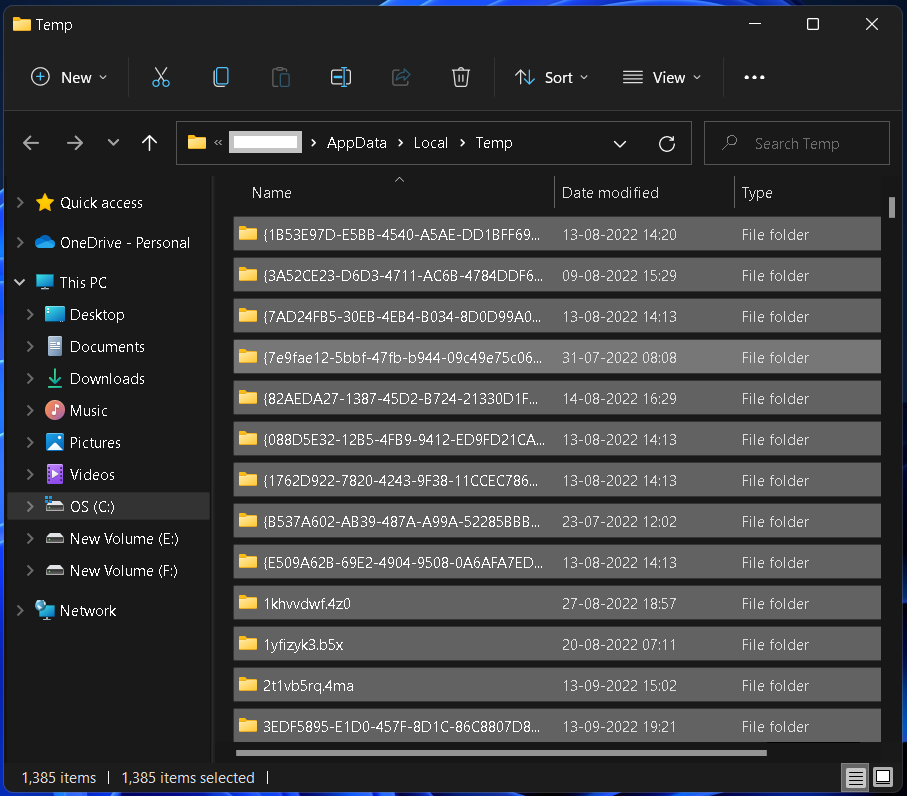
Windows 11 computers store app caches in a temporary folder known as Temp. Cached data for all apps installed on the computer is found here. You should delete files in this folder once in a while following these steps.
- Press the Windows key and R simultaneously to open the Run window. Type %temp% and then press Enter or click on OK.
- When the Temp folder opens, use the keyboard shortcut Ctrl+A to select all files.
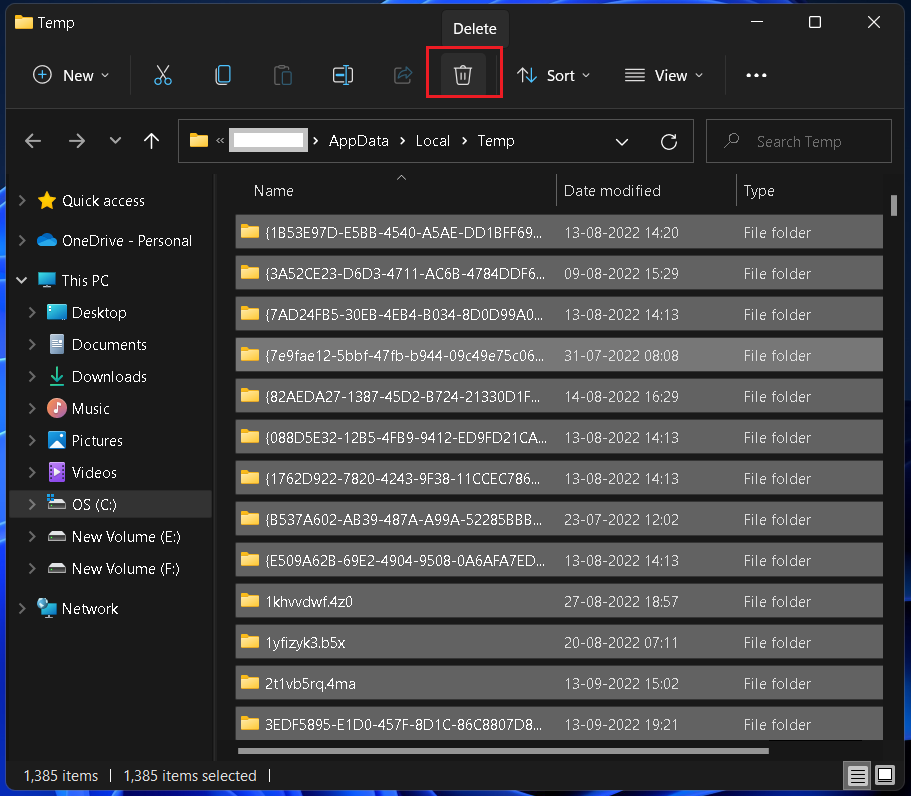
- Press the Delete button on the keyboard to delete all temporary files. You can also click on the Trash icon on the top ribbon.
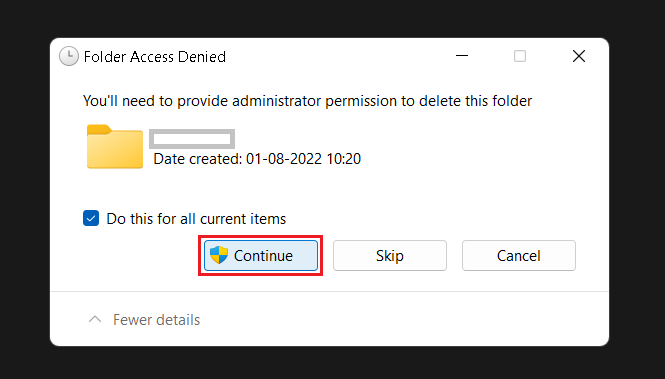
- If you see a prompt saying “you’ll need to provide administrator permission to delete this folder,” check the ‘Do this for all current items’ box and click on Continue.
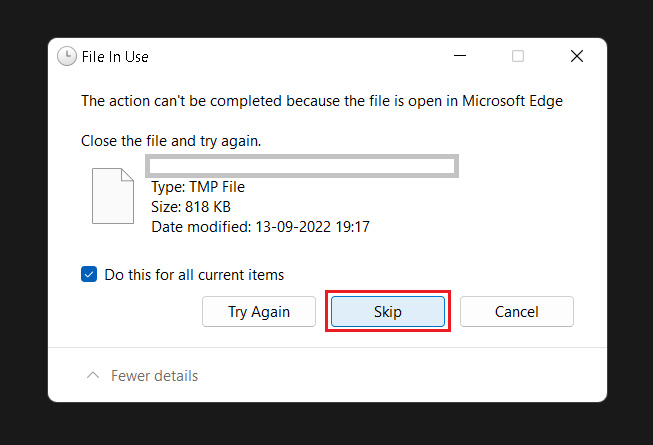
- If you see a prompt saying “the action can’t be completed because the folder or a file in it is open in another program [or program name],” check the ‘Do this for all current items’ box and click on Skip.
2. Delete Temporary Files from System Storage
Your computer’s system storage settings also have a separate folder for temporary files. You can delete some or all of these files to free up some storage space. Simply follow the steps below.
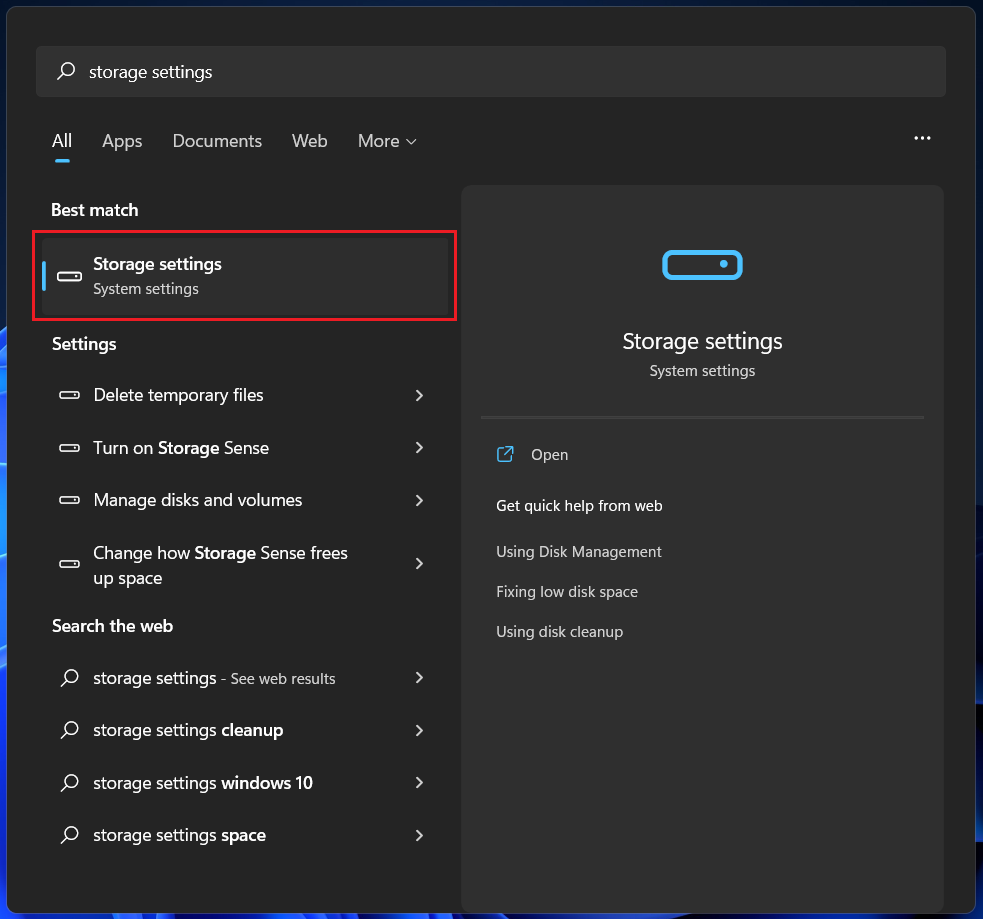
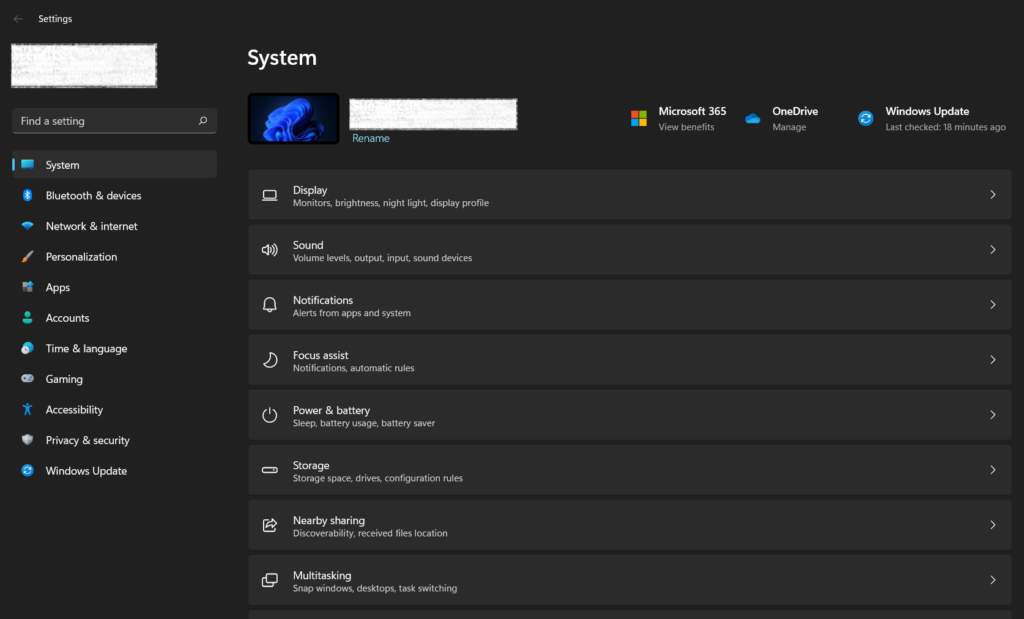
- Press the Windows key on the keyboard and type Storage settings. Click on the result to open the settings.
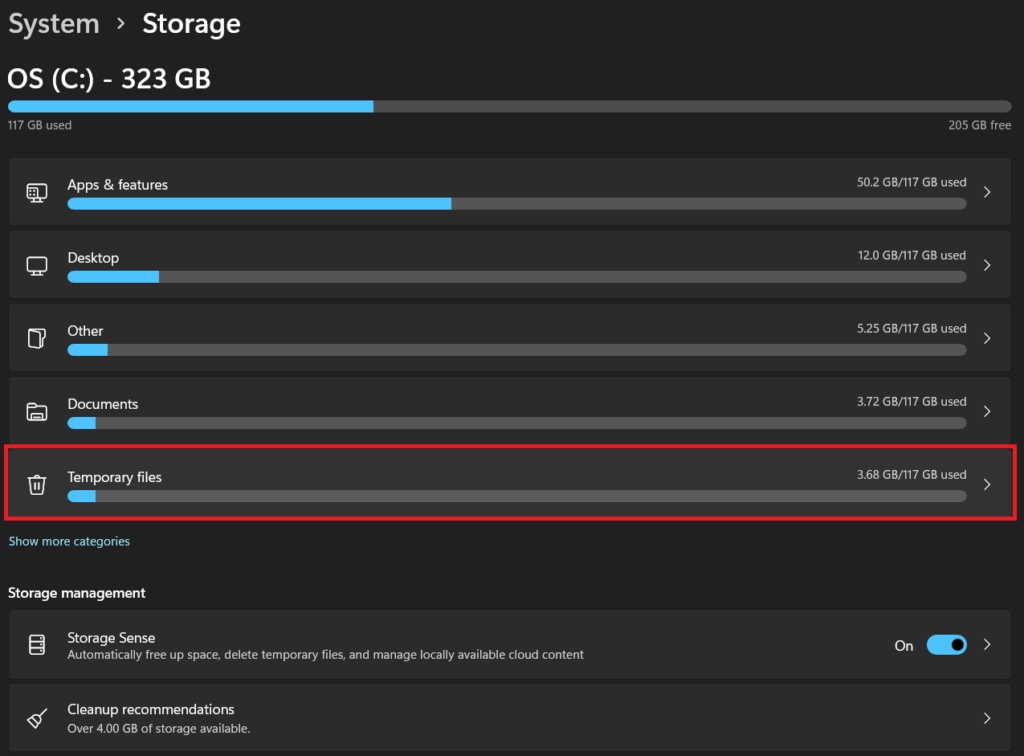
- Once Storage space details are updated on the screen, locate the Temporary files folder and click on it to open it.
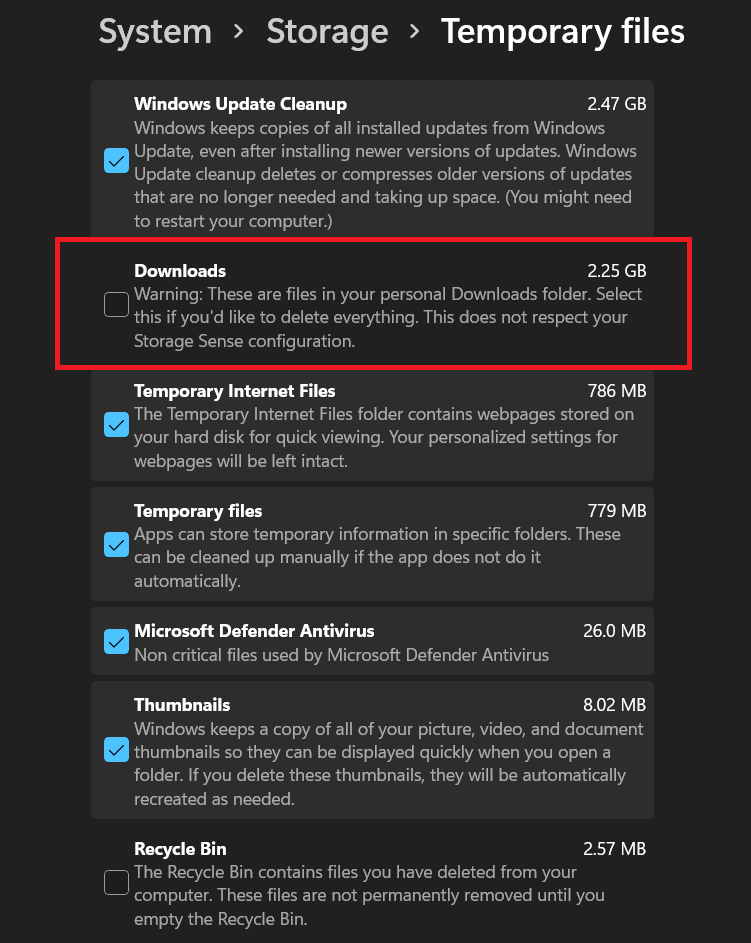
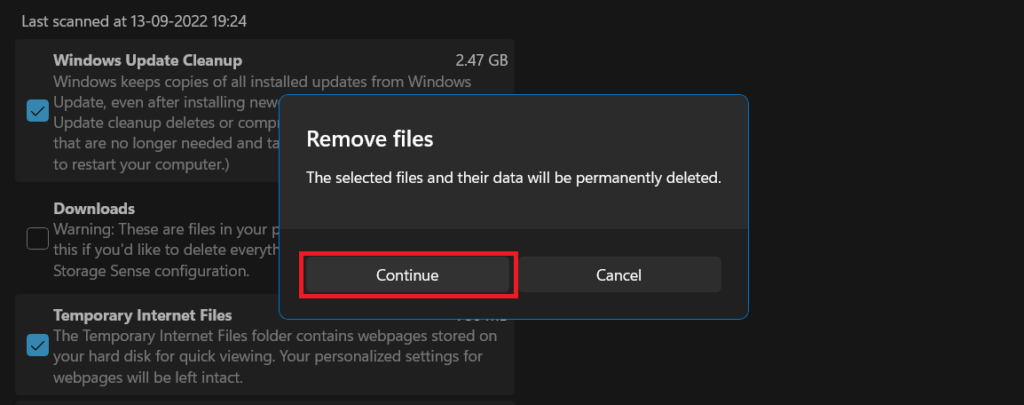
- You’ll find various types of temporary files here, such as Downloads, Windows Update files, Thumbnails, and more. Each file type has a brief description. Read the description carefully and select the files that you want to delete. Pro Tip: Avoid selecting the Downloads box as it may contain important files that you recently downloaded.
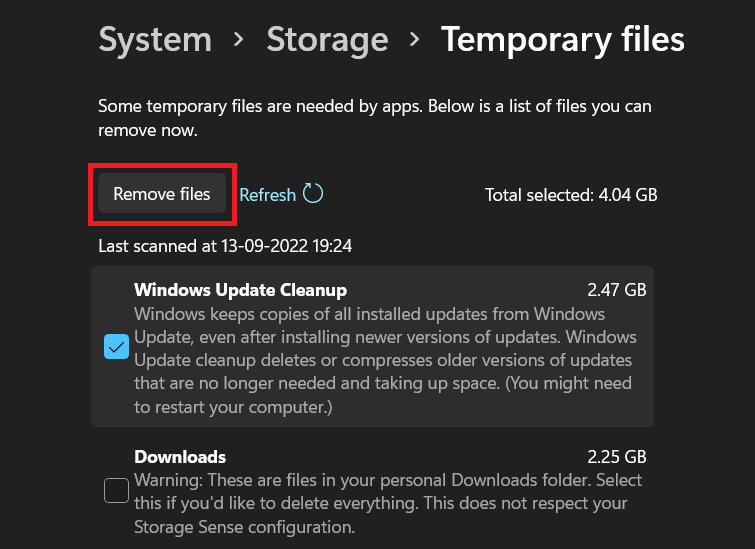
- Click on the Remove files button at the top of the list. You can see the total storage space occupied by those files next to it.
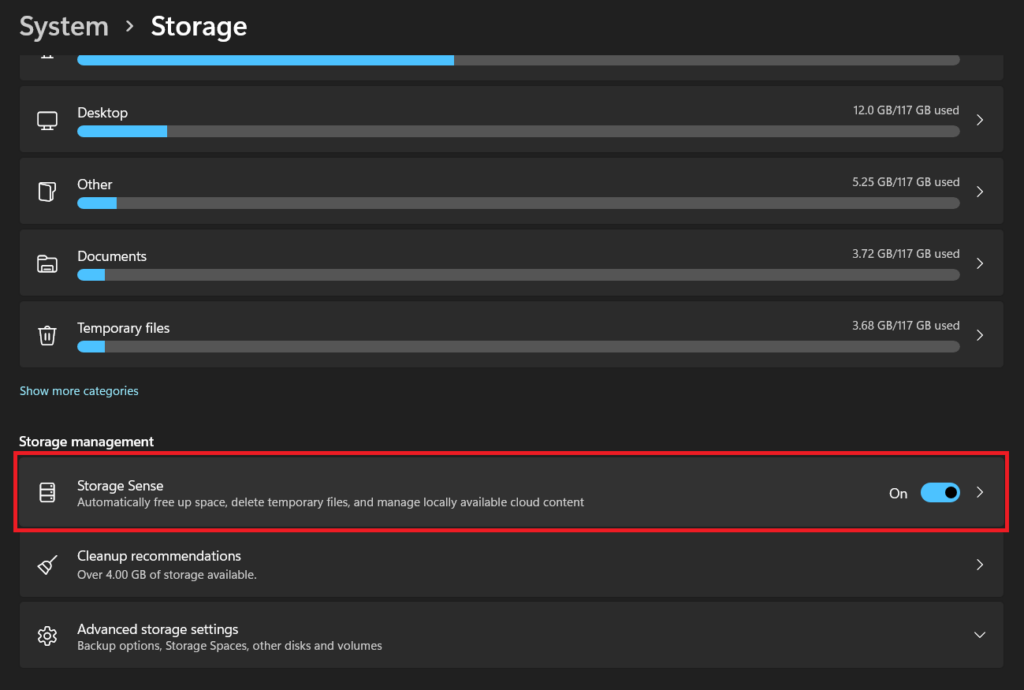
- If you see a confirmation prompt, select Continue. Note: You can enable Storage Sense in Storage settings and configure your choices to automatically delete the selected temporary files periodically.
3. Clear Cache Using Disk Cleanup
Disc Cleanup is another built-in tool to clear cache and other temporary files in Windows 11. It lets you select the files that you want to delete. Below are the steps.
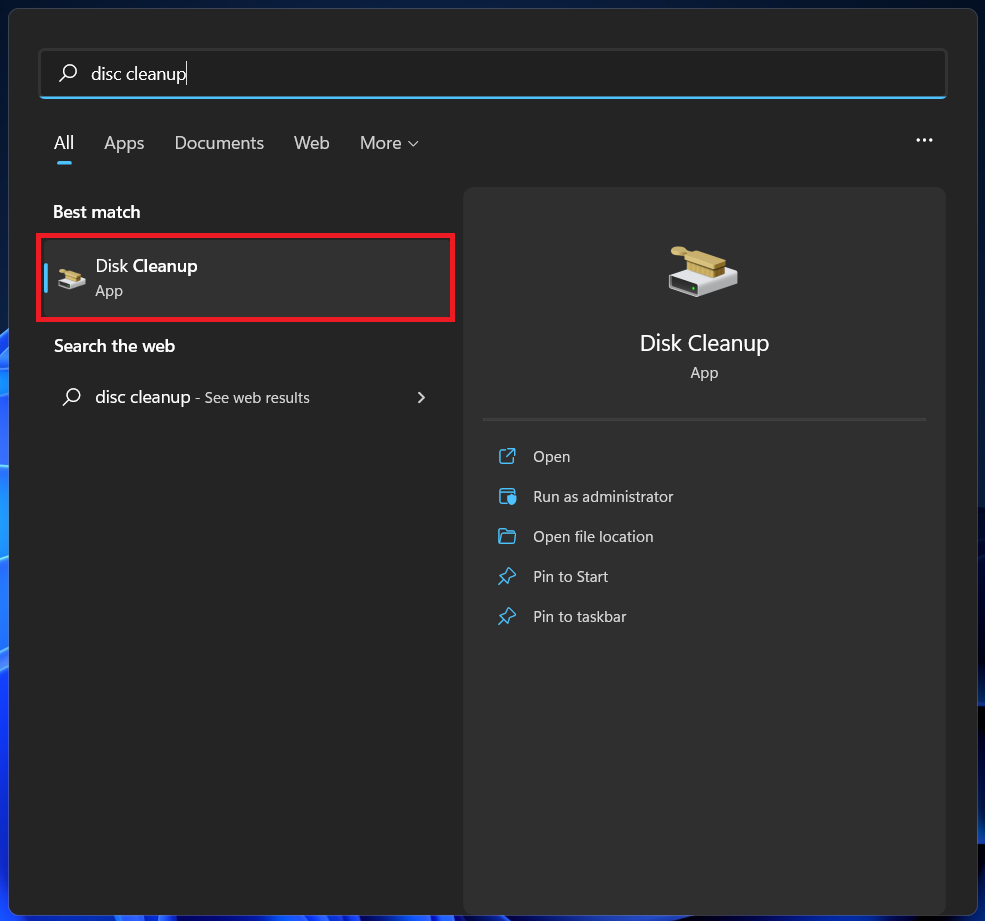
- Press the Windows key on the keyboard and type Disk Cleanup. Click on the result to open the tool.
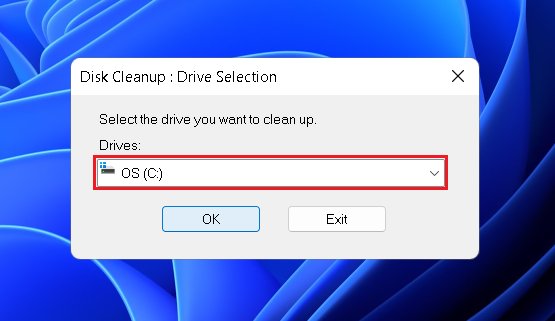
- Select the C drive from the drop-down menu and click on OK.
- Check the files you want to delete and click on OK.
- Select Delete files on the confirmation prompt.
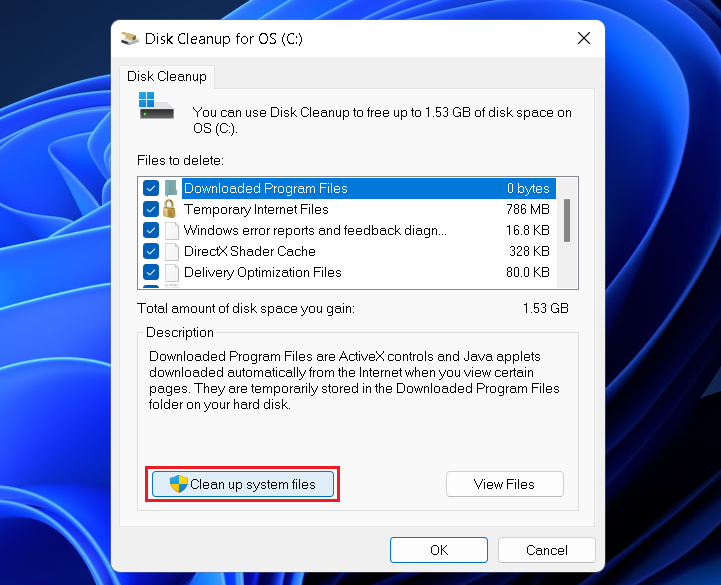
- Along with cache, you can also use the Disc Cleanup tool to delete temporary system files.
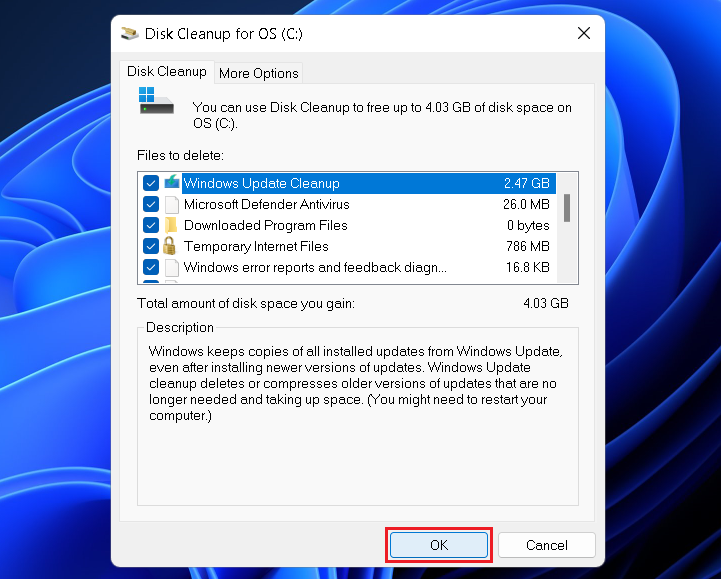
- Click on Clean up system files. If prompted, select the C drive again and click on OK.
- Check the system files you want to delete and click on OK.
- Select Delete files on the confirmation prompt.
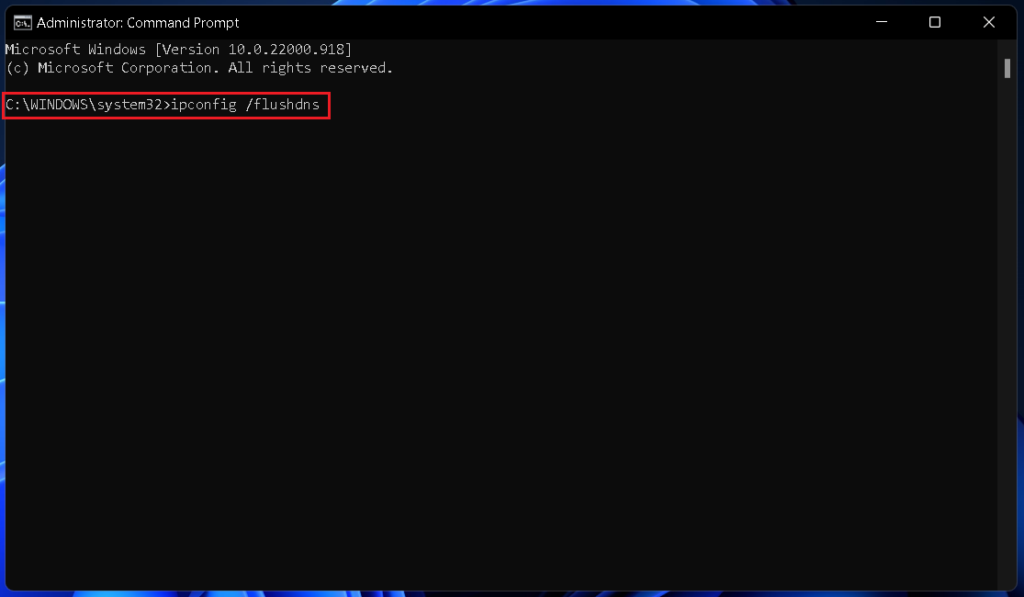
4. Delete DNS Cache
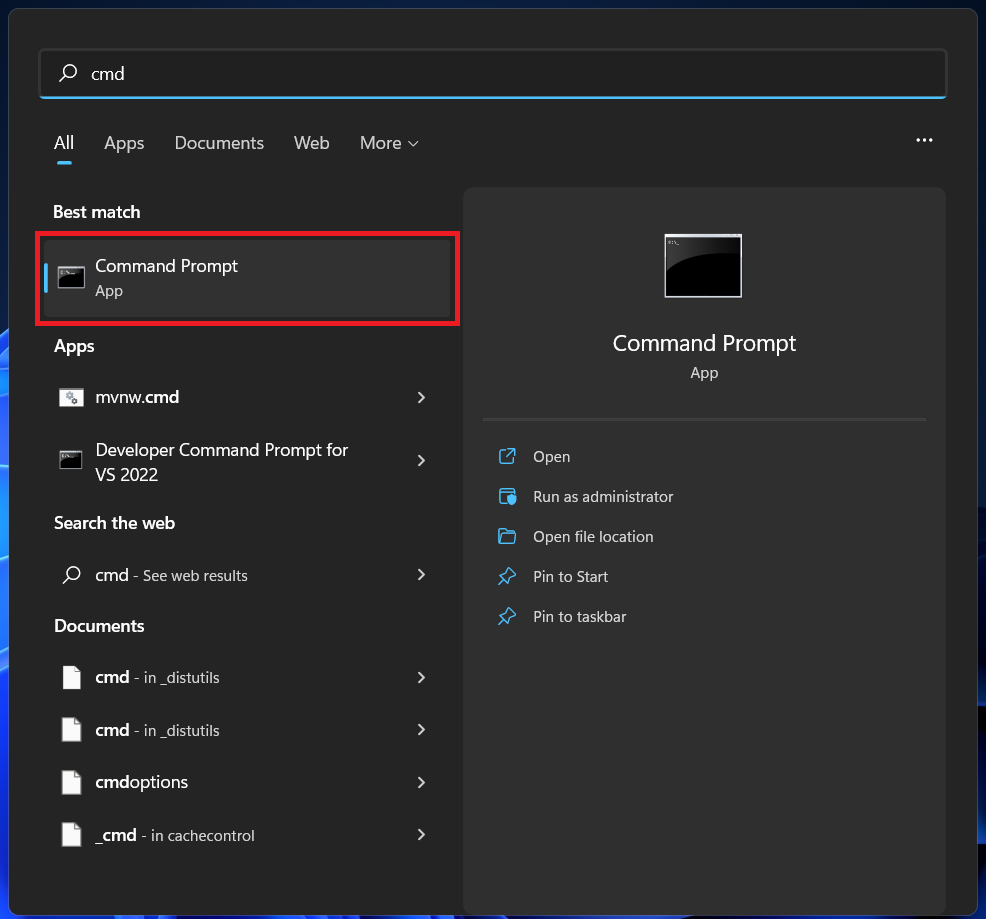
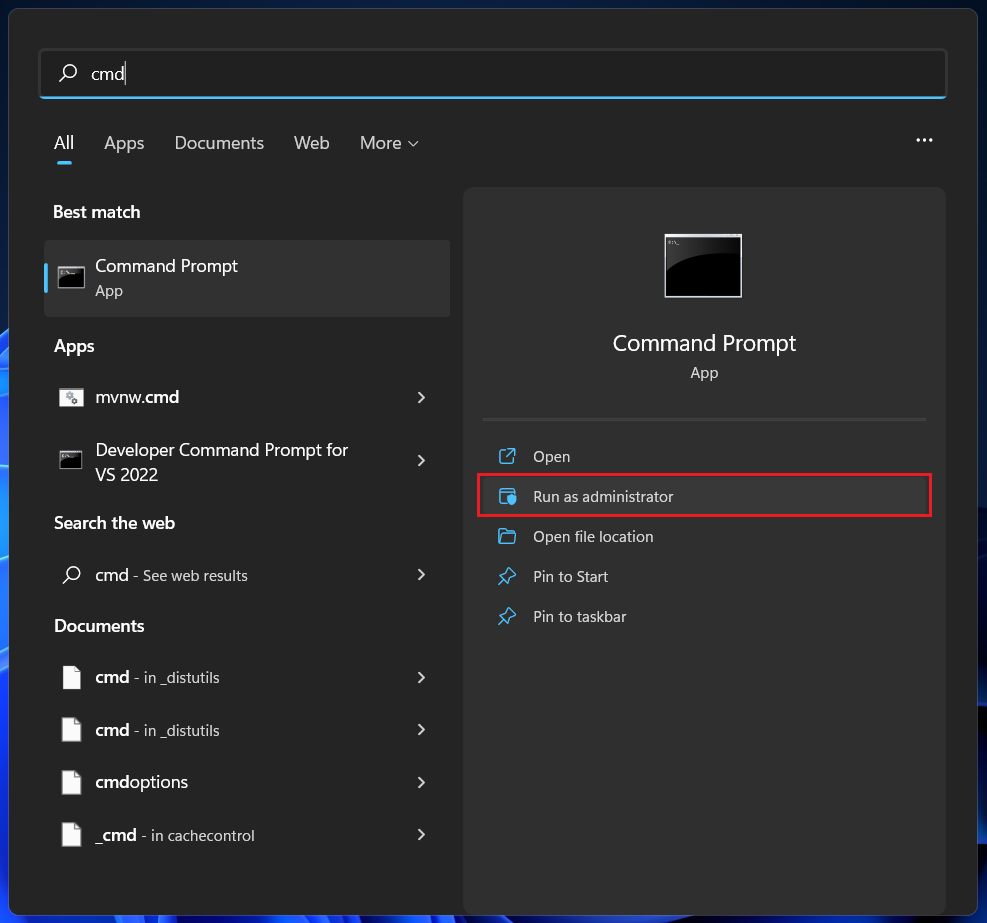
DNS, or Domain Name System, enables your computer to quickly load web pages on subsequent visits by storing caches. But the number of these caches grows over time to occupy some valuable storage space. DNS cache poisoning may also cause issues with websites which can be resolved by deleting the DNS caches. Thankfully, you can do that easily by following the steps below. 1. Press the Windows key and type cmd or Command Prompt in the search bar. 2. Select the Run as administrator option. You may be asked for authorization. Select Yes. 3. When the Command Prompt opens, copy and paste the following command and press the Enter key. DNS cache has been flushed or deleted. You can close the Command Prompt. If required, restart your computer.
5. Clear Location History
Your Windows 11 computer also saves your location history as caches. You can delete the location cache from Settings following these steps.
- Use the keyboard shortcut Windows+I to open Settings.
- Go to the Privacy & security section and click on the Location option under App permissions.
- Look for Location history and click the Clear button next to it.
6. Clear Activity History
Along with location history, your Windows 11 computer also saves your activity history to improve your user experience. Information saved as caches includes your browsing activities and how you use apps and services. You can delete your activity history by following the steps below.
- Use the keyboard shortcut Windows+I to open Settings.
- Go to the Privacy & security section and find Activity History under Windows permissions. Click to open it.
- Click the Clear button under Clear activity history. Note: You can stop your computer from storing your activity history by unchecking the following box.
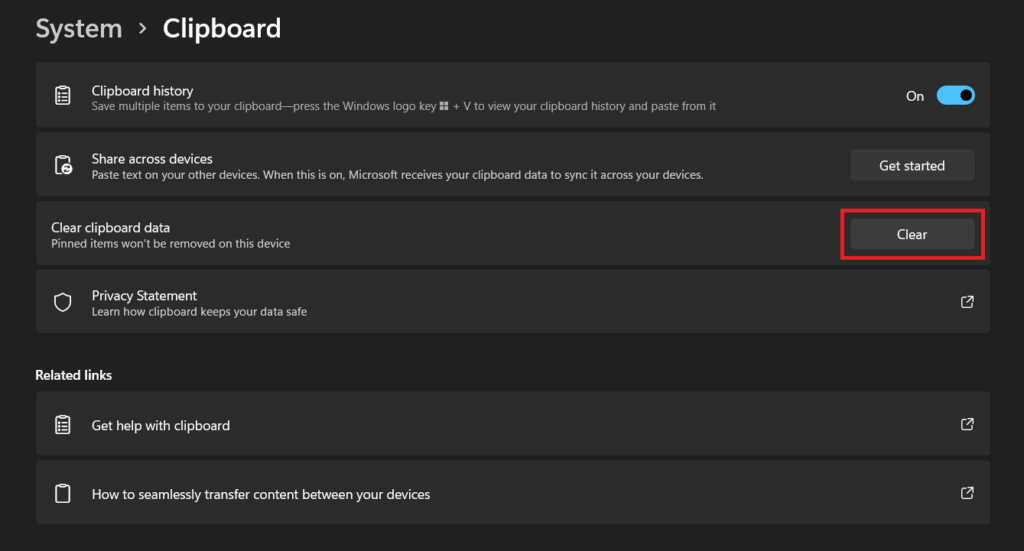
7. Delete Clipboard Cache
Clipboard stores text and files that you have copied across your computer. It can eat up a good amount of storage space as well. Here’s how you can clear the clipboard cache in Windows 11.
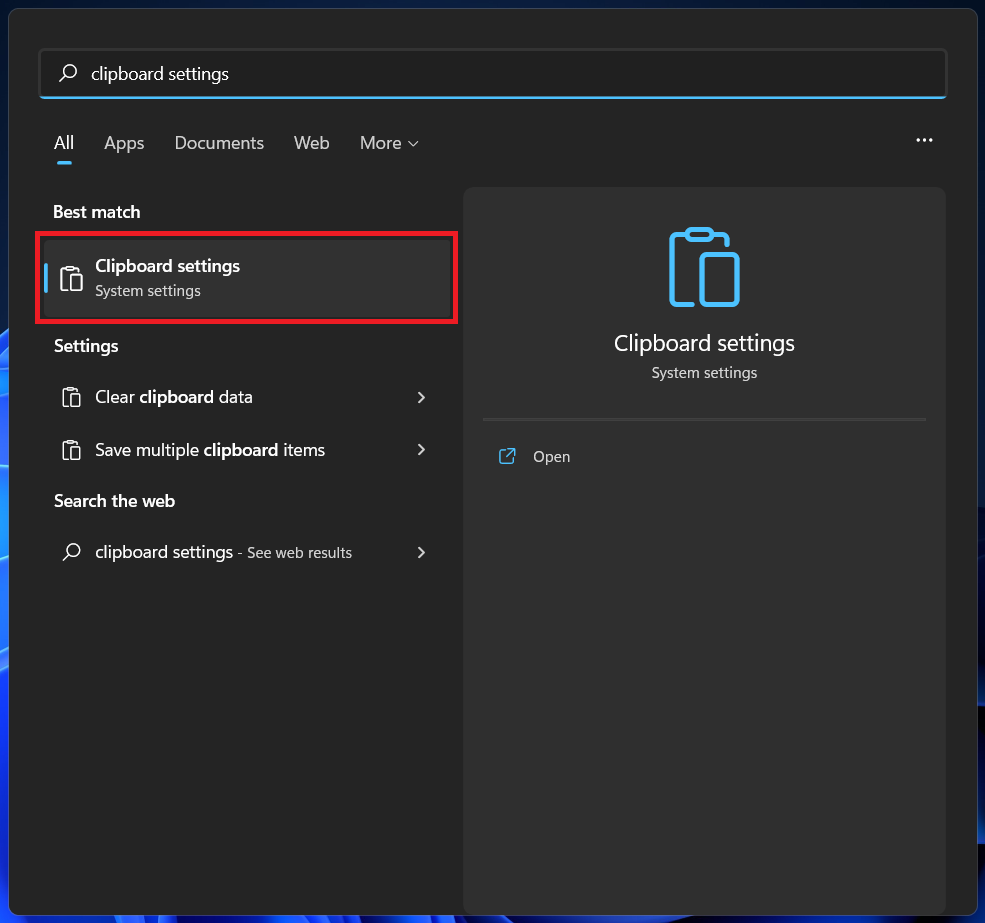
- Press the Windows key and search for Clipboard settings. Click on the result to open it.
- Locate the Clear clipboard data section and click on the Clear button next to it.
8. Clear Cache From System Apps in Windows 11
System apps like Microsoft Store, File Explorer, and web browsers also store caches on your computer. But you can delete those easily whenever you want. Perhaps it’s recommended that you clear the cache from system apps in your Windows 11 periodically. Here’s how.
Delete Microsoft Store Cache
Like all other apps, Microsoft Store also creates caches on your computer for future use. You can delete those cache files following these steps.
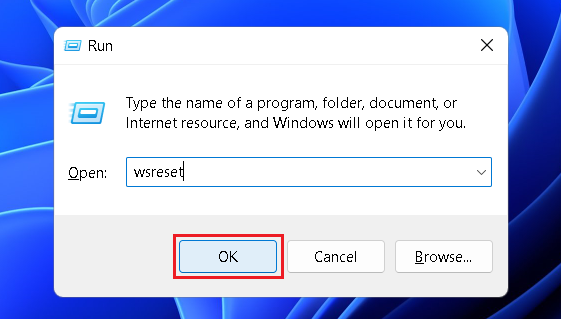
- Press the Windows key and R simultaneously to open the Run window. Type wsreset and then press Enter or click on OK. The Microsoft Store cache will be deleted without any further permission required. The Store may open automatically.
Delete File Explorer Cache
File Explorer uses caches to quickly load files and folders on your computer. Deleting these caches may temporarily increase the loading time of files and folders, but may resolve some issues caused by corrupted or outdated caches. Here’s how you can delete File Explorer caches.
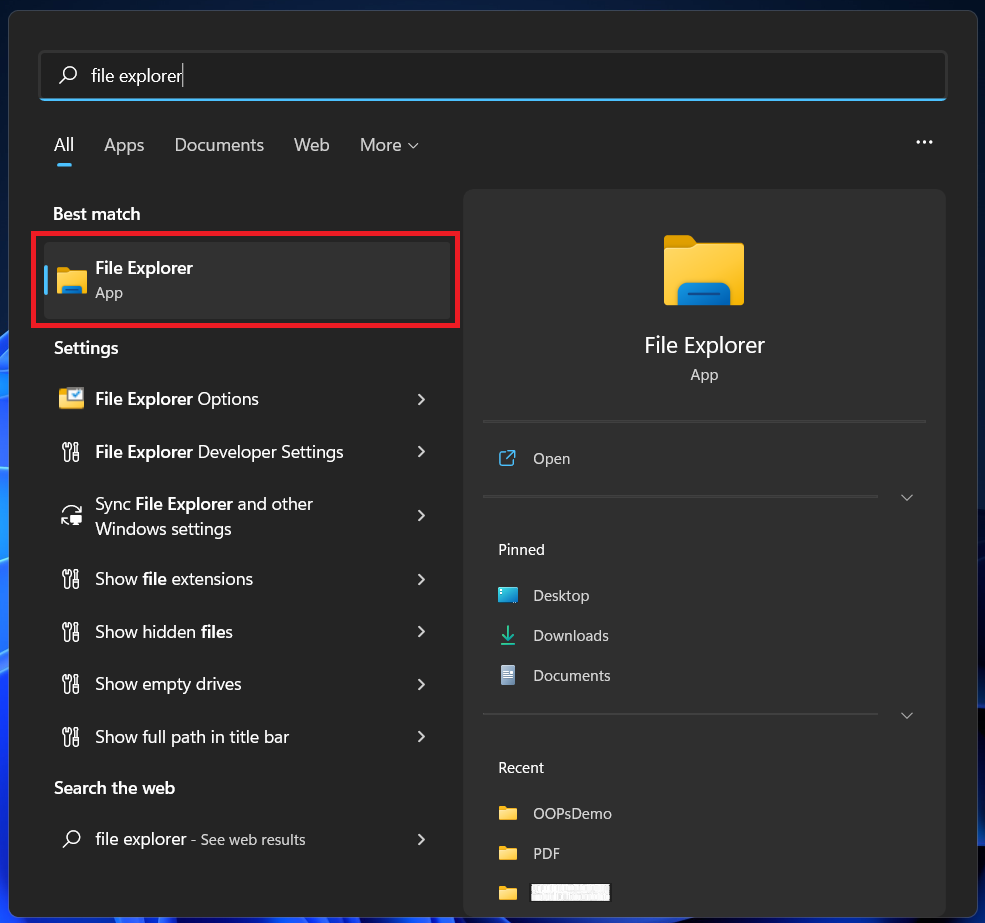
- Press the Windows key and search for File Explorer. Click on the result to open it.
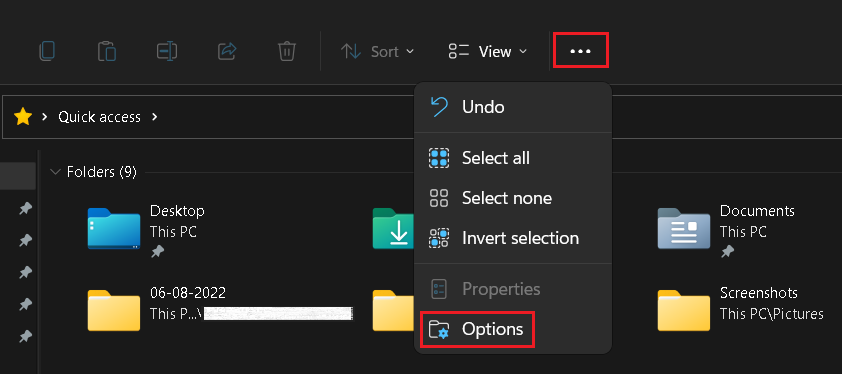
- Click on the three-dot button located in the top ribbon and select the Options option from the drop-down menu.
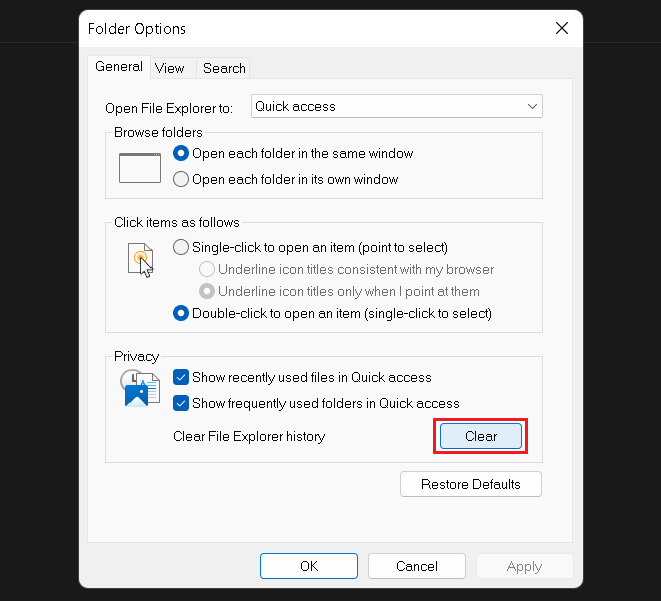
- Click the Clear button in the Privacy section under the General tab and click on OK.
9. Clear Browser Cache in Windows 11
Web browsers store a cached copy of the web pages you visit to render them faster in your subsequent visits. This behind-the-scenes activity makes your internet browsing faster. But if a cached file is outdated, it may cause problems when loading the corresponding web page. So periodic clearing of browser caches is a good idea. The process isn’t the same for all browsers. We have provided a guide for the three most widely used Windows browsers: Microsoft Edge, Google Chrome, and Mozilla Firefox.
Clear Cache From Microsoft Edge in Windows 11
Microsoft Edge comes pre-installed on Windows 11. If it is your default browser, your computer may already have stored a large number of cache files from Edge. Here’s how you can clear those.
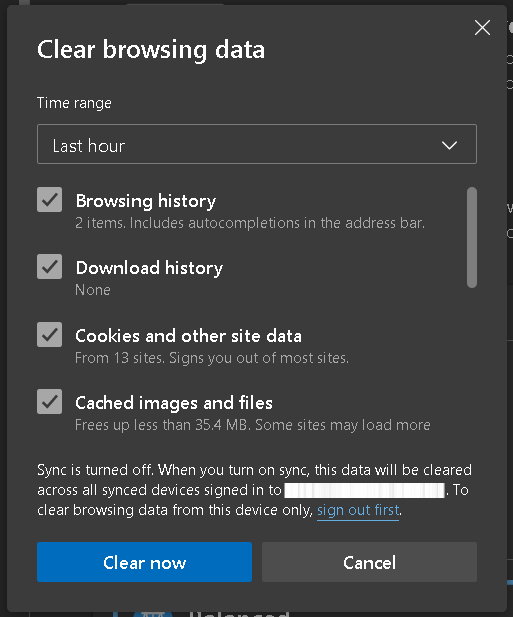
- Use the keyboard shortcut Ctrl+Shift+Delete to pull up Microsoft Edge browsing data Settings.
- Select the All time option from the drop-down menu, or the time range you want to delete cached files.
- Check the Cached images and files box and click on Clear now.
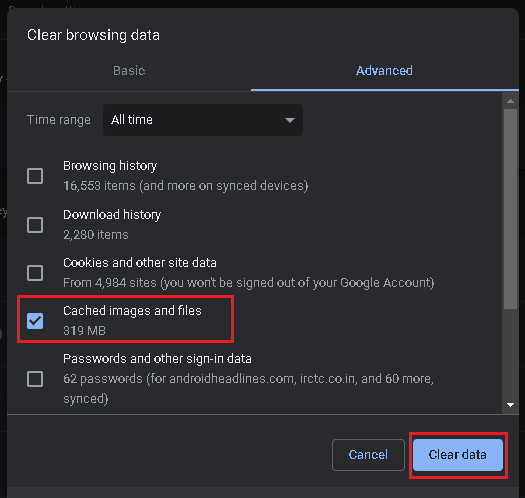
Clear Cache from Google Chrome in Windows 11
Google Chrome is another popular web browser. Perhaps the world’s most popular desktop browser globally. Deleting the Chrome cache is also fairly easy. Check out the steps below.
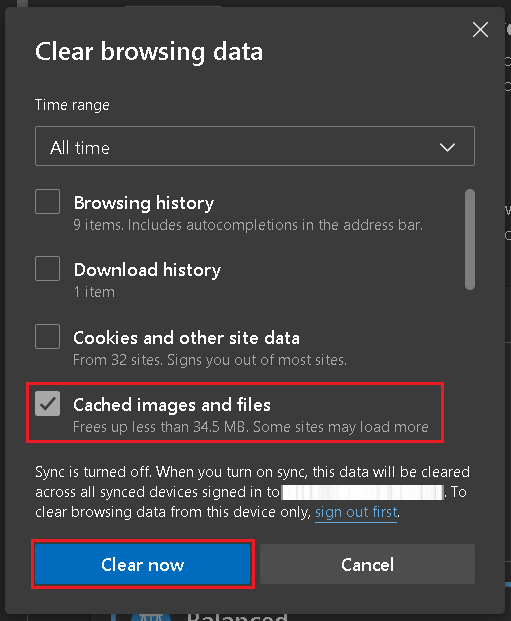
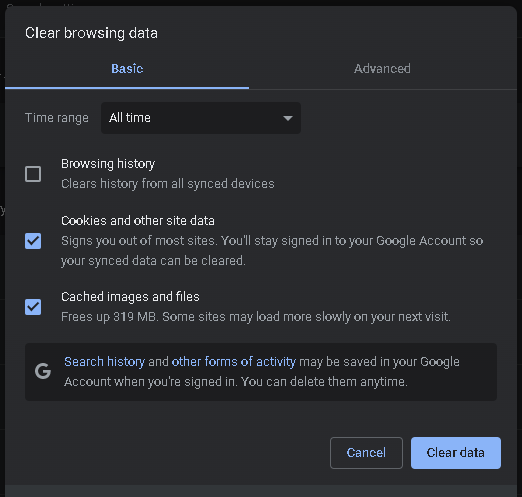
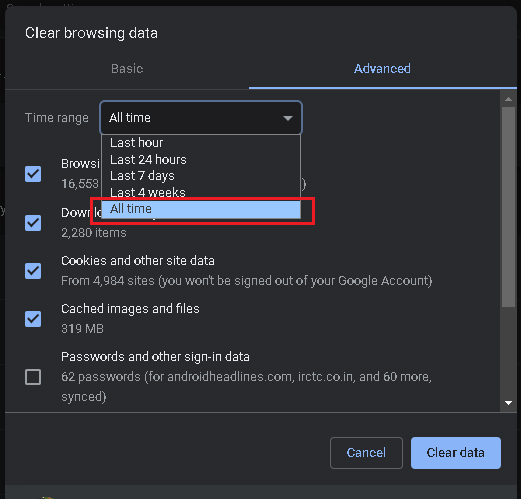
- Use the keyboard shortcut Ctrl+Shift+Delete to pull up Google Chrome browsing data Settings.
- Switch to the Advanced tab and select the All time option from the drop-down menu. If you don’t want to delete all cache files, you can select one of the other four options: last hour, last 24 hours, last 7 days, and last 4 weeks.
- Check the Cached images and files box and click on Clear data.
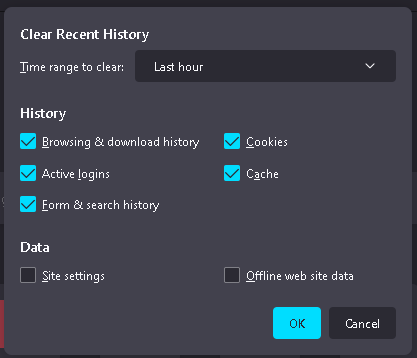
Clear Cache from Firefox in Windows 11
Mozilla Firefox is also widely used around the world. The process of deleting cache files from this browser is also somewhat similar. Below are the steps.
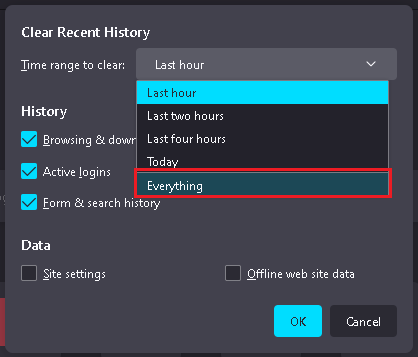
- Use the keyboard shortcut Ctrl+Shift+Delete to pull up Mozilla Firefox browsing data settings.
- Select the Everything option from the drop-down menu, or the time range you want to delete cached files.
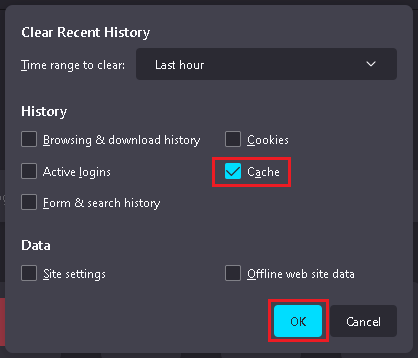
- Check the Cache box and click on OK.
Is it safe to delete cache files?
Yes, it is safe to delete cache files from your computer or app. These files aren’t necessary for the normal functioning of the computer or the app. You will find various ways to clear cache files in Windows 11 here.
What is the shortcut to clear cache?
A computer stores various types of cache files and the process to clear those is different for each app. This article provides step-by-step guides to all kinds of clear cache files in Windows 11.
Will clearing cache delete passwords?
No, clearing the cache will not delete saved passwords on your web browser. You can safely delete those files without affecting the functionality of your computer. Make sure you don’t select passwords while clearing the cache.
Final Words
Clearing cache is safe and recommended once in a while. If cache files accumulate in large numbers, they may cause your computer to slow down. You can use one or more of the above-listed methods to clear the cache on your Windows 11 machine. Of course, the computer will start storing caches as soon as you clear them. So you need to regularly do this. If you encounter any issues with any of these methods, tell us in the comments below. We will help you out.
Δ